


Photoshop a sky in ten minutes using blending options
Photoshop a sky in ten minutes using blending options
There are many ways of adding sky in Photoshop and that’s before getting anywhere near third party plugin software. Different methods are suitable for different images with the deciding factor usually coming down to time. Below I will explain one of the quickest methods I know of adding sky where complex shapes, such as trees, need to be dealt with. To Photoshop a sky in ten minutes is not unreasonable once you are used to the concepts here. I have often used this method when I have ten or twenty shots to retouch and only half a day to do them in.
A quick note before reading. If you have problems seeing details on any of these images click on the image to see an enlarged version.
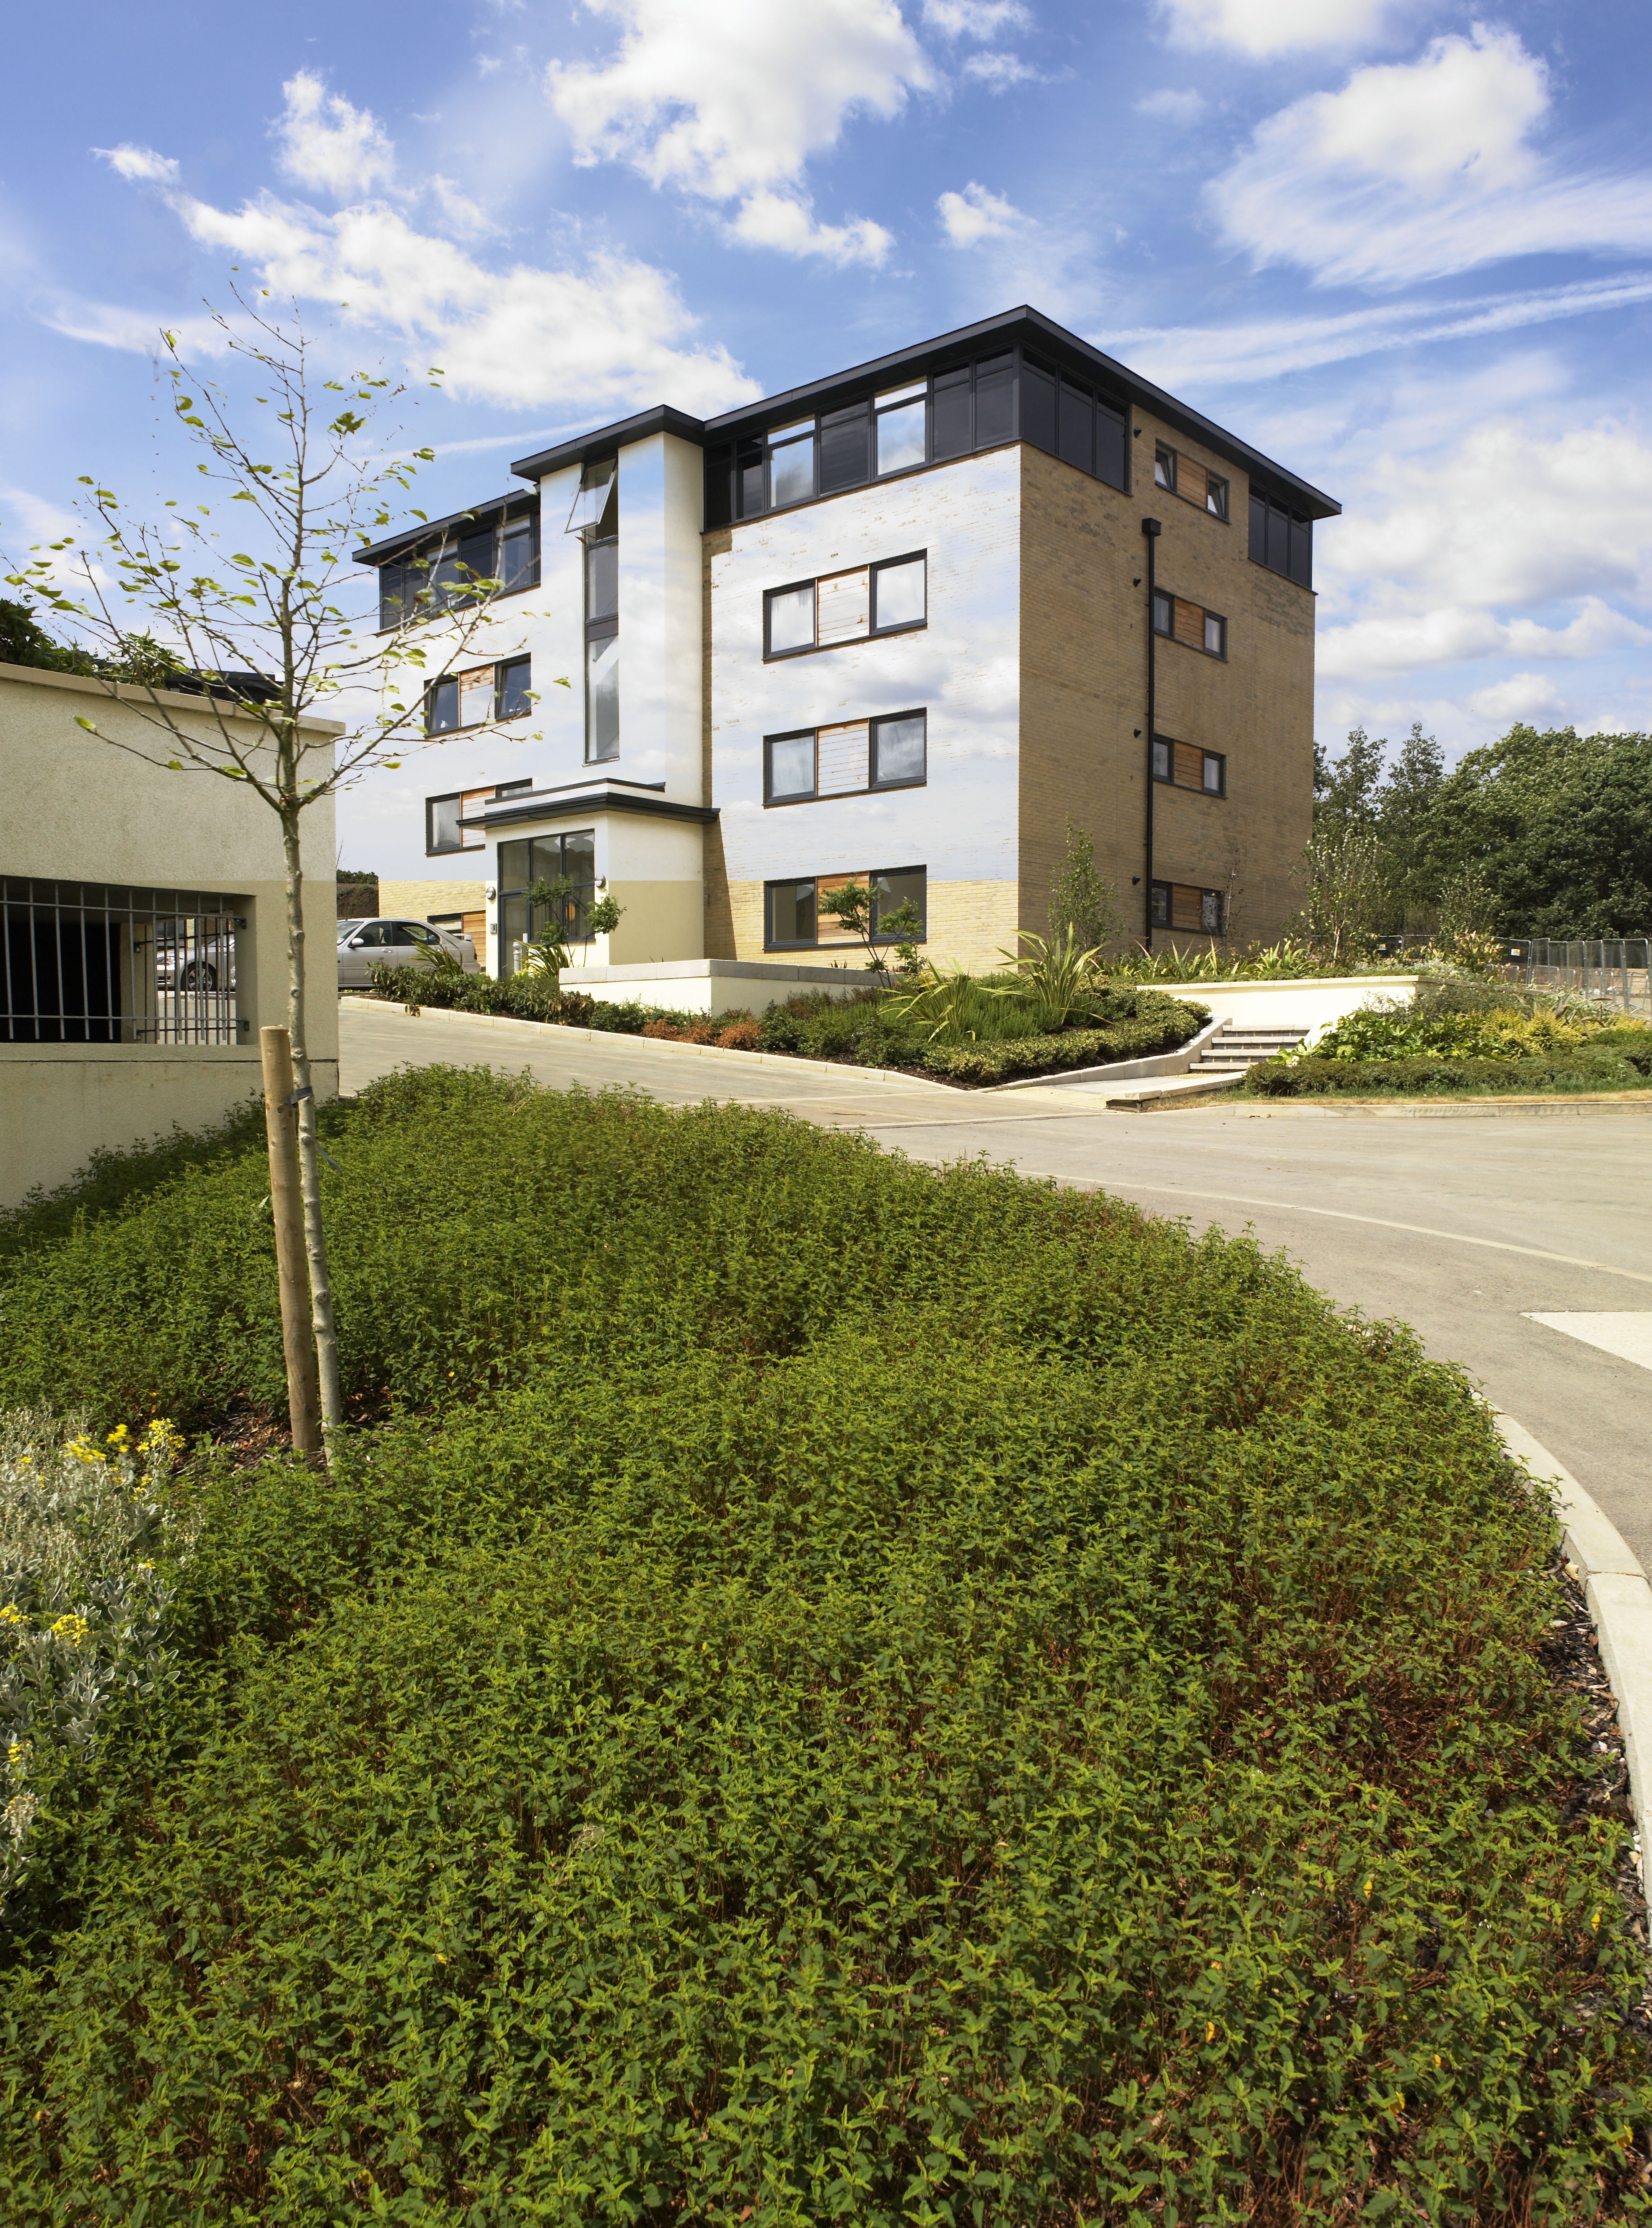
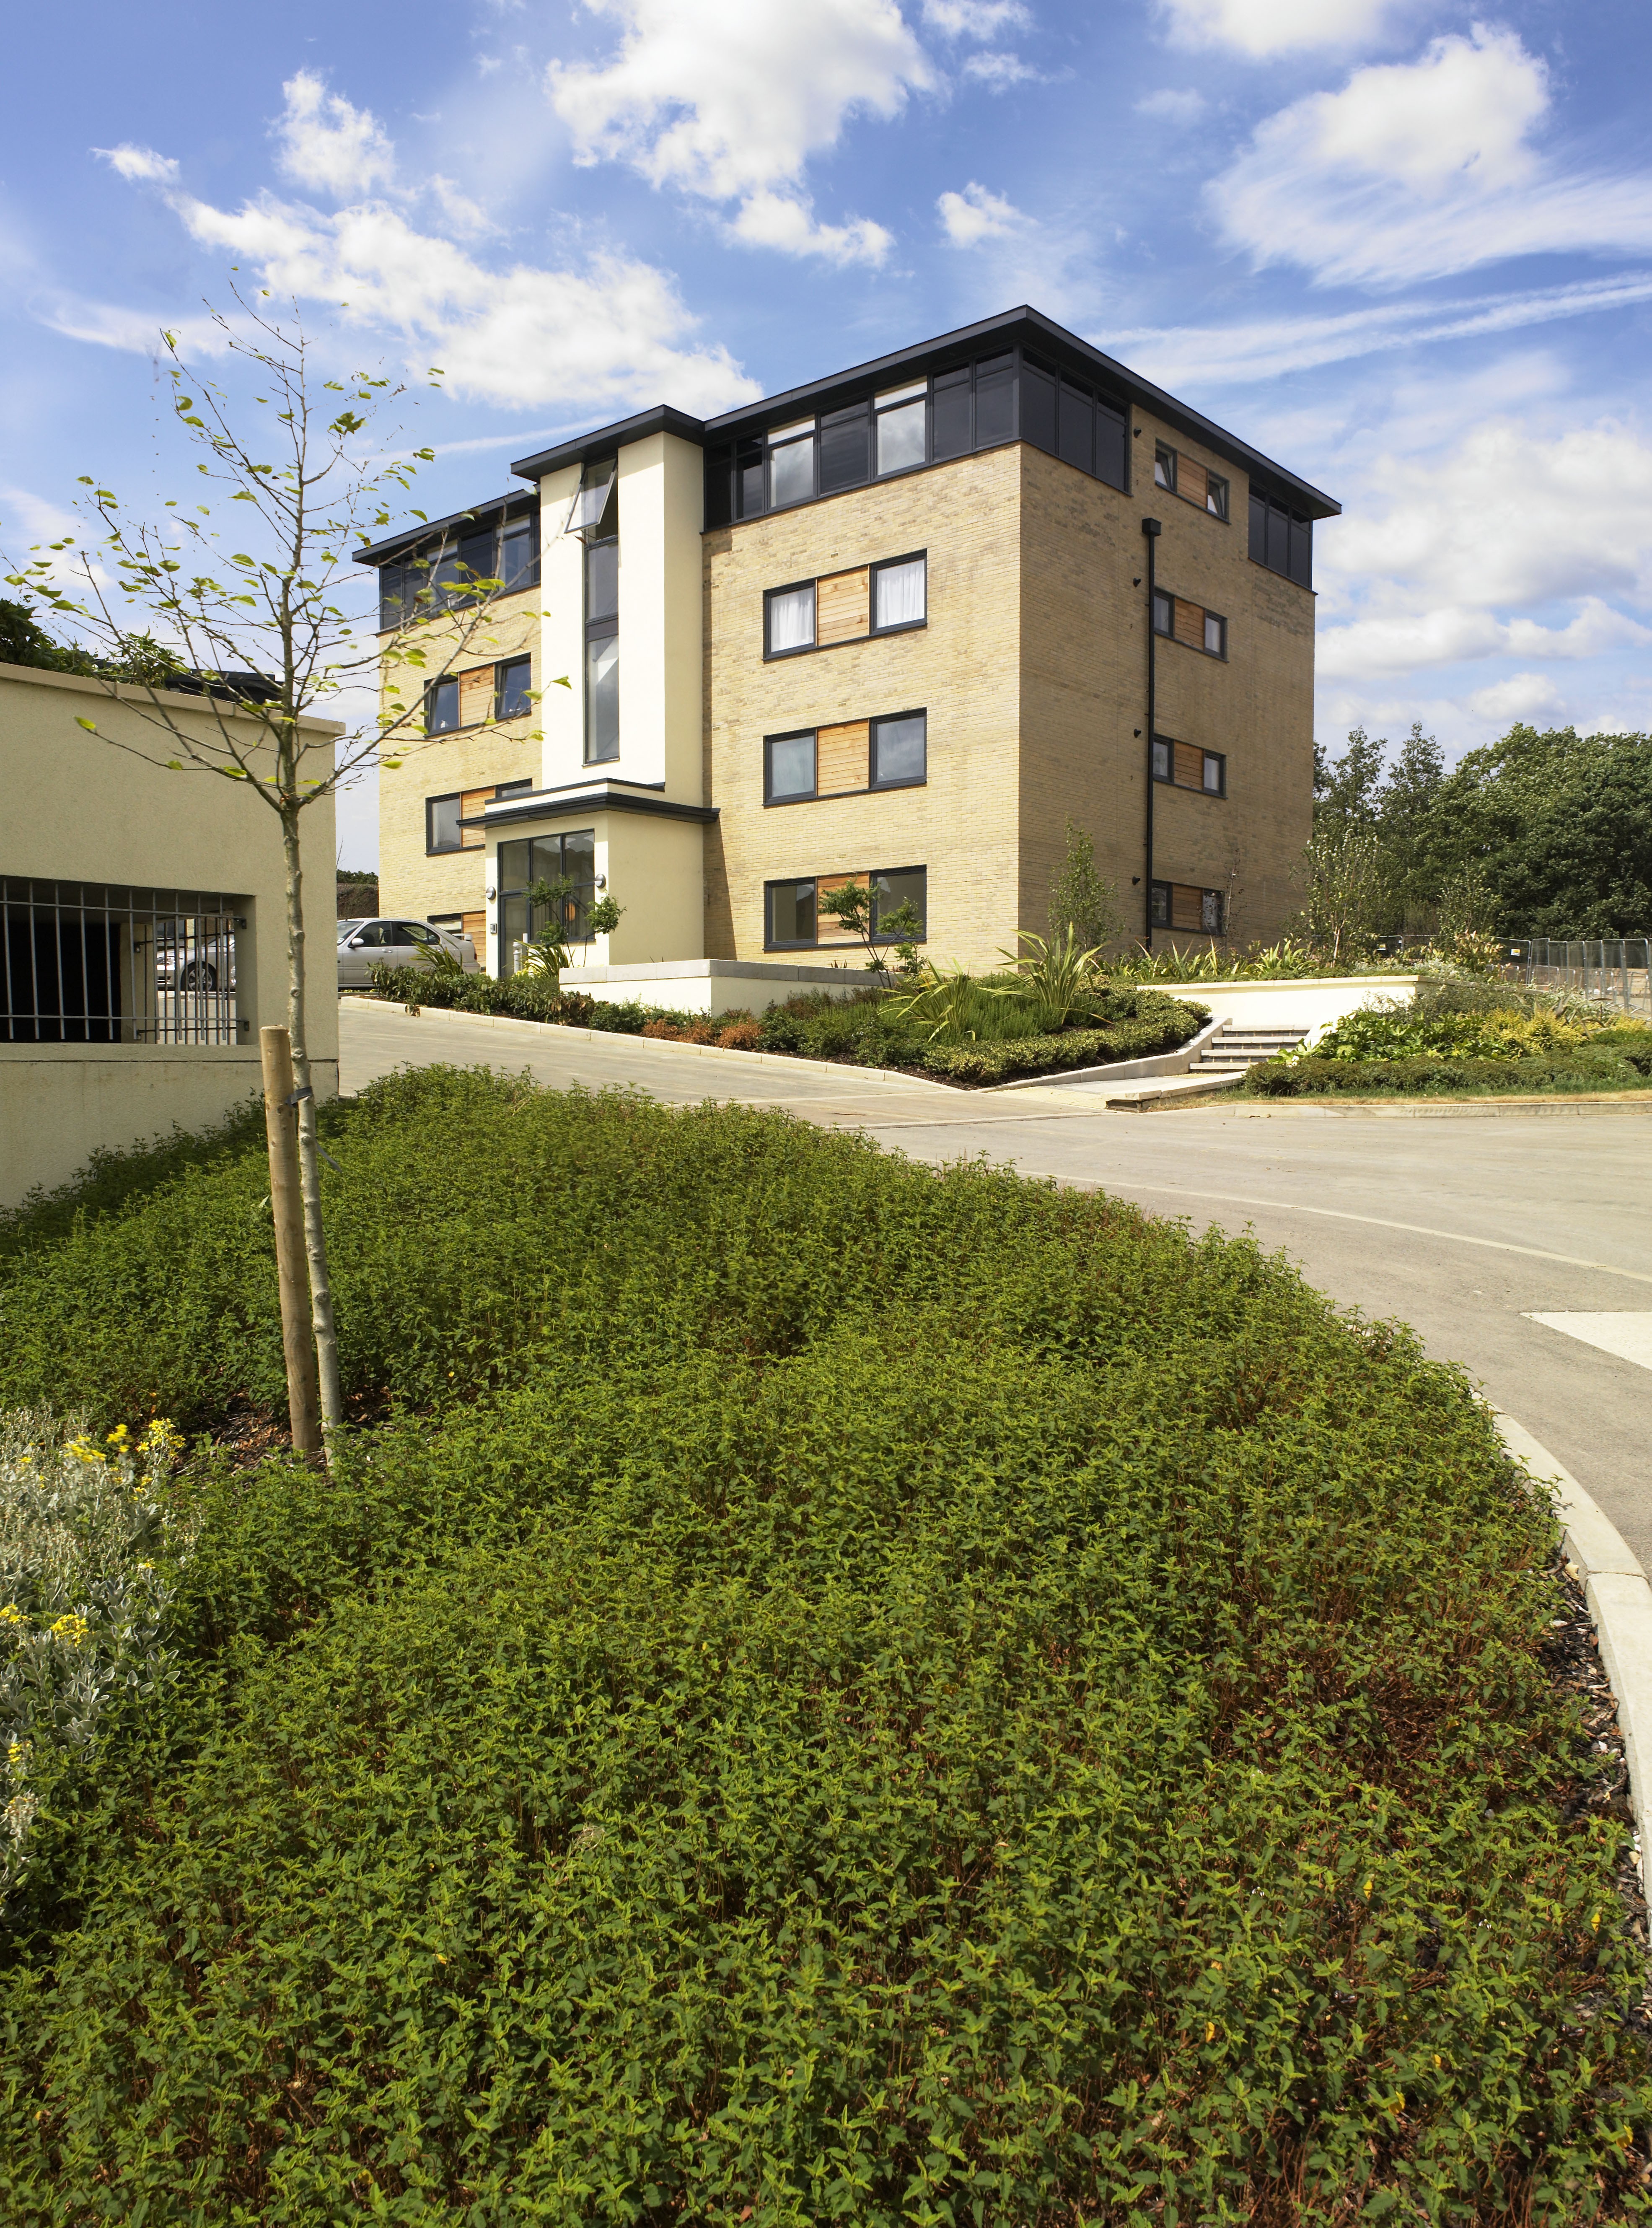
Here are my before and after shots:
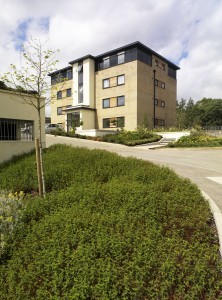
- Before
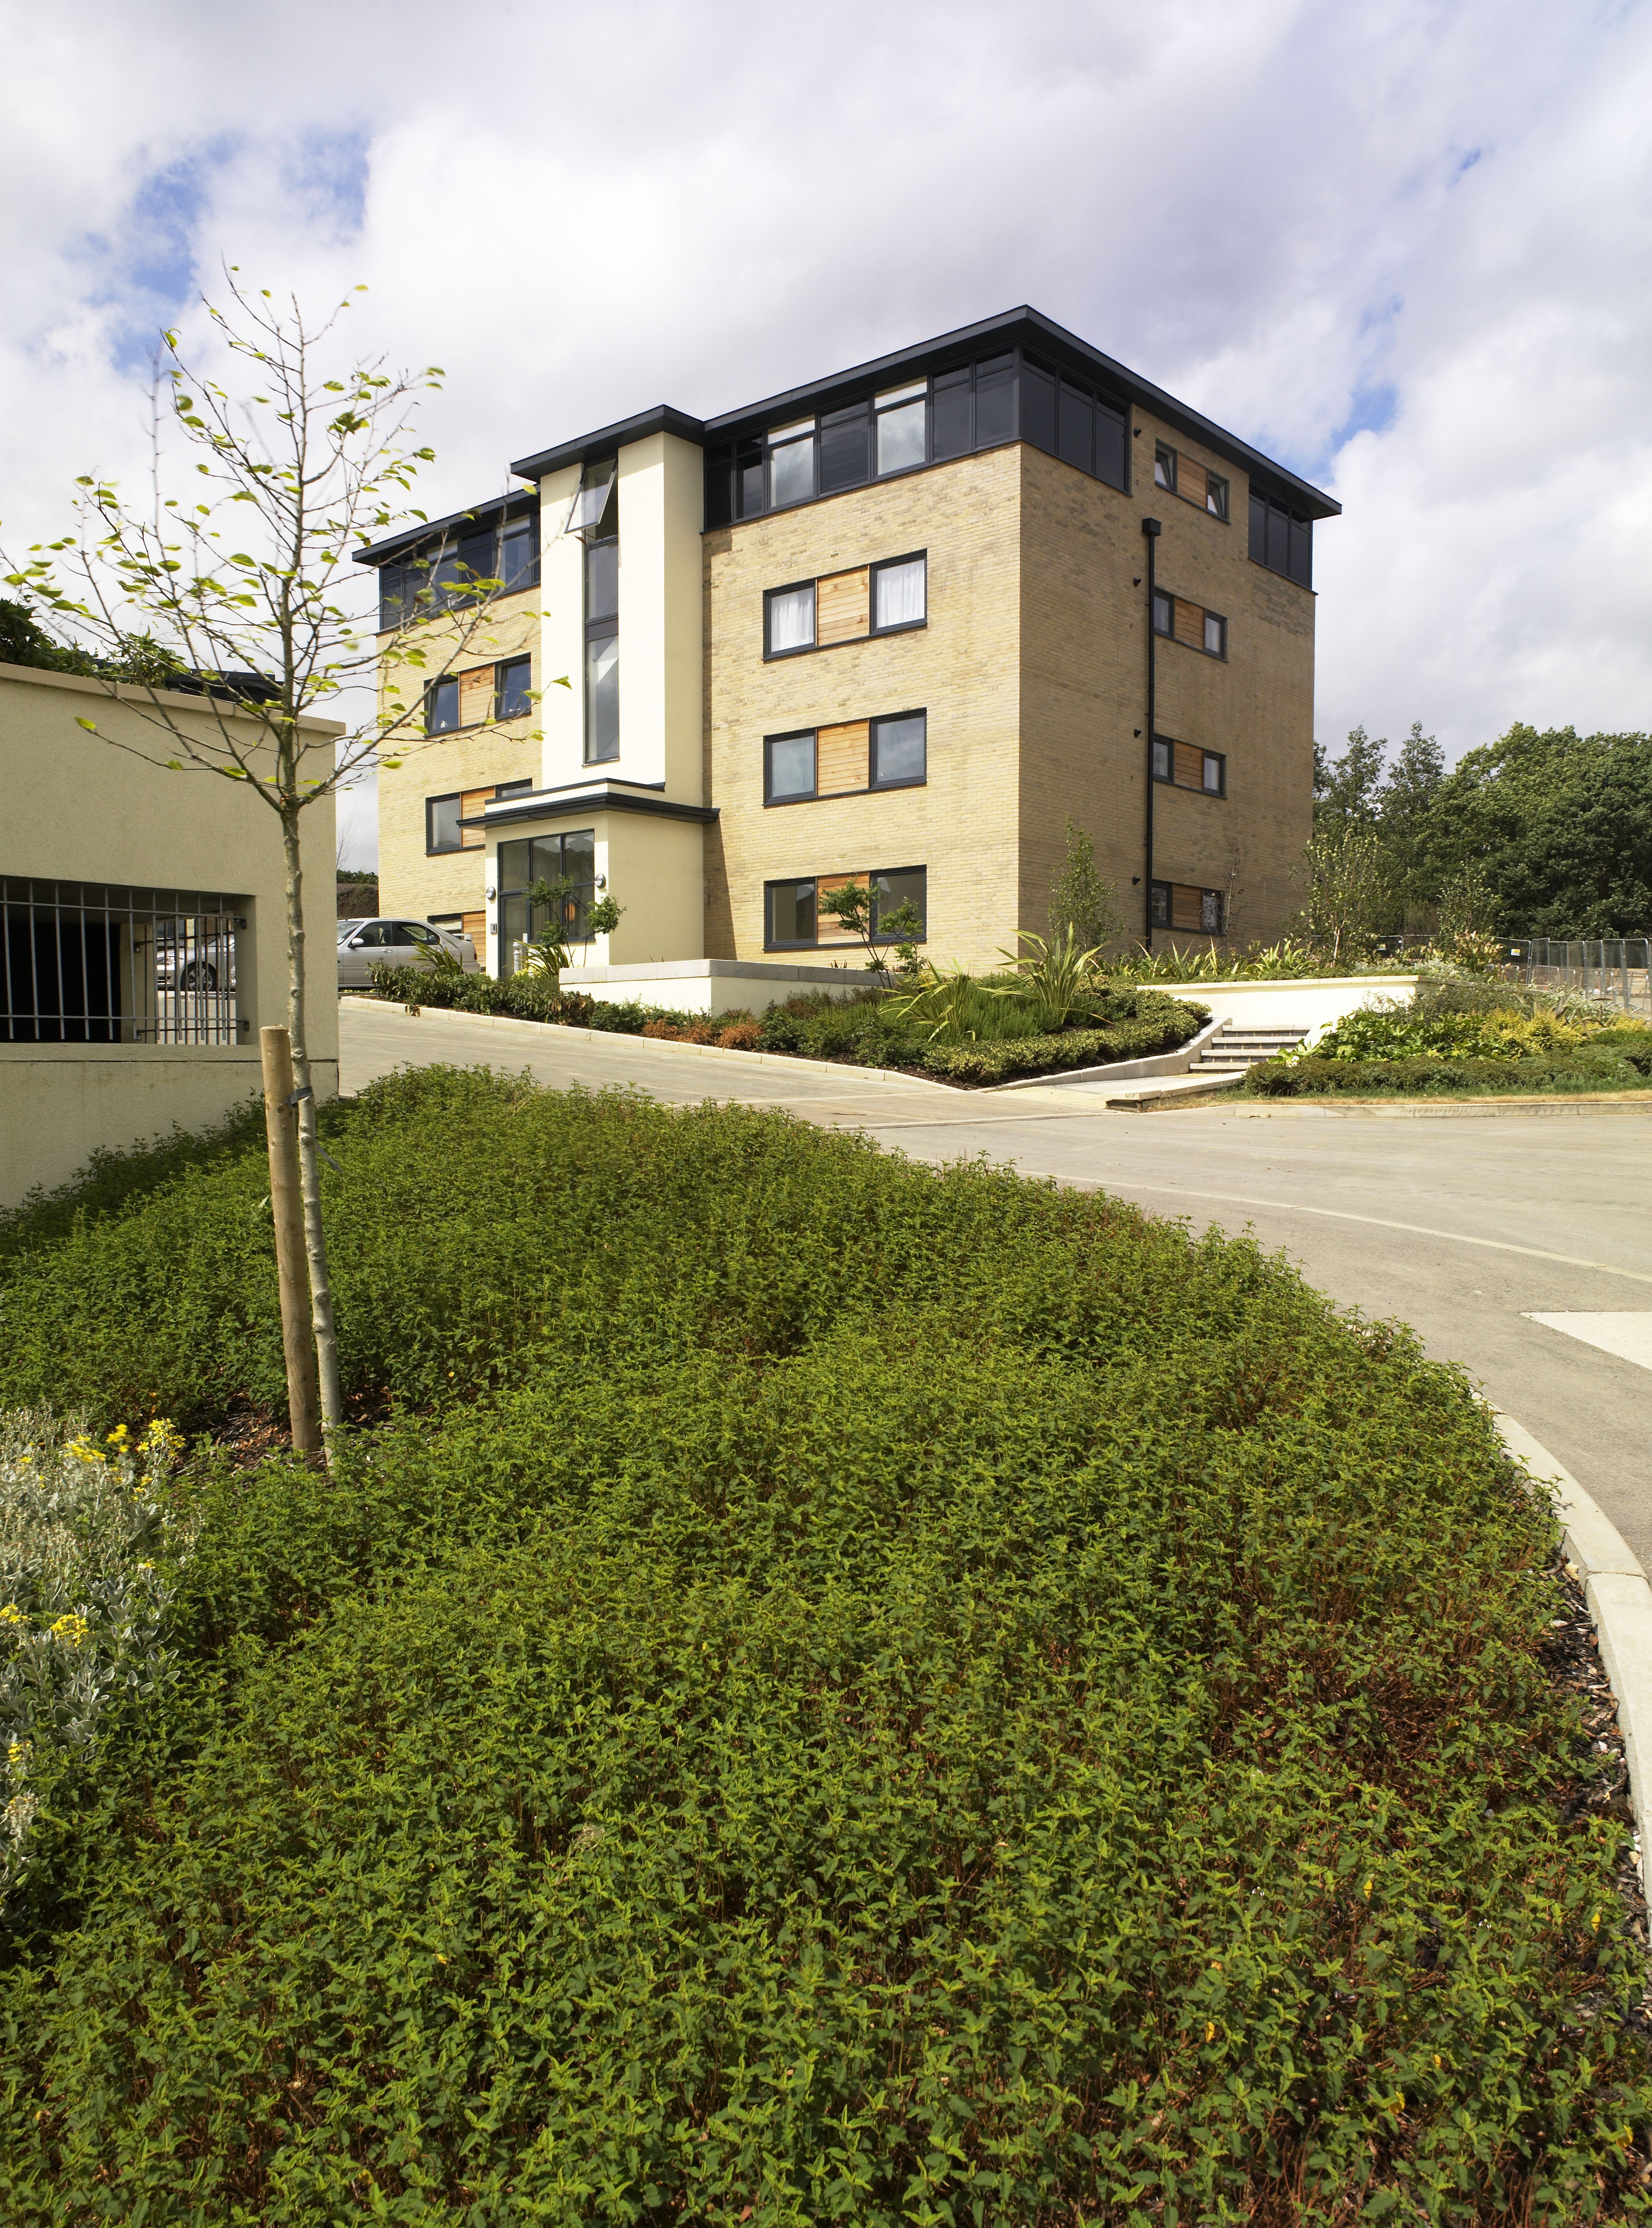

After
Analysing the image
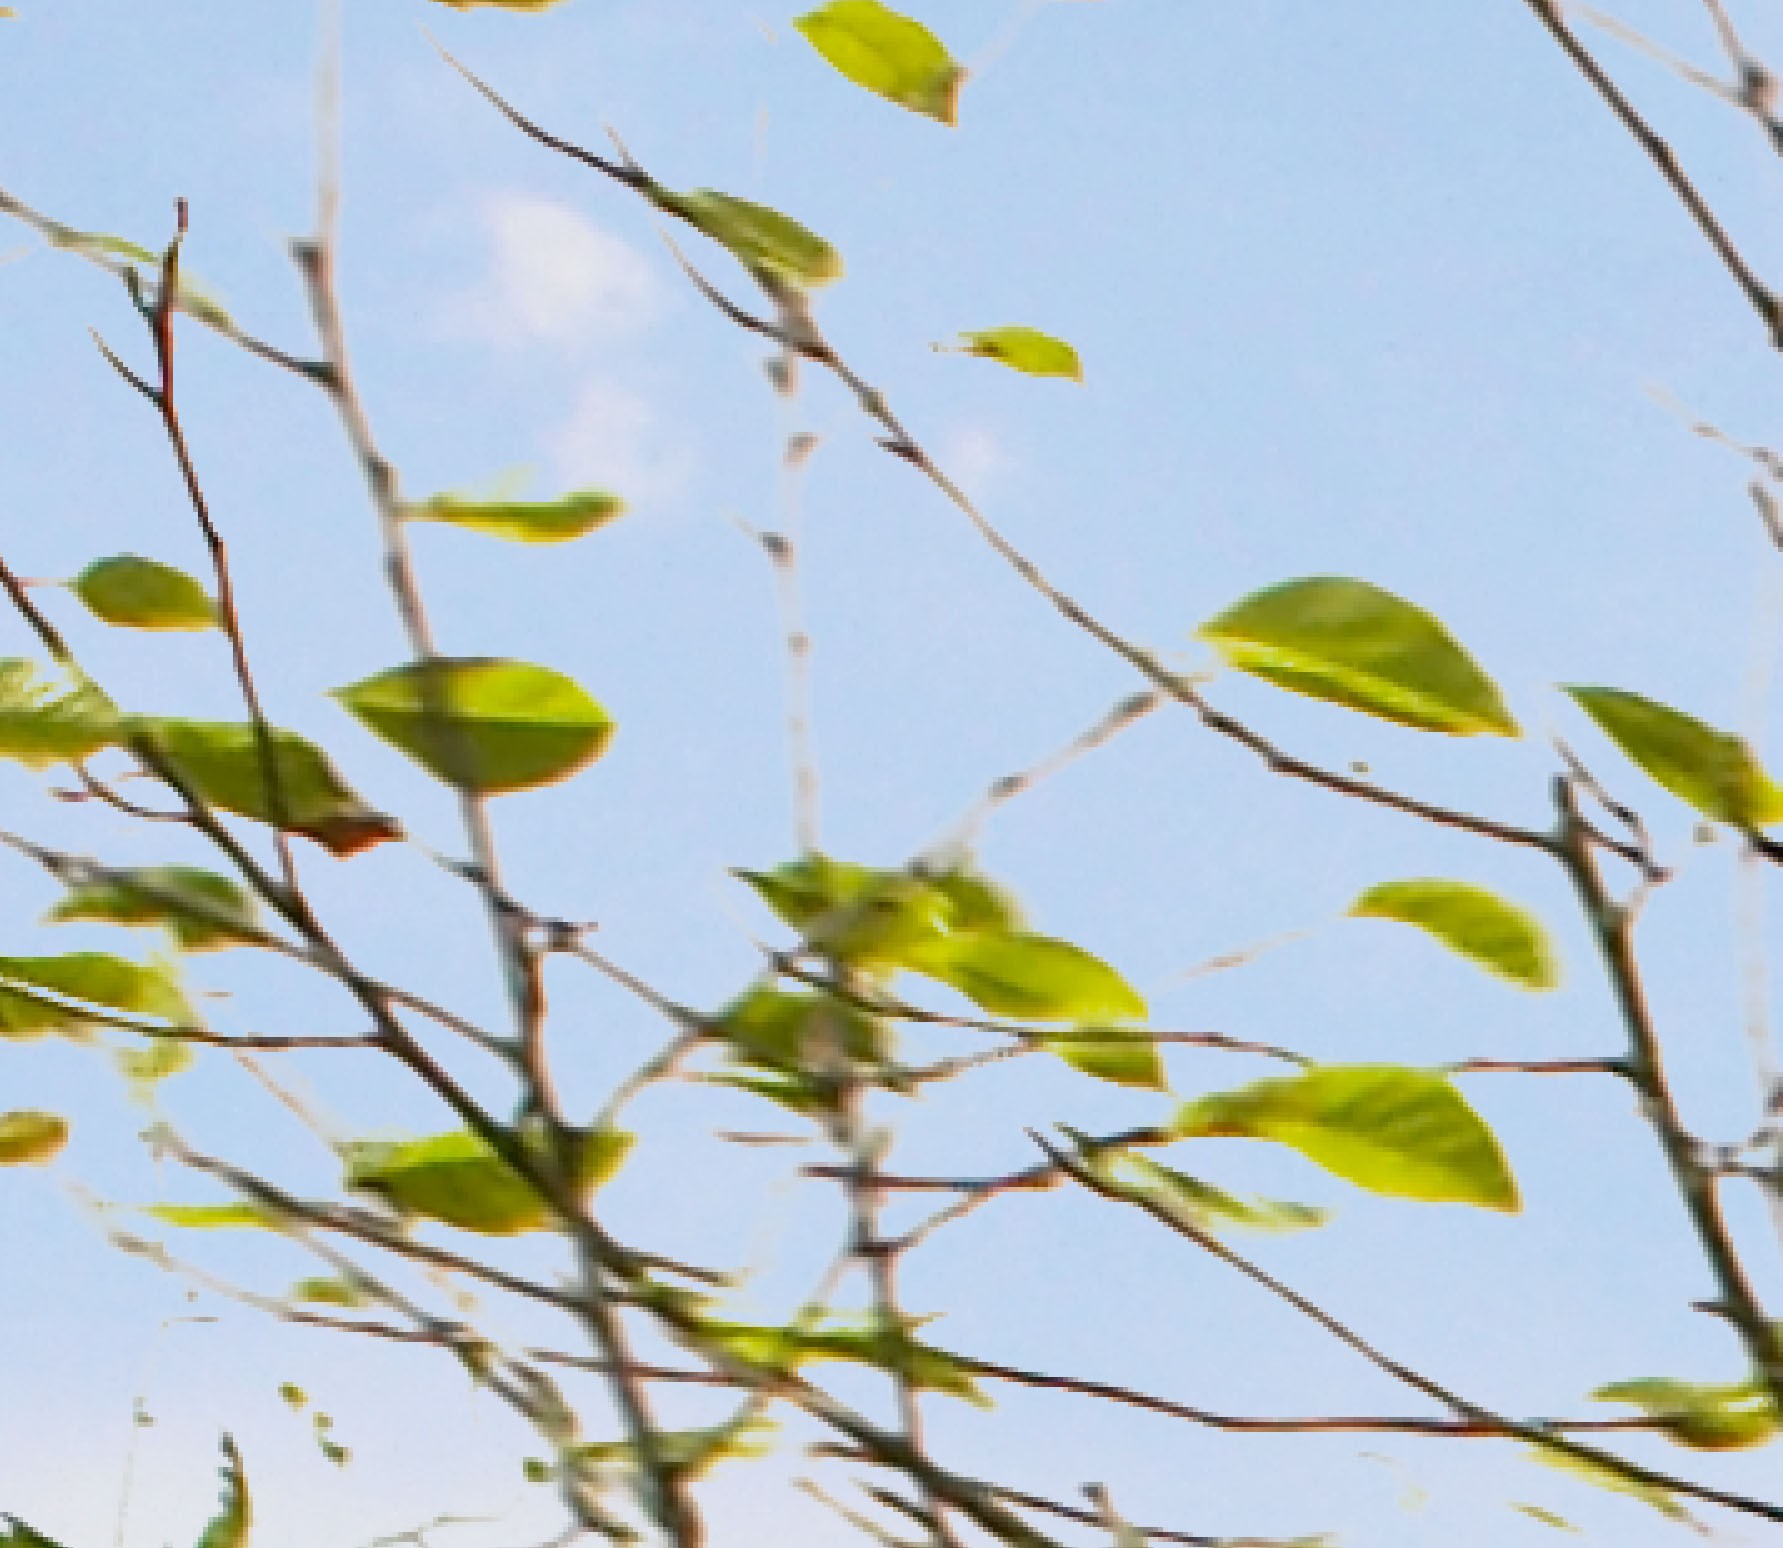
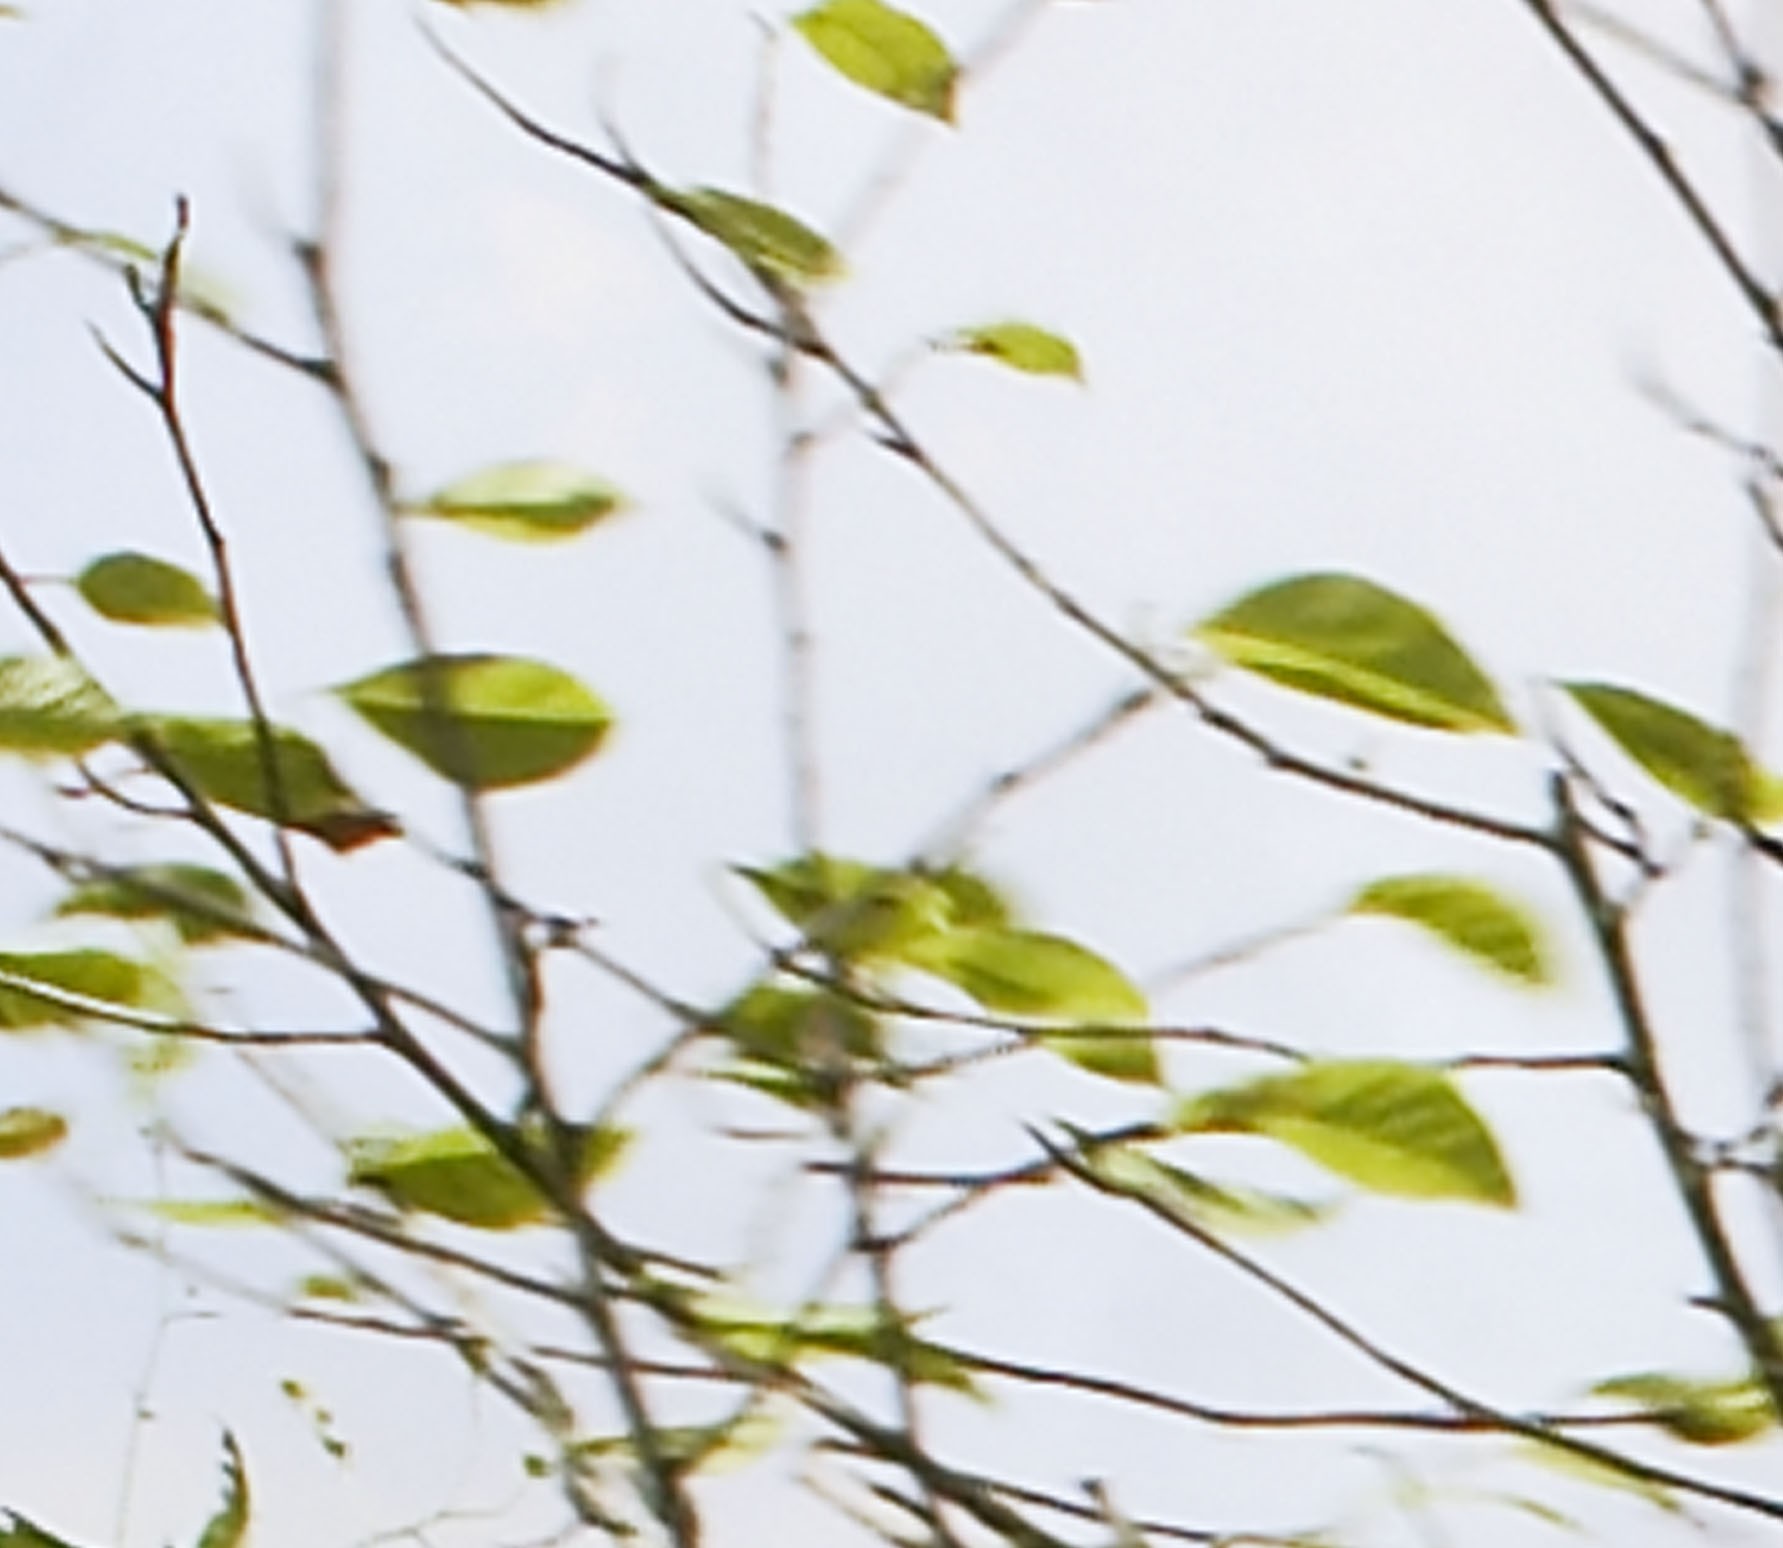
Looking at the before image you can immediately see the foreground tree is going to be a problem. Depth of field means the tree is slightly out of focus with motion blur adding to the chaos. Putting in a new sky means you have to deal with these awkward edges. Here’s a close up of the area to show exactly what needs to be tackled:
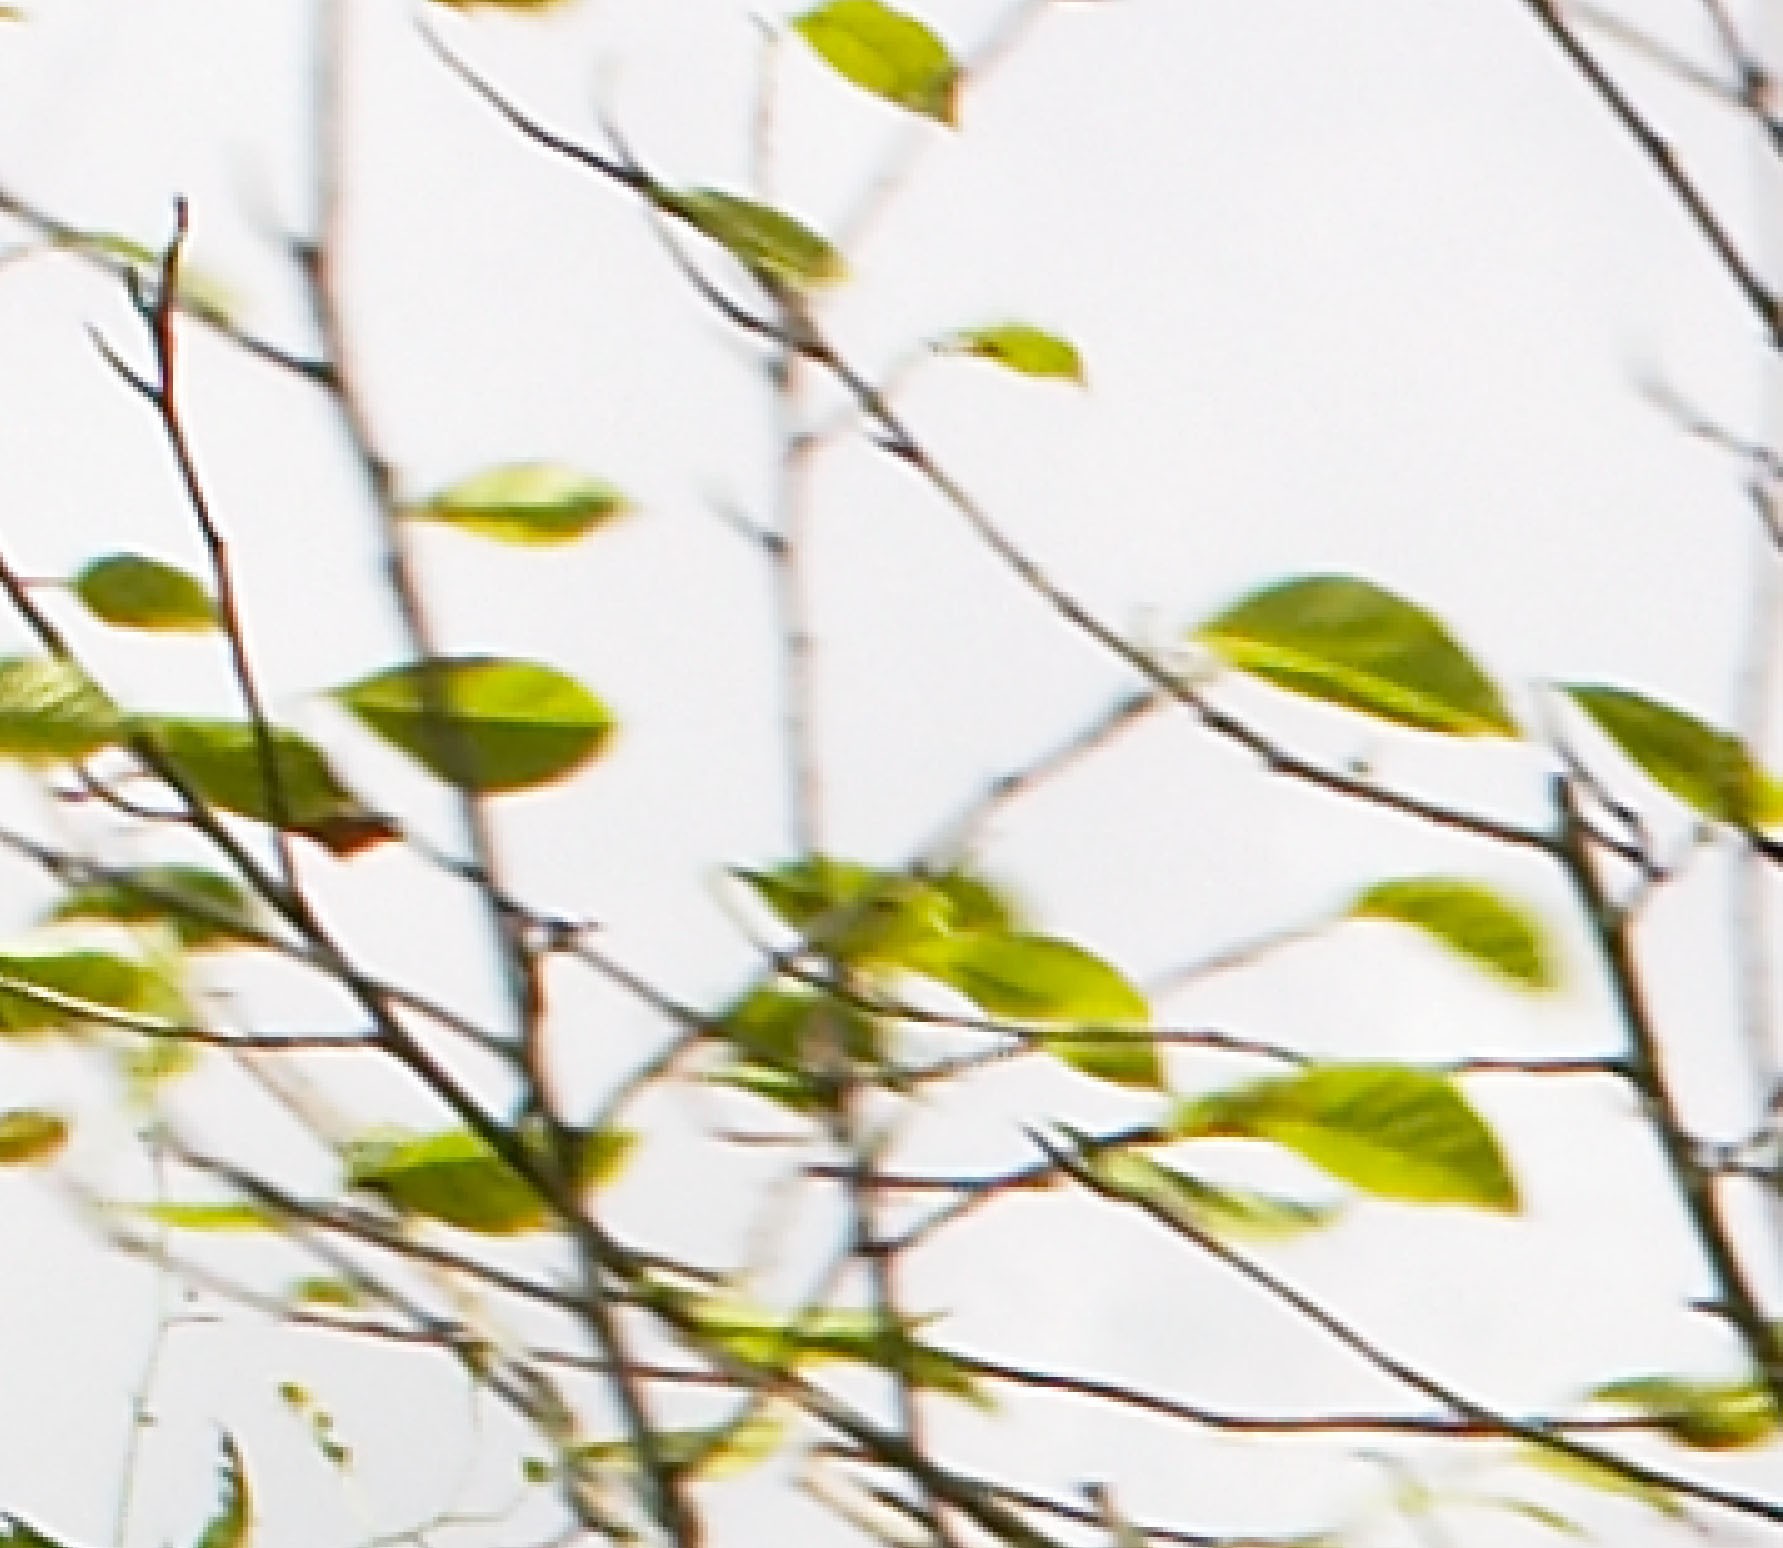
Tree Detail
Adding the sky as a separate layer
Open the image to be retouched and the sky image in Photoshop. With the sky image visible copy and paste onto the background image. A quick way of doing this is to hold down the ⌘Cmd key and keep it down, then one at a time press the “A” key, the “C” key, the “W” key and finally the “V” key. These are Mac shortcuts.
Here’s what’s happening.
⌘Cmd A selects the whole image. You will see the dotted selection line around the edge.
⌘Cmd C copies the selection. i.e.the whole sky document.
⌘Cmd W closes the sky document.
⌘Cmd V pastes the sky as a separate layer onto the background layer.
Positioning the sky
Press and hold the ⌘Cmd key to temporarily access the move tool. Click and drag the sky to where it needs to be. Next resize the sky (⌘Cmd and “T” keys) pressing the return key when happy with the results. Here’s the sky in position;
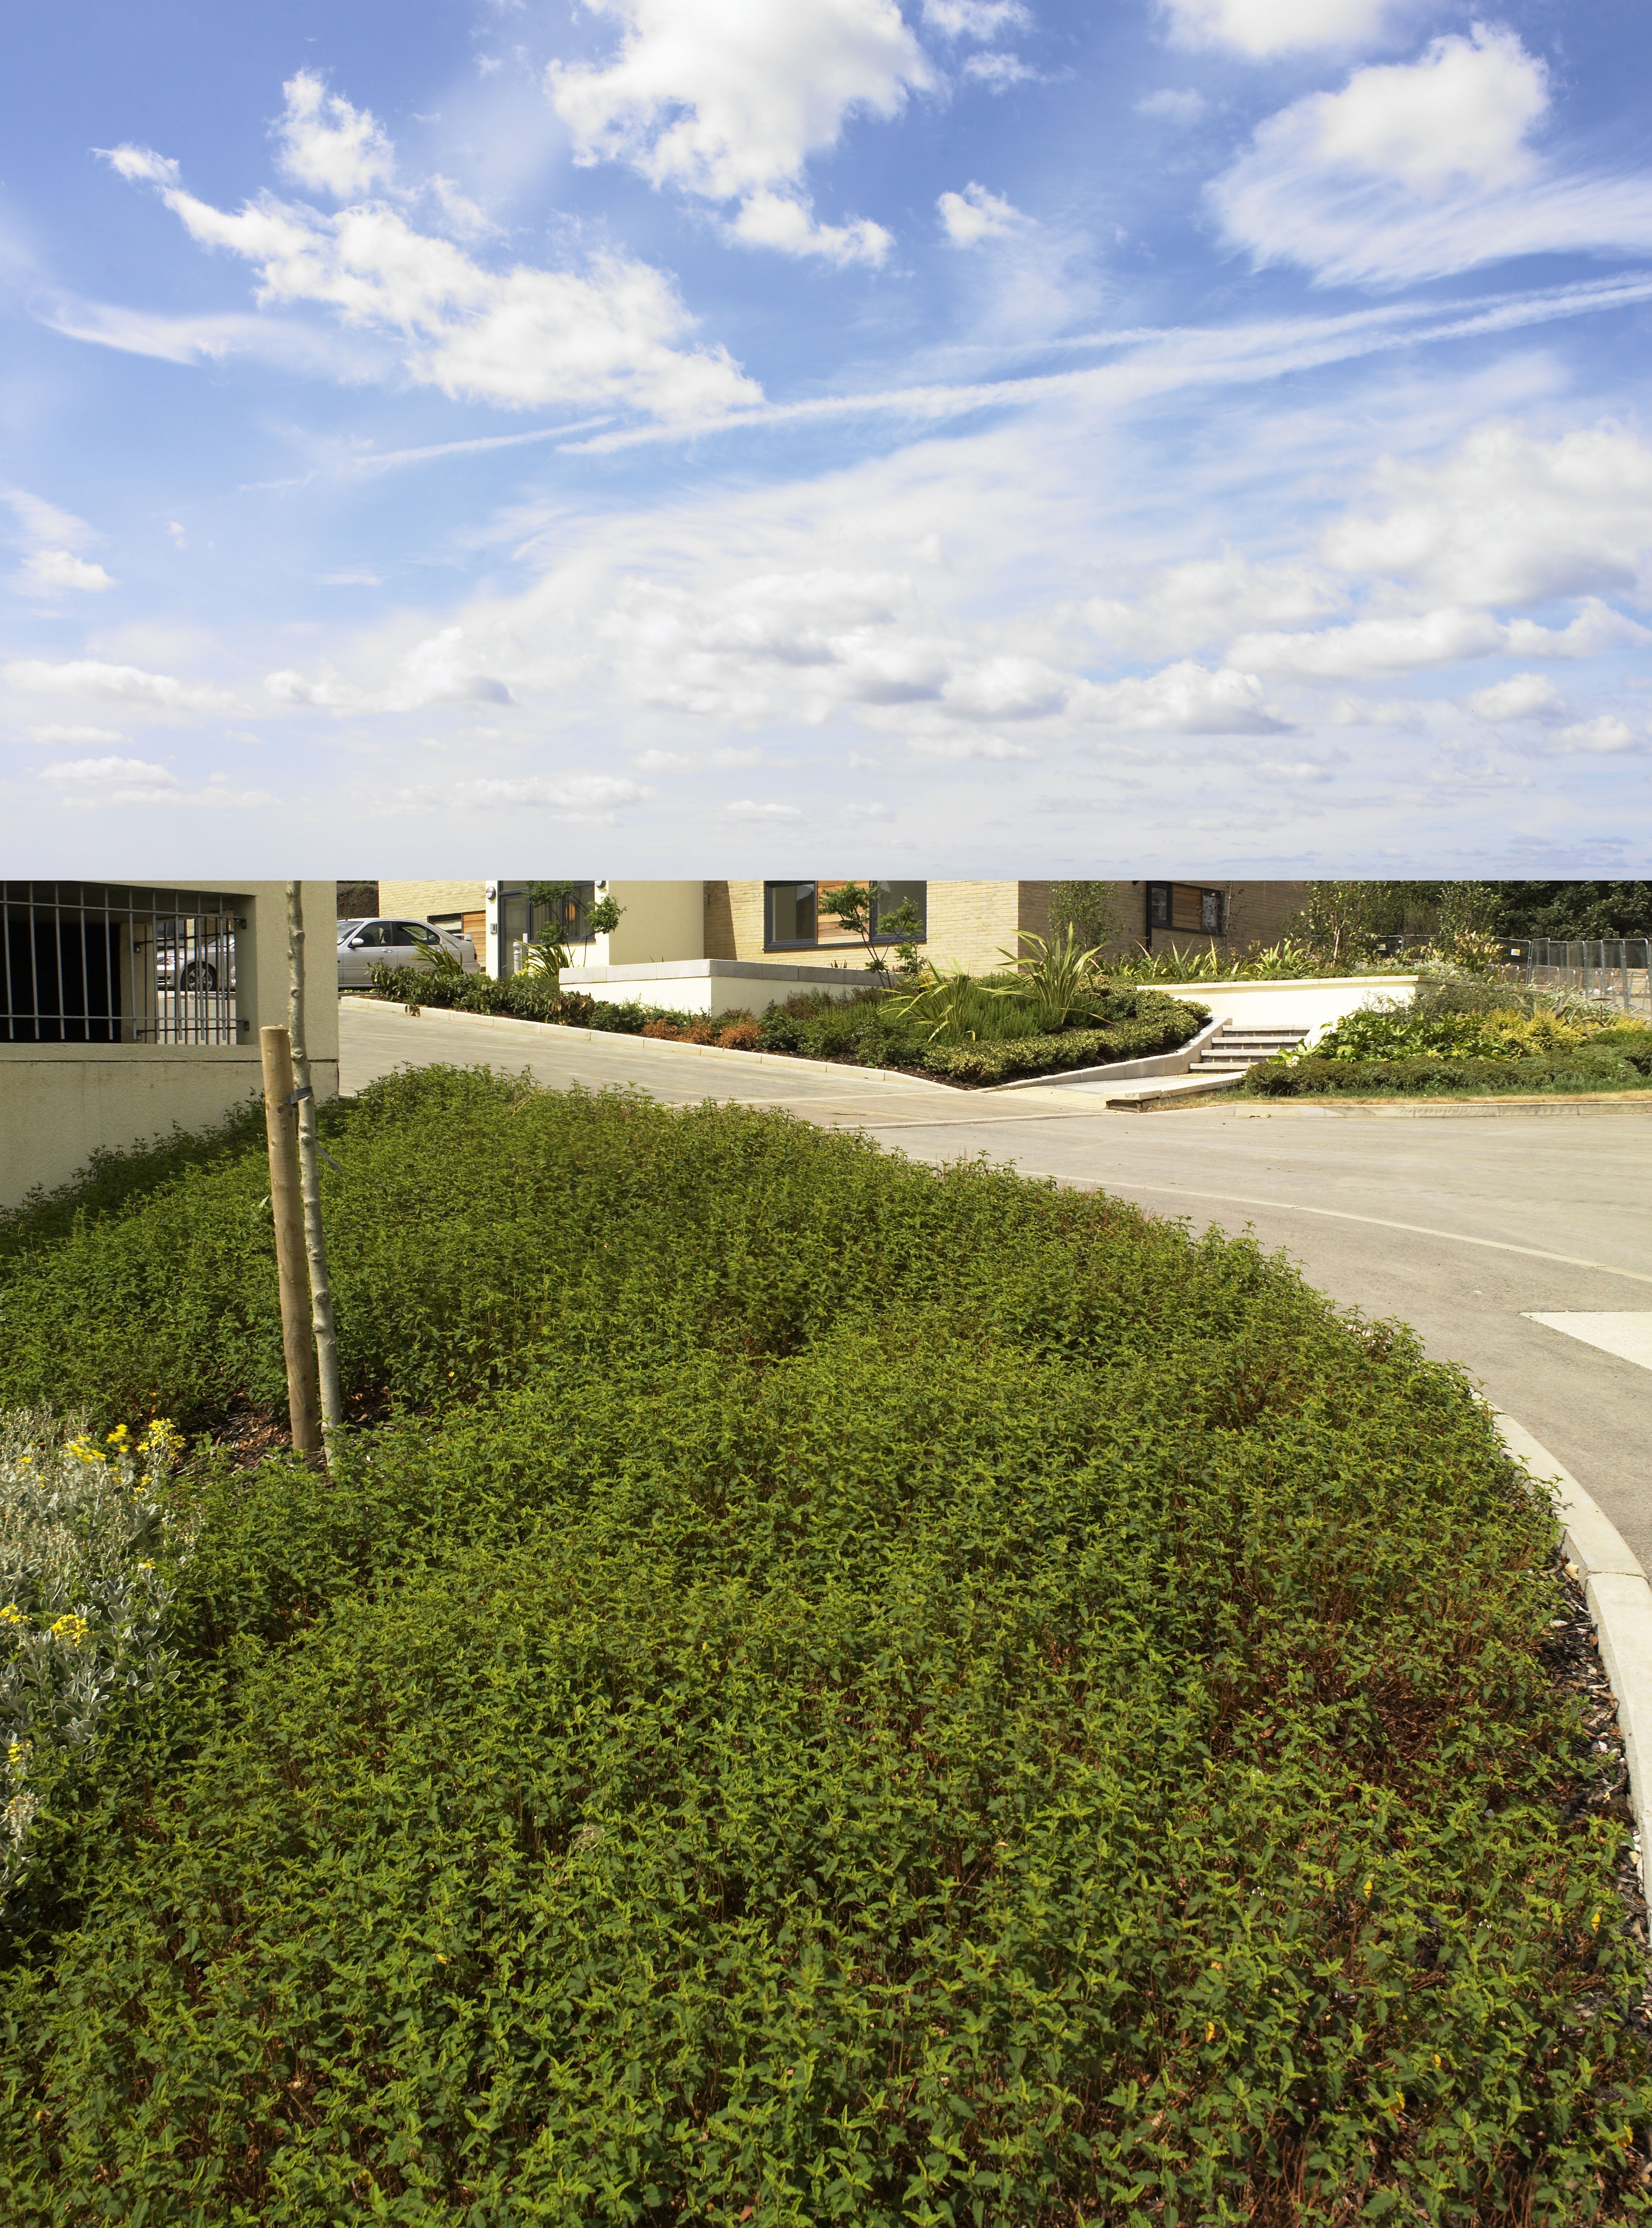
Sky in position
Blending Options
You can use the blending options to hide the sky where there are darker areas on the underlying background layer. To do this double click on the sky layer in the layers pallet to open the Layer Style pallet, which has the blending options selected by default. Here’s how it looks before making any adjustments;
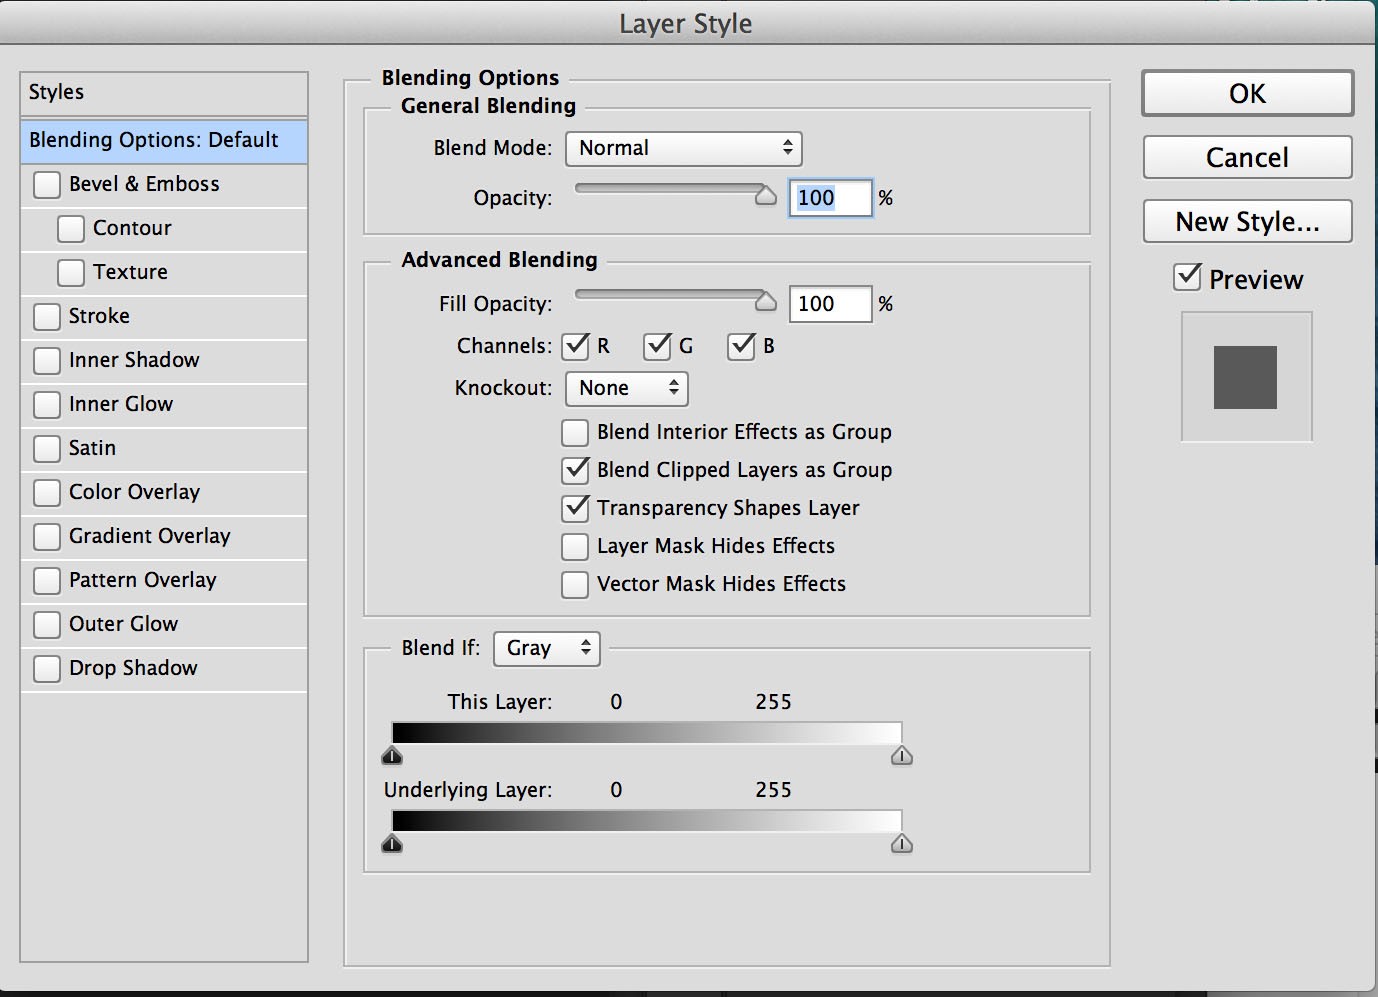
Layer Style Pallet
You need to slide in the bottom left hand slider to the right until the majority of the building and trees are revealed, but stop before the sky from the background layer starts to show through. Then press the ⌥Alt key to split the slider into two halves and drag one half away from the other. This creates a gradual transition between light and dark areas. If you zoom in on the fine tree details while doing this you will be able to see what has the most pleasing results.
Here’s how the adjustments look in the pallet:
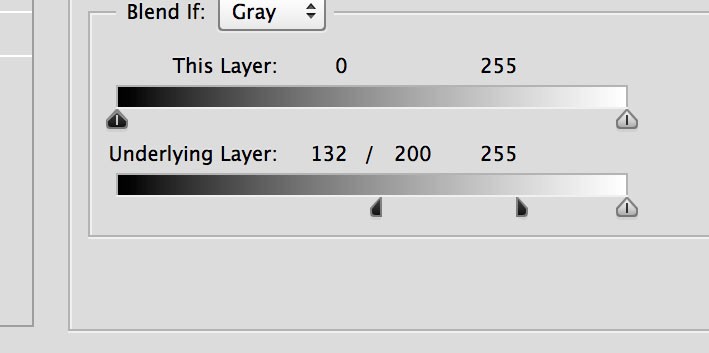
Blending Options Adjustments.
And here’s how the image looks with these adjustments:
Effects Of Blending Options on image.
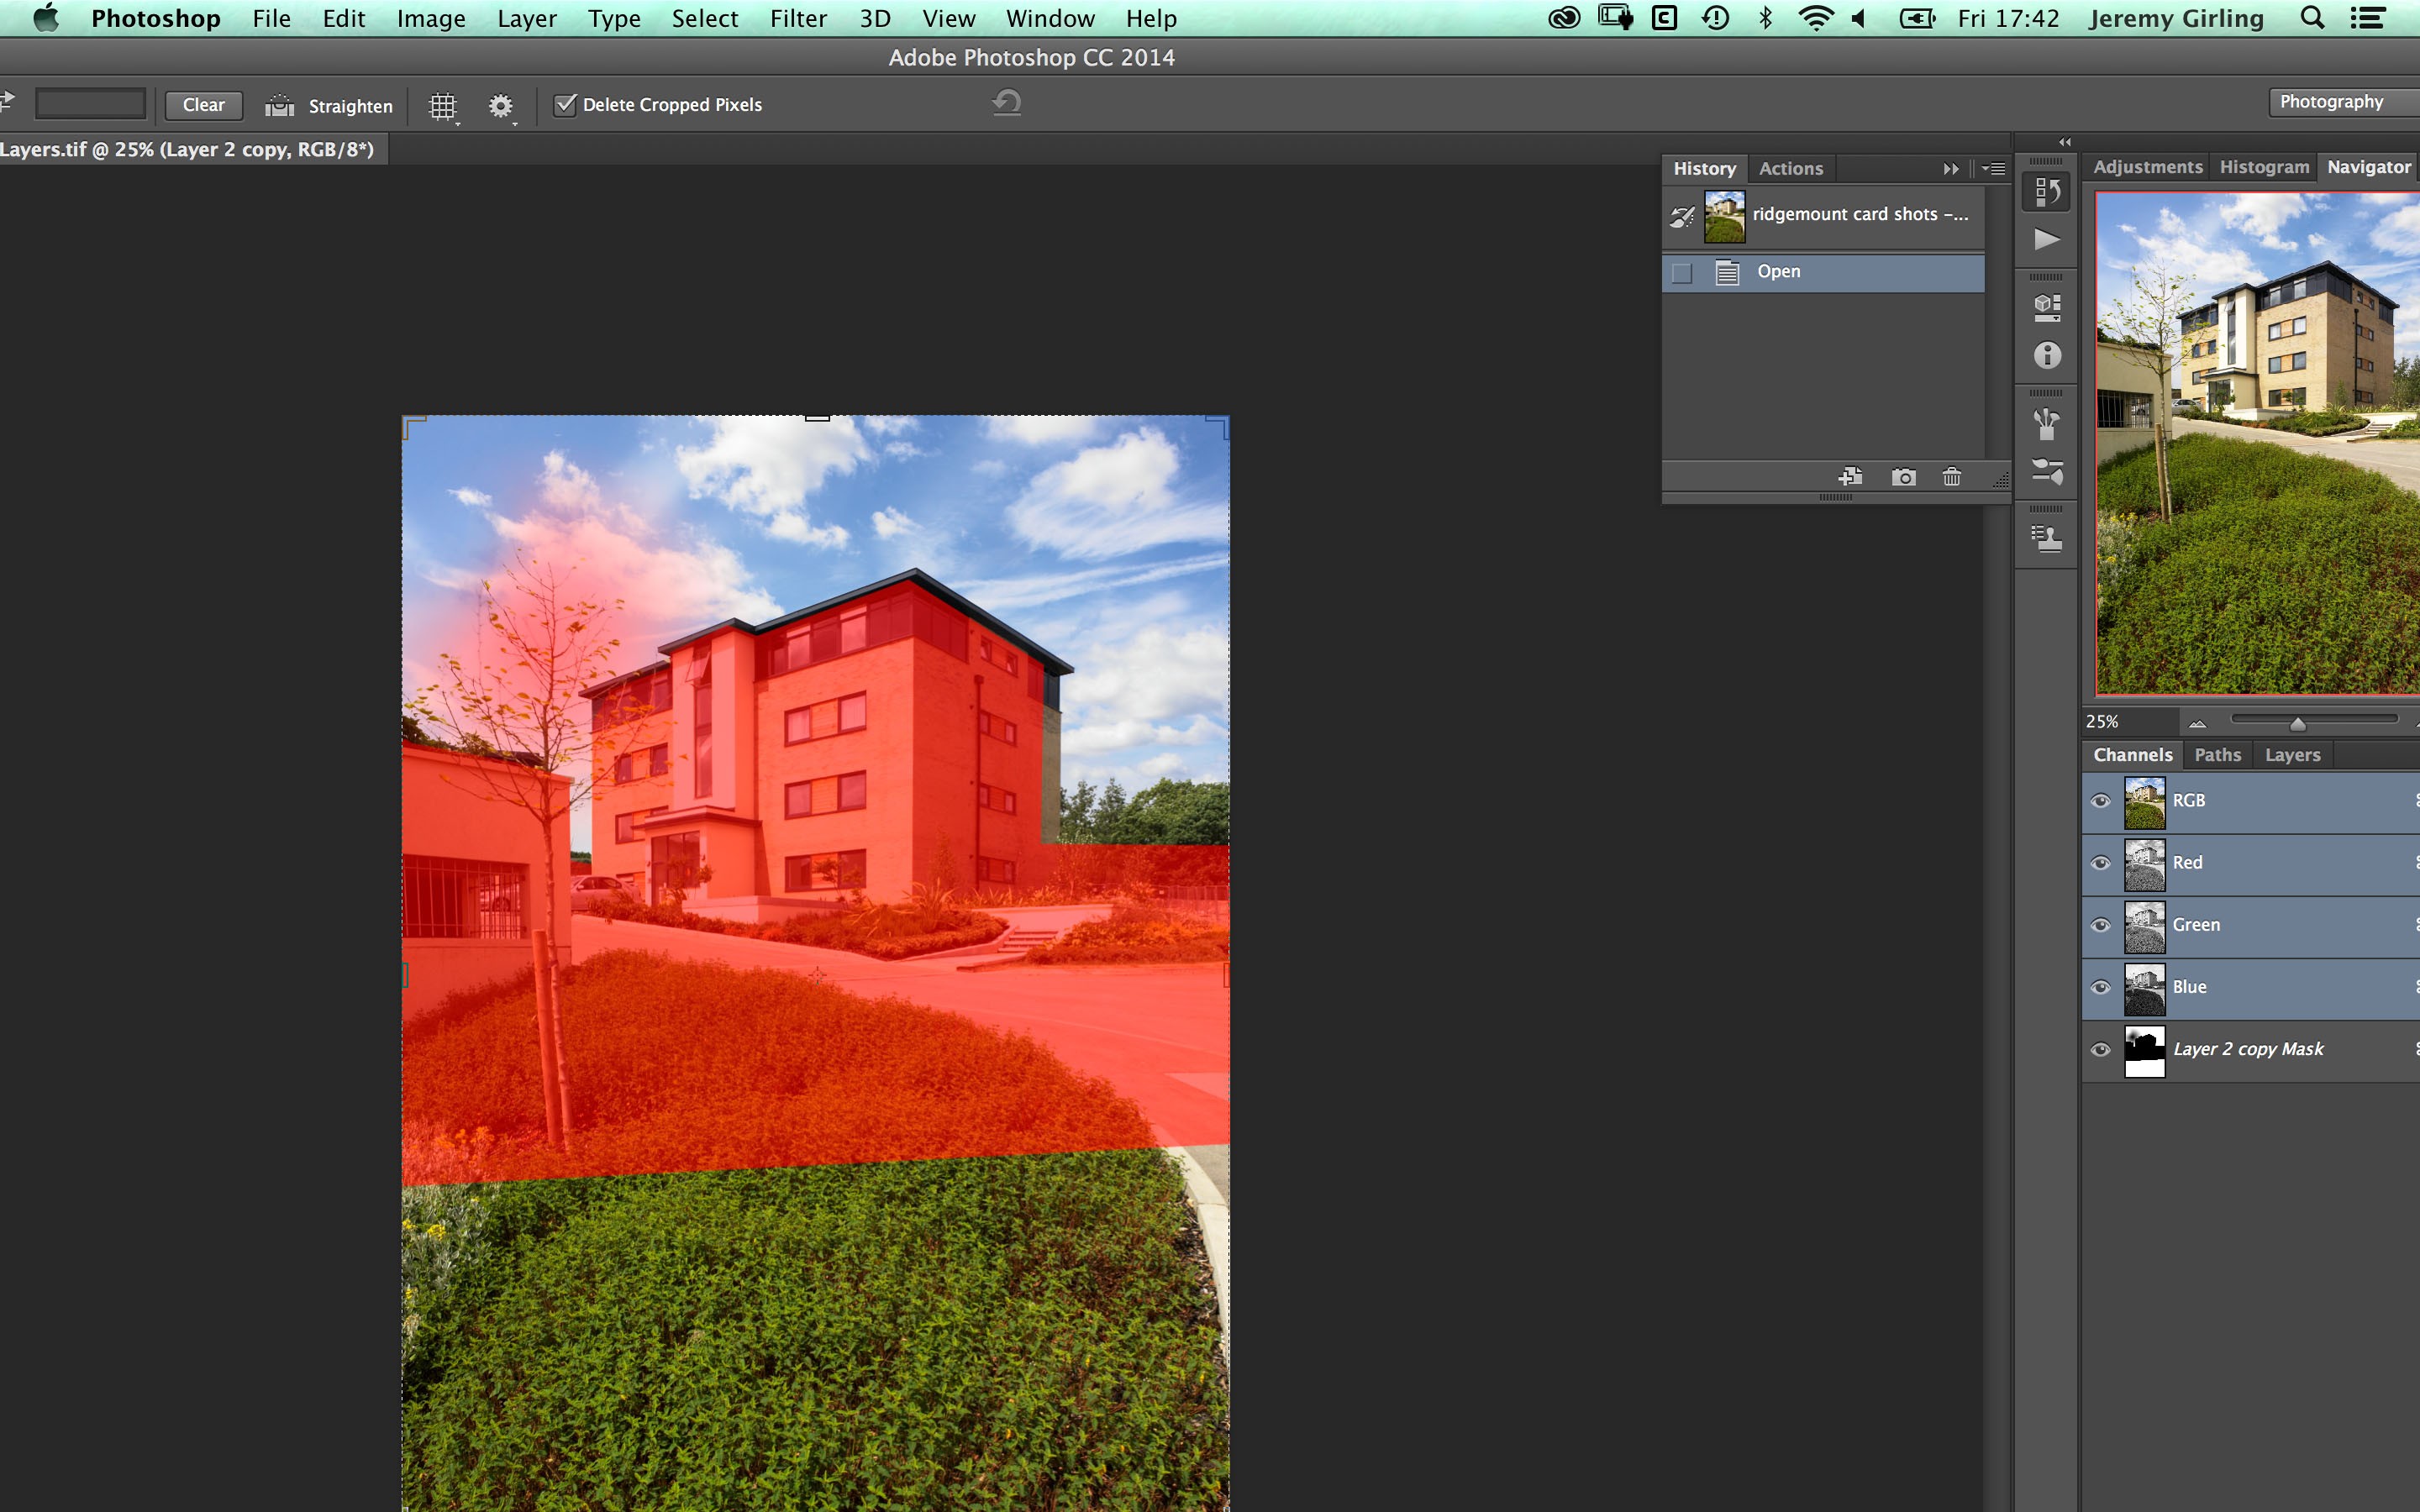
As you can see the sky still shows through on the lighter parts of the building. You need to use a layer mask to hide these parts. With the sky layer selected in the layers pallet click on the area shown:
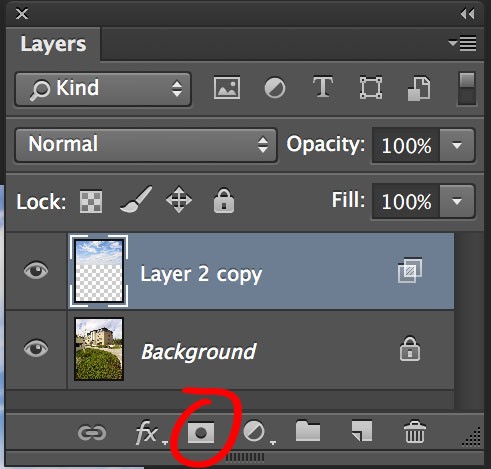
Applying a Layer Mask
You will now see a layer mask on the sky layer as shown:
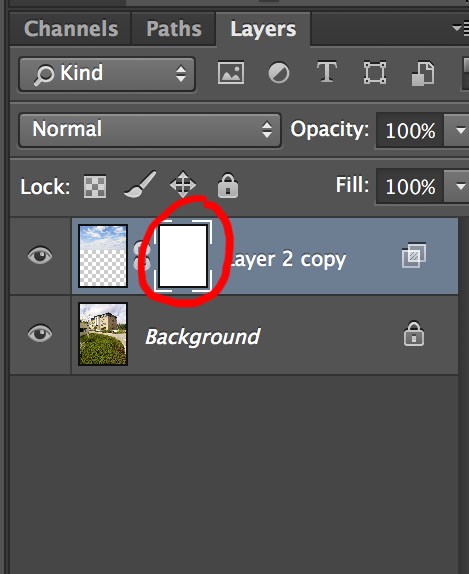
Layer Mask.
Notice the layer mask has a border around it which is white in the corners. This shows it is the layer mask that is selected and not the layer itself. Painting black on the layer mask will hide the sky and painting white will reveal. You will notice that the layer mask just shows white at the moment meaning all the sky is revealed. (Ignoring the effects of blending options for the moment) You could paint black with a brush, but this will take a long time. A much better option is to make a selection and fill that selection with black. Here’s where it is a huge advantage mixing blending options and a layer mask. You only have to select accurately in a few areas. Here’s an image showing my selection made using the polygon lasso. The area circled in red is where you need to be accurate with the selection. The rest can be done more quickly and doesn’t need to go to the roofline of the building as this is already hidden with the blending options.
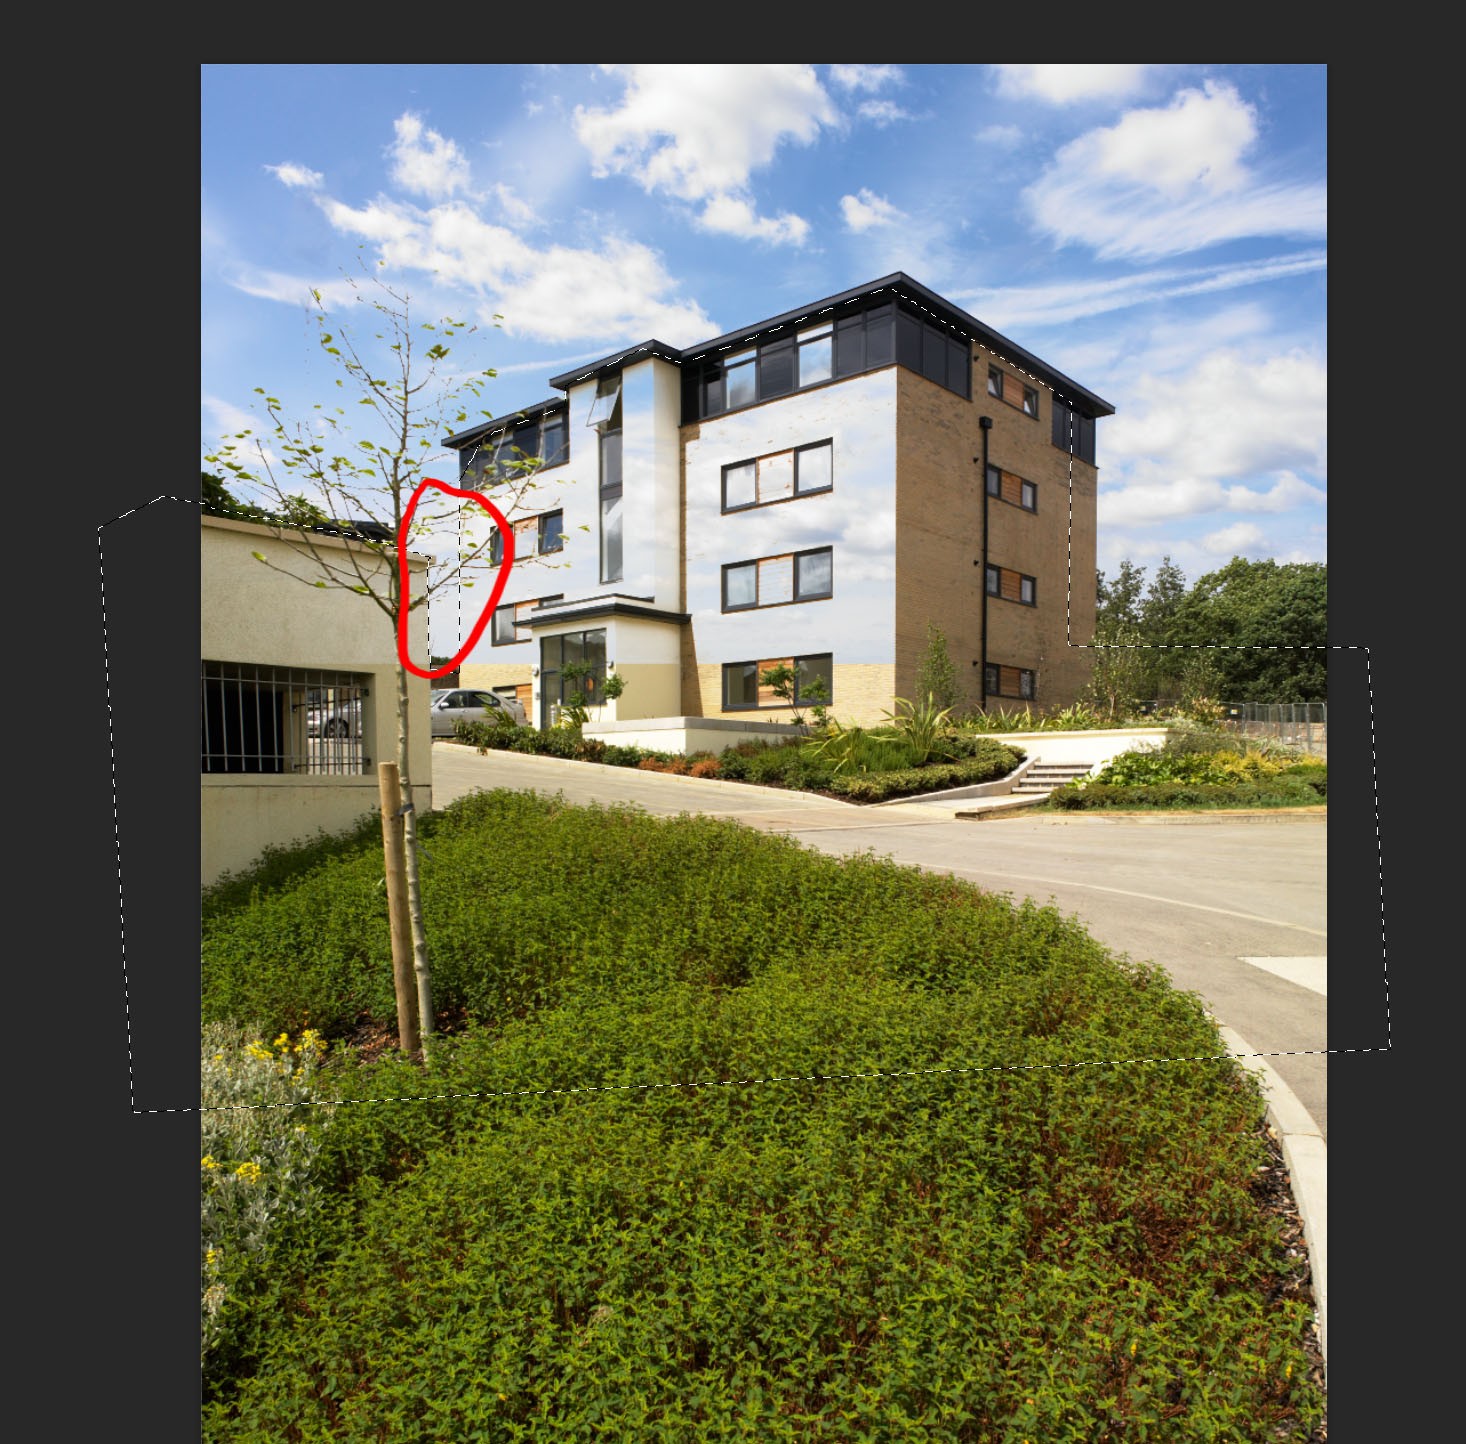
Selection
This may be hard to see so for illustrative purposes only here’s the selection shown in quick mask mode. The red areas show parts of the image not selected:
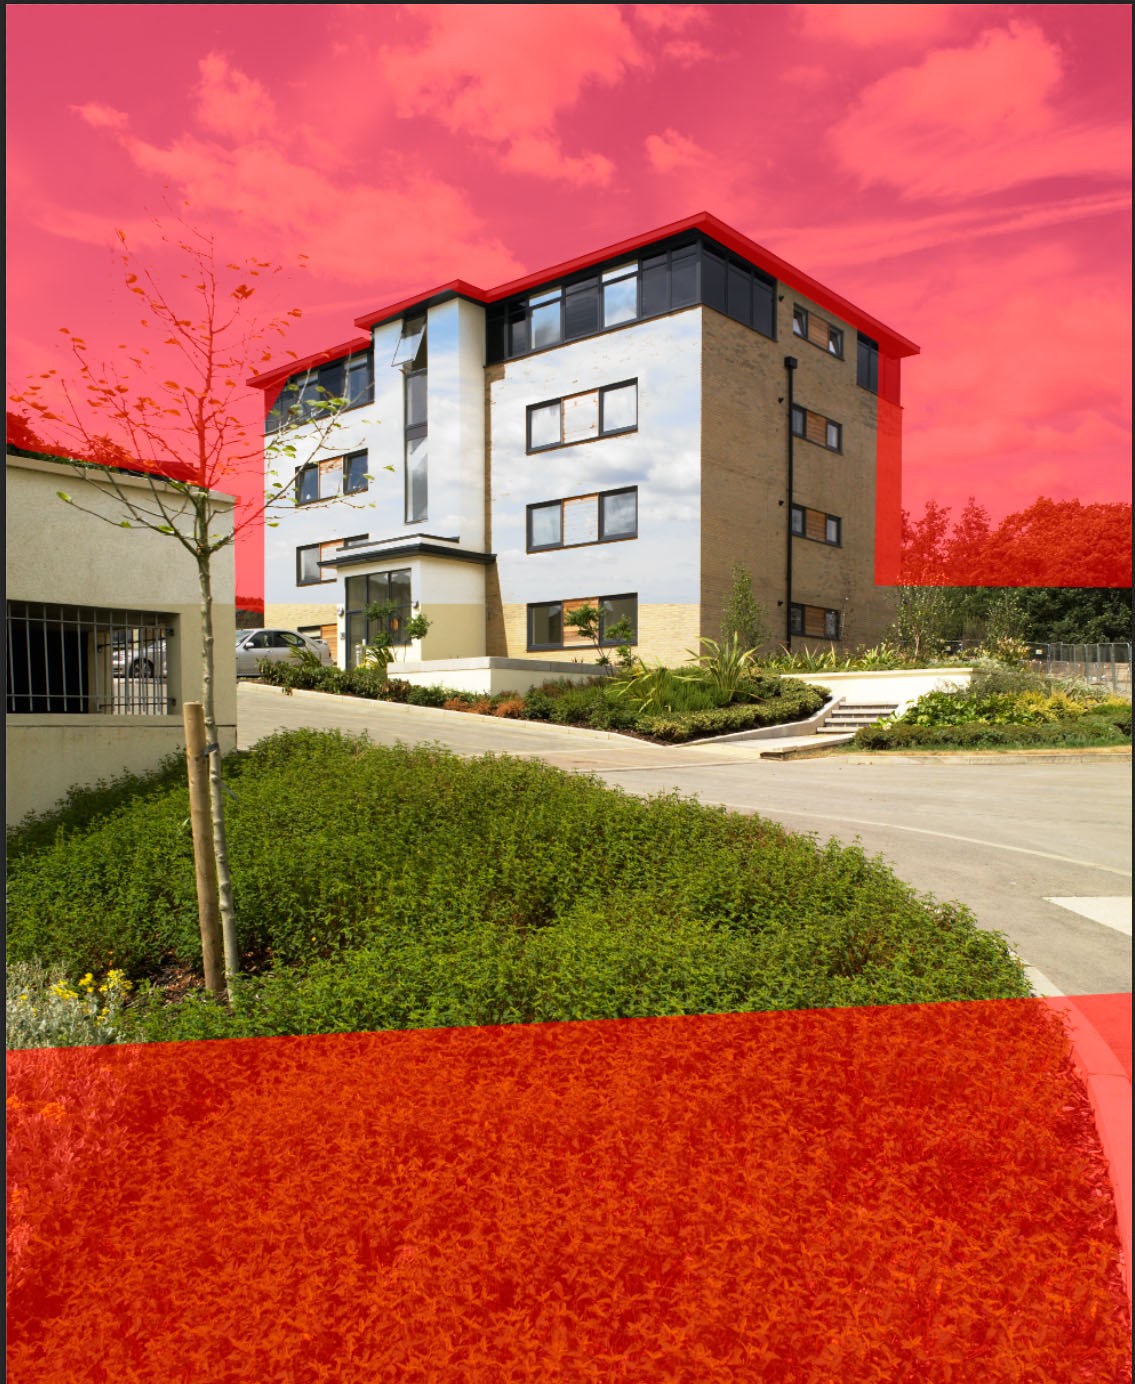
Selection shown in Quick Mask Mode.
Notice how the selection doesn’t need to go to the bottom of the image as there is no sky to hide here. Also where the darker parts of the building meet the sky you don’t need to follow the building edge, but can just select somewhere within the dark area.
With the selection active (not in quick mask mode) go to Edit>Fill and select “Black” from the drop down menu as shown. Make sure you have the Layer Mask selected in the layers pallet, otherwise you will be painting black onto the actual image.
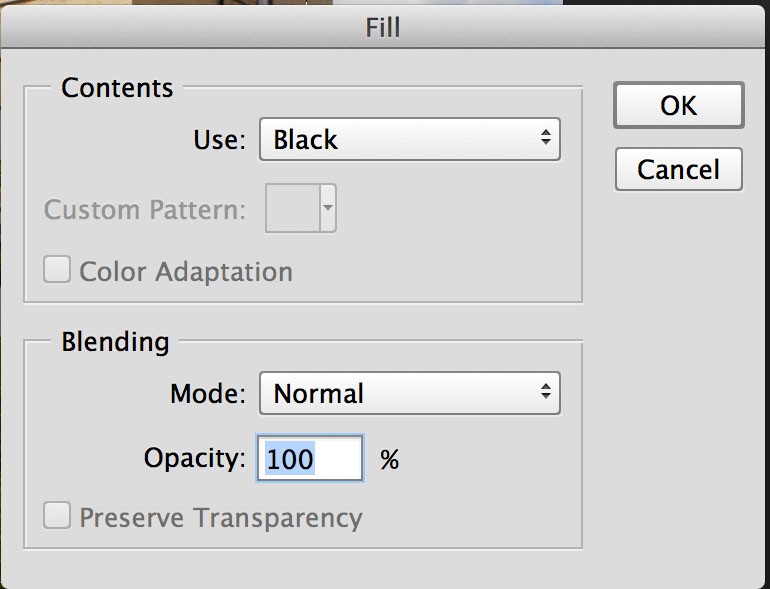
Photoshop’s fill option
Here’s how the image looks now:
Almost there.
There’s just a bit of tidying up to do now. Taking a closer look at the tree branches there’s a bit of a halo effect:
Blending Options effect on blurred edges.
This may be ok for some people, but it is quite simple to get a more natural look.
Make sure the layer mask is selected on your sky layer. Press the “G” key to select the gradient tool. select the radial gradient going from black to transparent as shown;
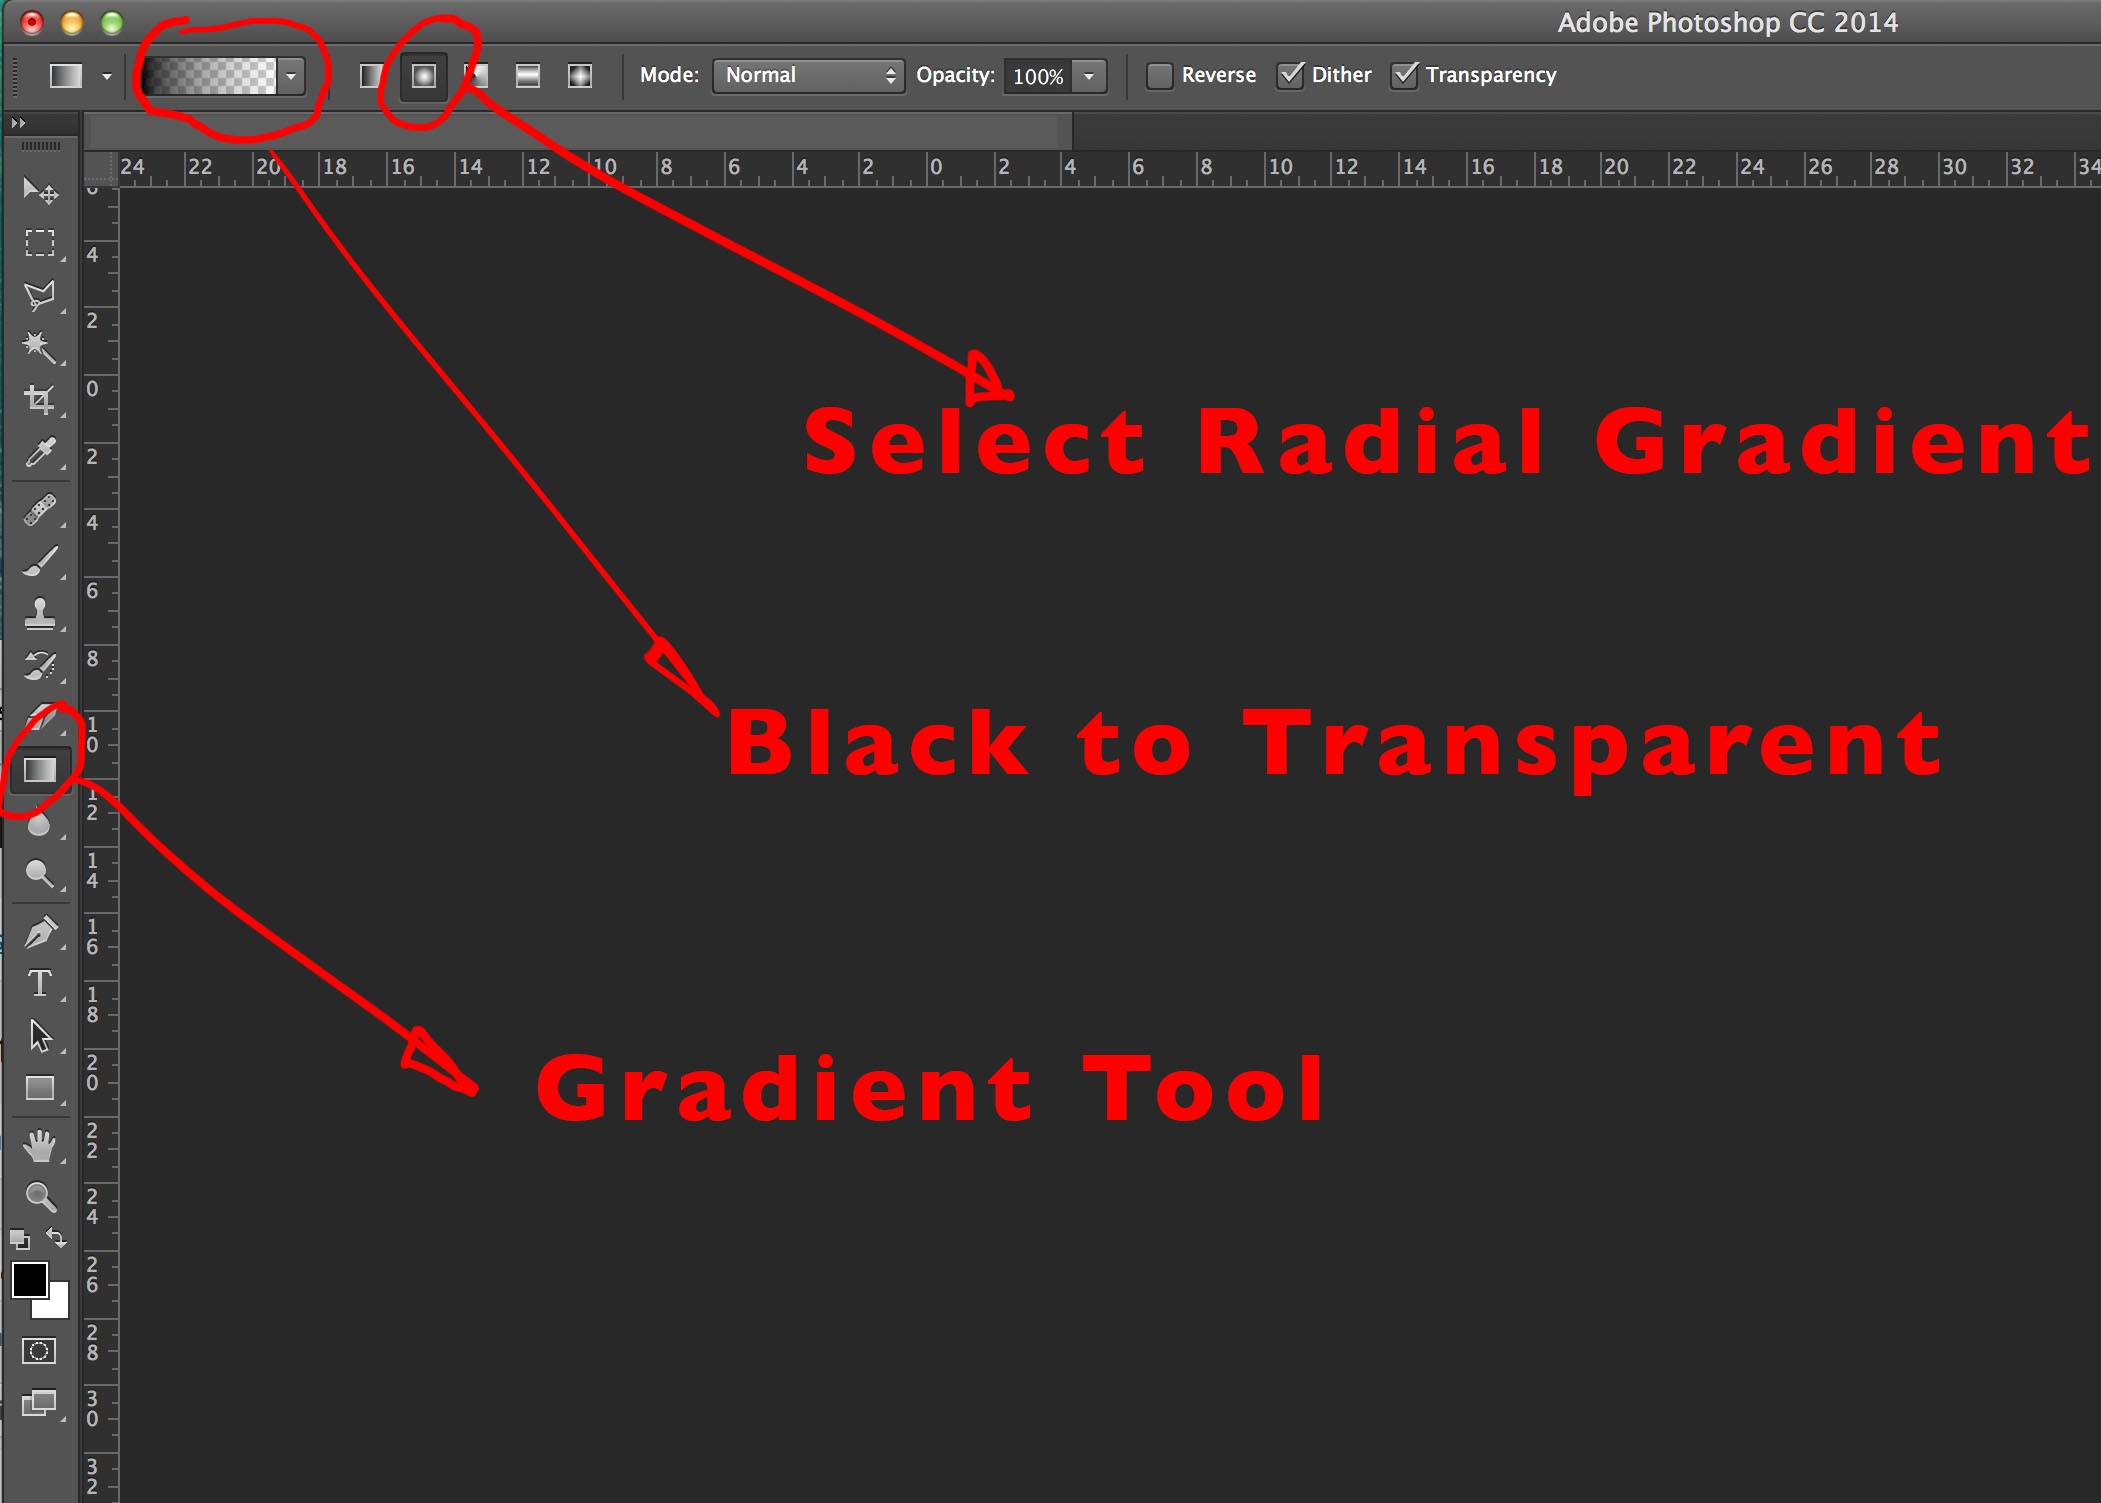
Photoshops Gradient Options
Click and drag from the centre of the tree branches to a small way outside the tree as shown by the red arrow. The direction you drag in is not important, but the distance certainly is.
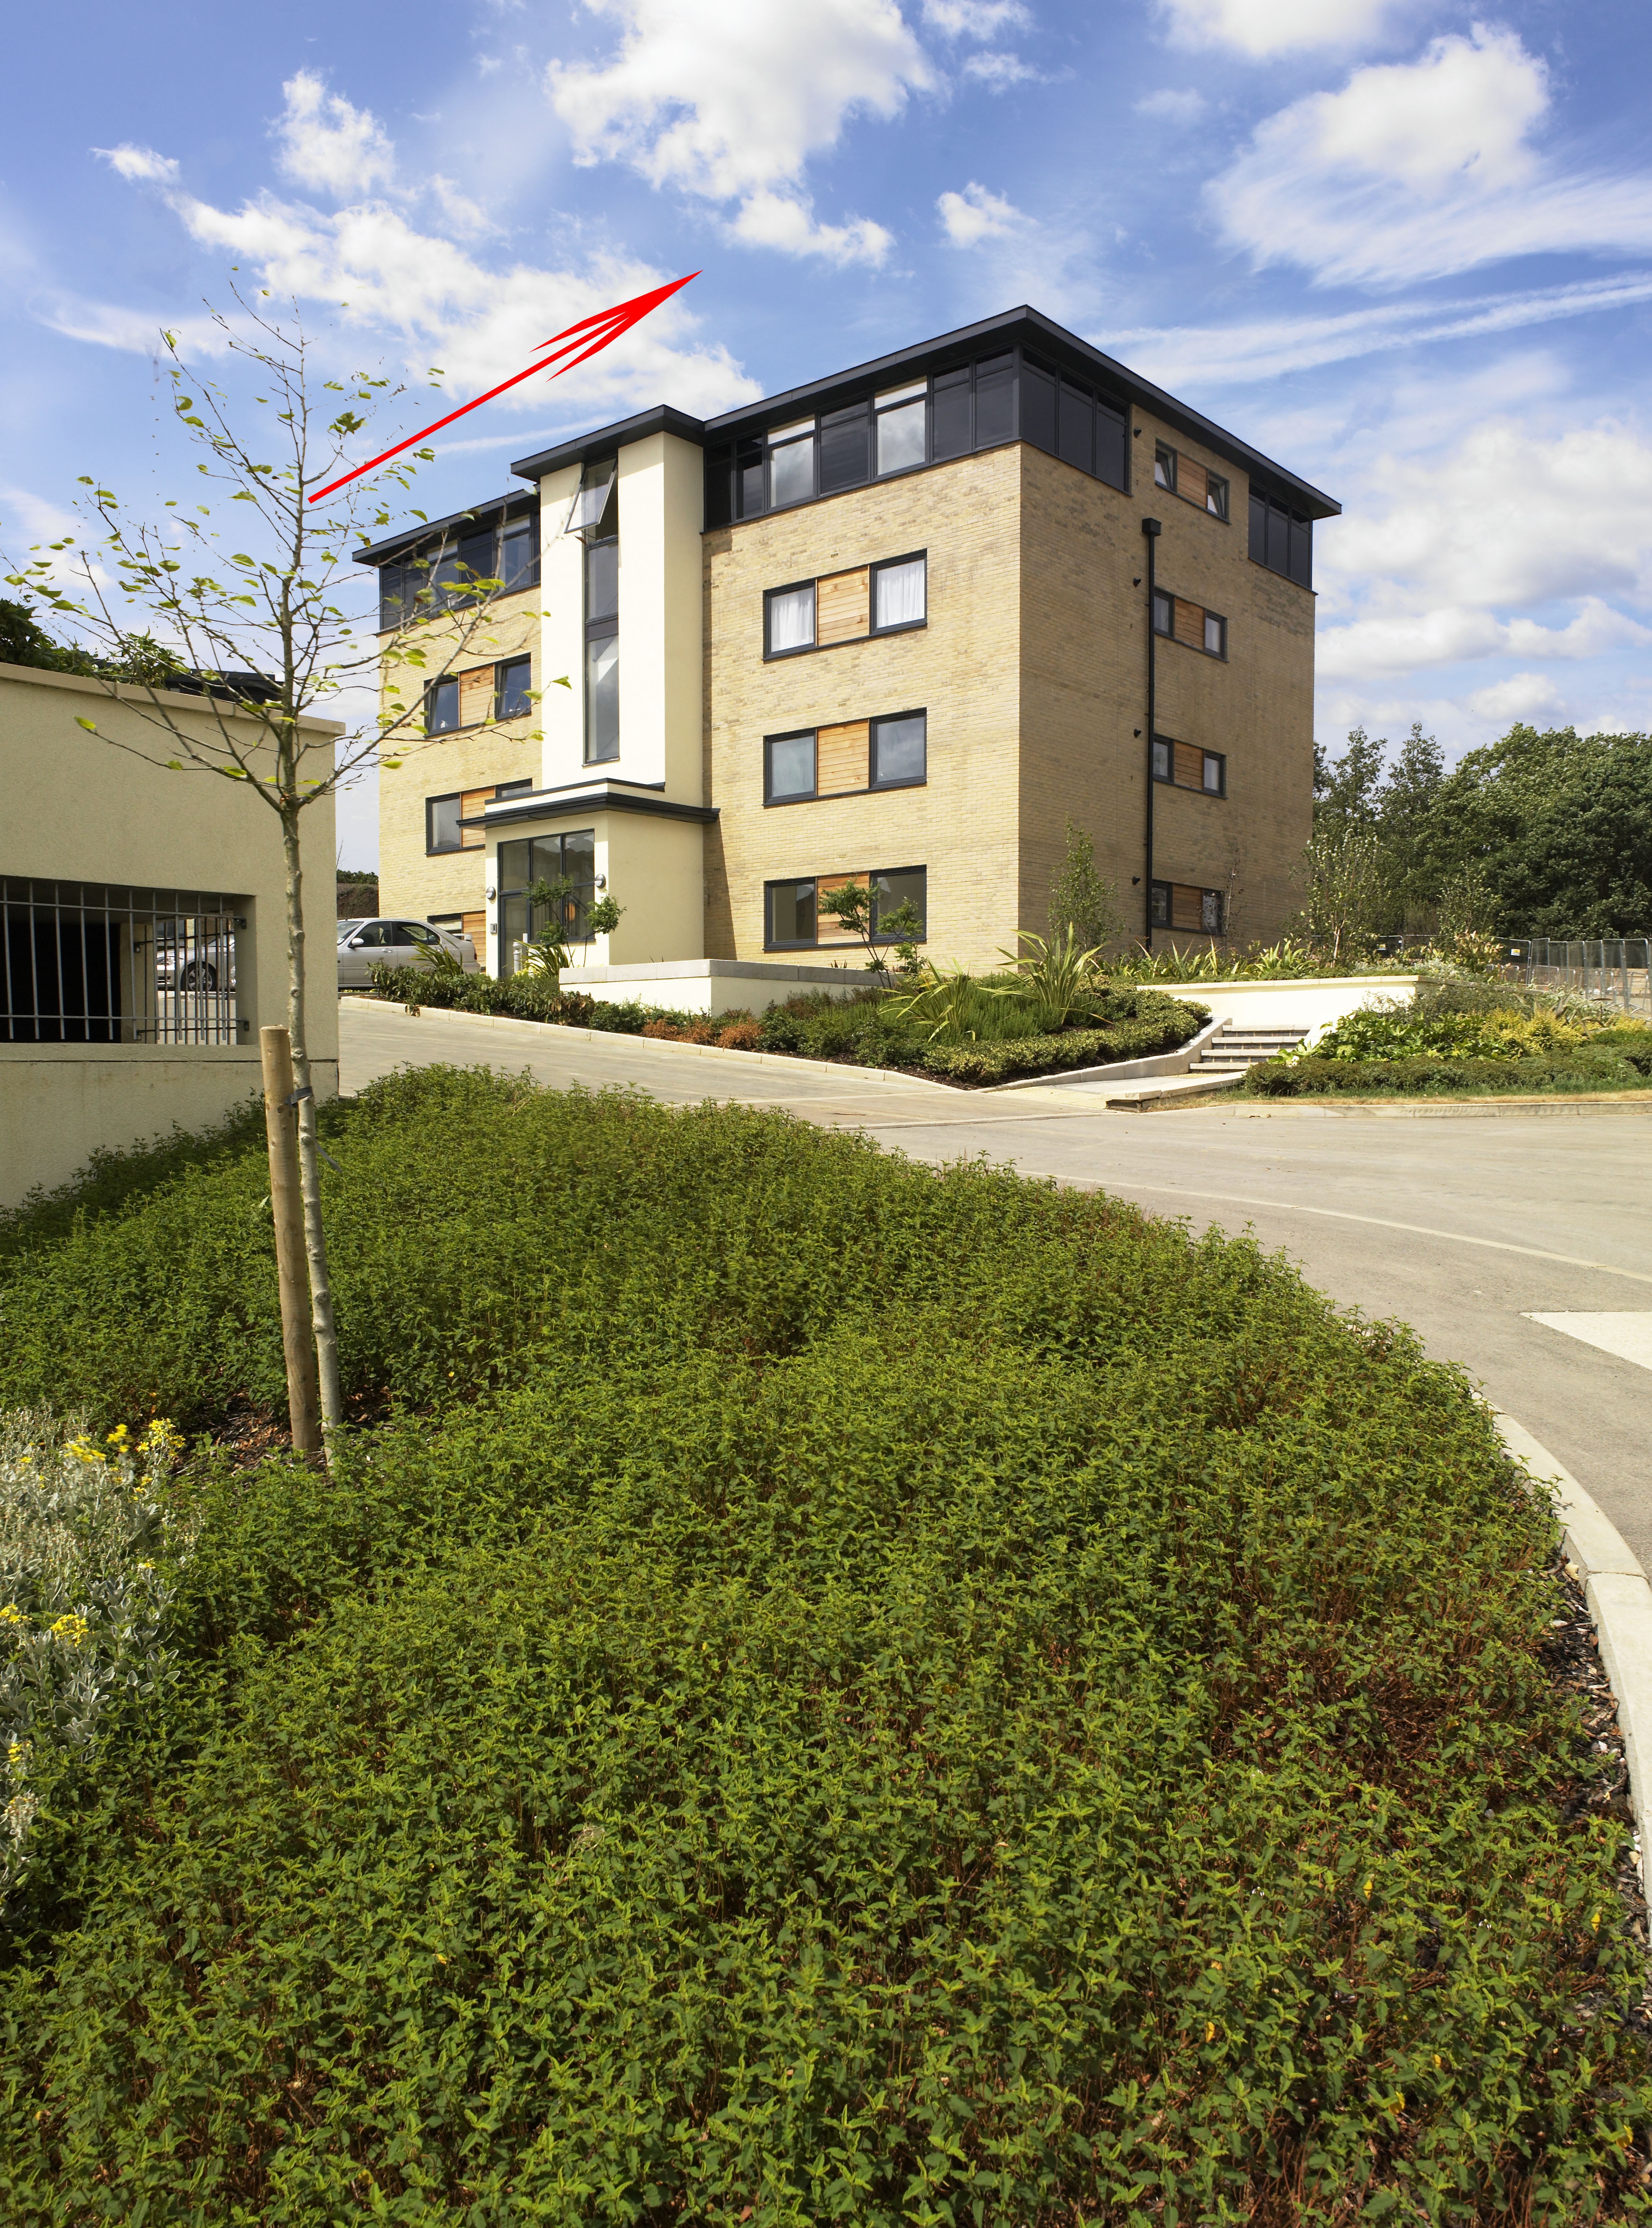
Click and drag gradient
Here’s your final result with a close up showing how the blurred branches look:

Final result
Tree detail after using Gradient tool.
What we have created here is the effect a highlight area in the sky. We are showing the background layer and so seeing the blurred branches as they naturally are. If the light patch is too harsh you can also get a good effect by lowering the opacity of the gradient tool. This is a very simple idea and may feel like cheating, but I prefer the more natural look achieved.
Here’s and image showing the layer mask with hidden sky areas shown in red:
Hidden areas shown in red.
A good point to keep in mind is if you need to fade out a sky to reveal the background layer try to position a highlight patch or white cloud from the sky you’re adding over the relevant area.
This has taken longer to explain than to do, but once you are used to working with these ideas ten minutes is not an unreasonable time to add sky to an image like this.
Of course some images are more problematic. I use OnOne’s masking software a lot which makes very short work of some images. Other images are a lot simpler and a sky can be added using only Photoshops blending blending options in seconds.
In general Photoshop has some great functions for achieving lots of results. If you cannot achieve what you want using one method don’t feel you have to be limited. Quite often using a combination of methods works very well. In this case blending options and layer mask have been used in conjunction with each other.
I hope you have learned a lot from this post. If there are any points you are not clear on please feel free to post any questions.