


Photoshop 3D Beginners Tutorial (Part 2)
Photoshop 3D Beginners Tutorial (Part 2)
In this second part of my Photoshop 3D beginners tutorial I will assume you have created the object in Part 1 and that you are reasonably proficient in other functions of Photoshop outside the 3D working space.
Moving objects within the 3D workspace.
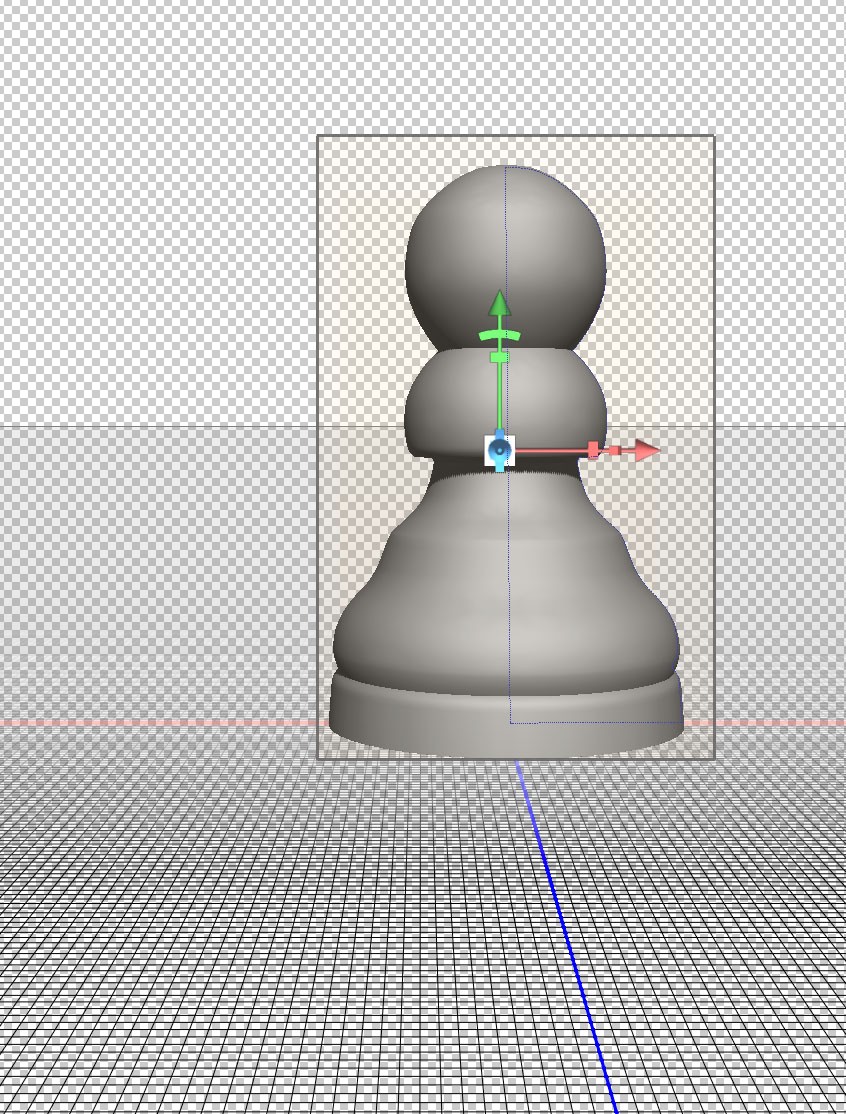
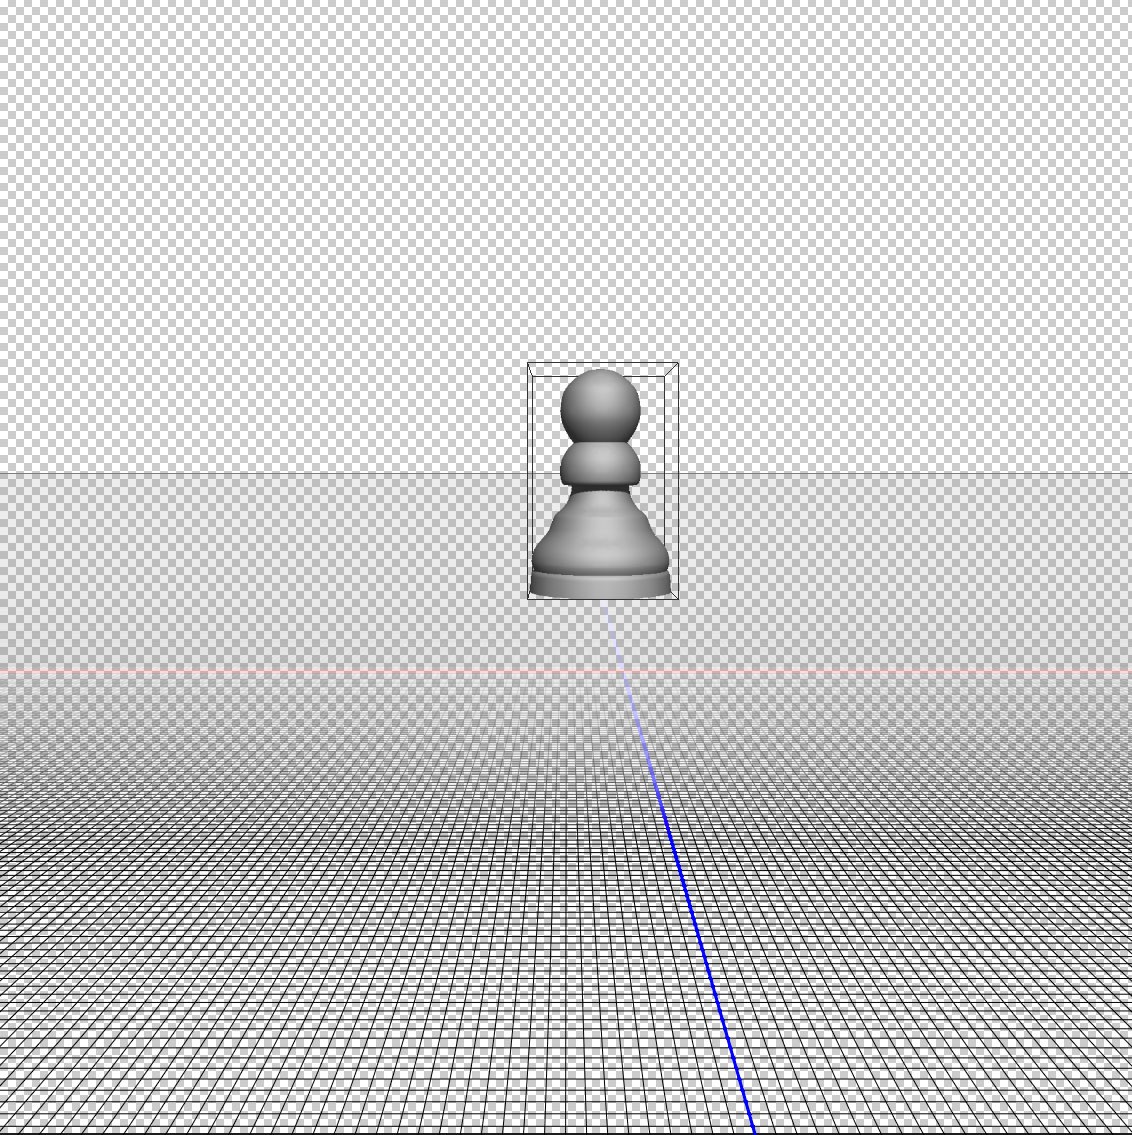
Here’s the object created in the last tutorial. If you prefer, you can use any other object you have created. The principles in this tutorial will be the same.

Starting Image
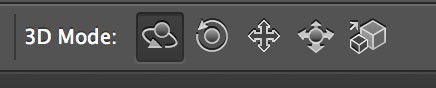
I’ve moved the object around intentionally to illustrate how you can re-set to a starting position. Firstly you need to select the move tool (shortcut “V”):
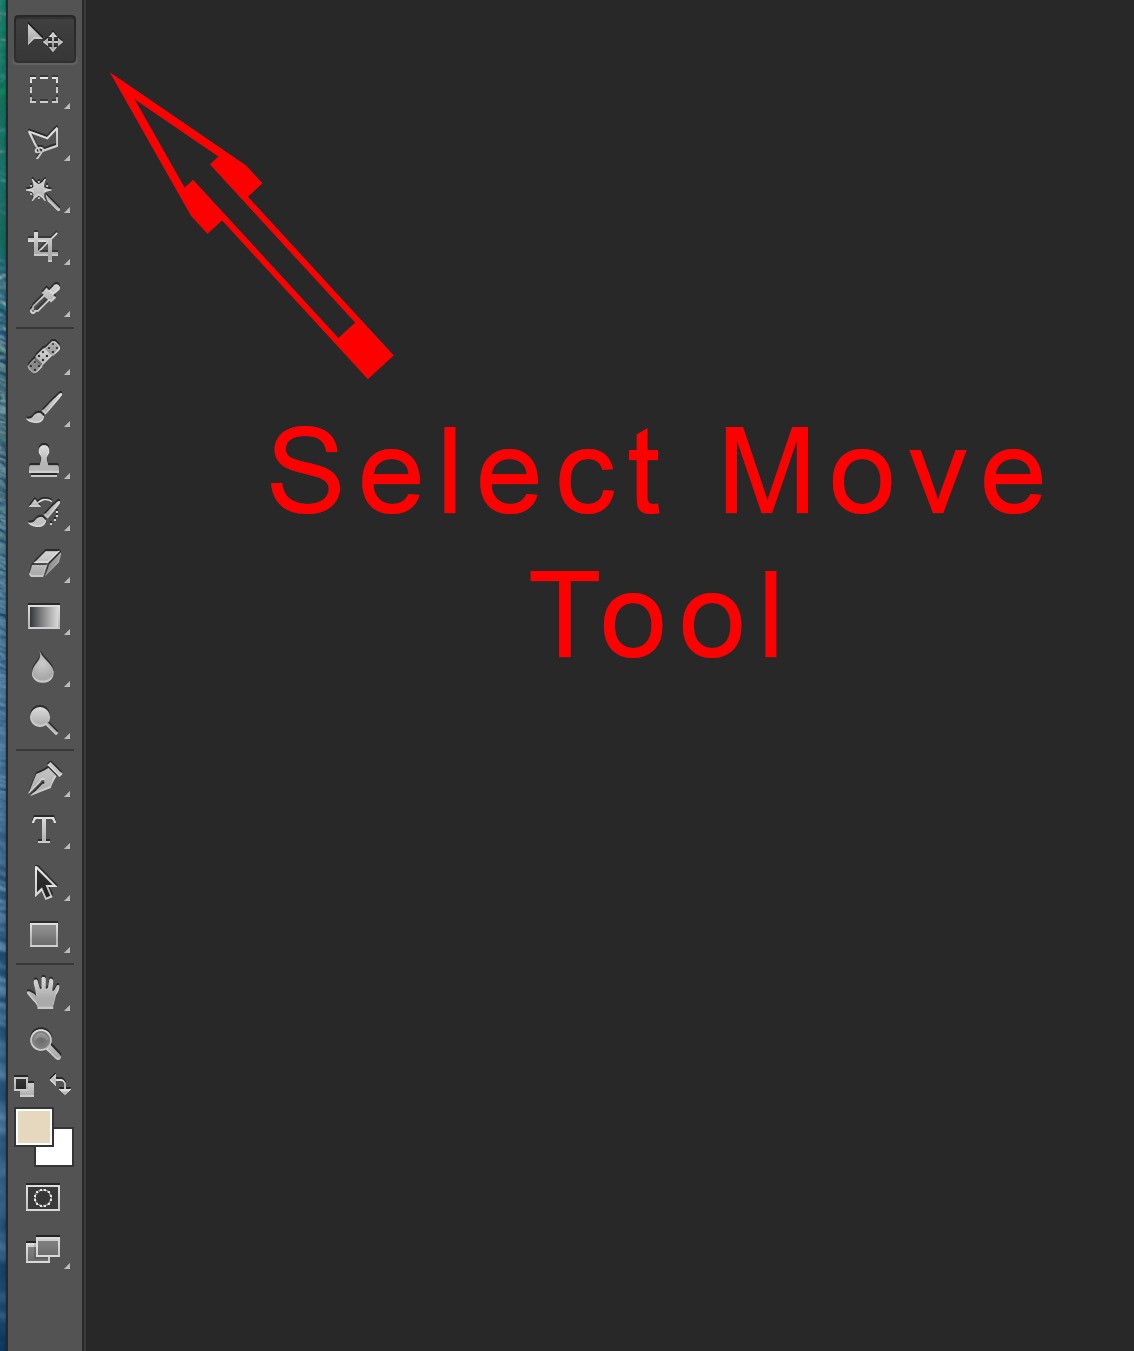
Select Move Tool
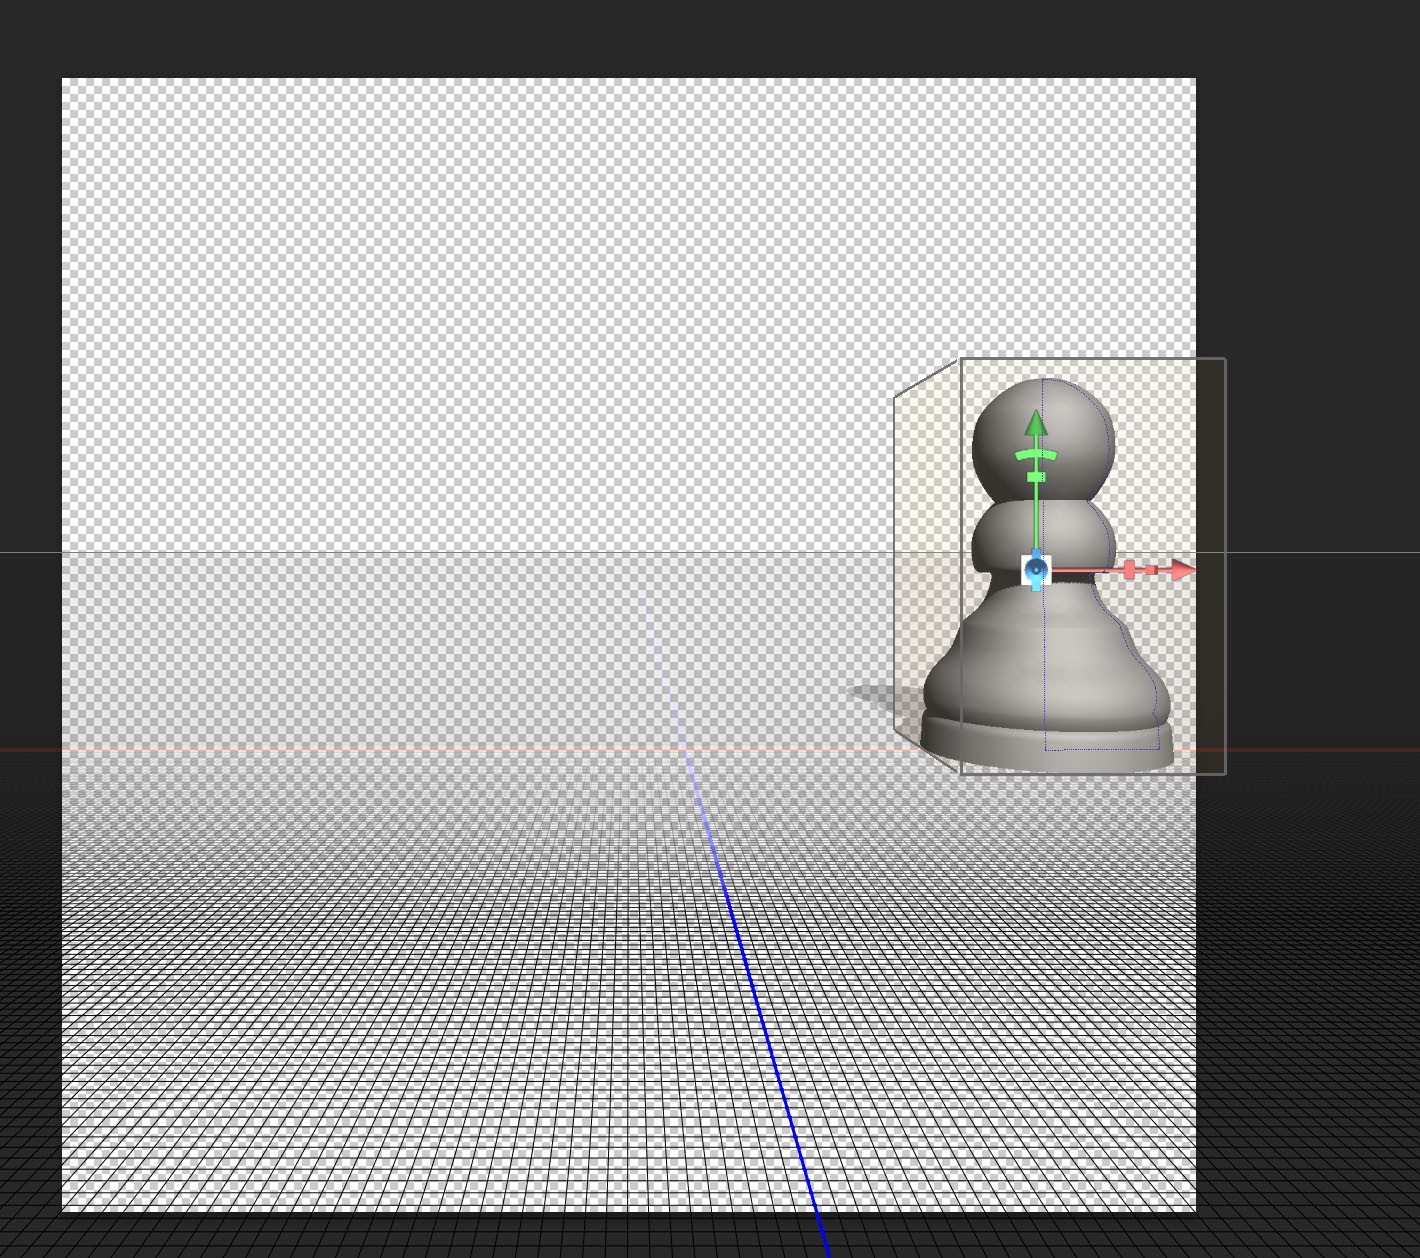
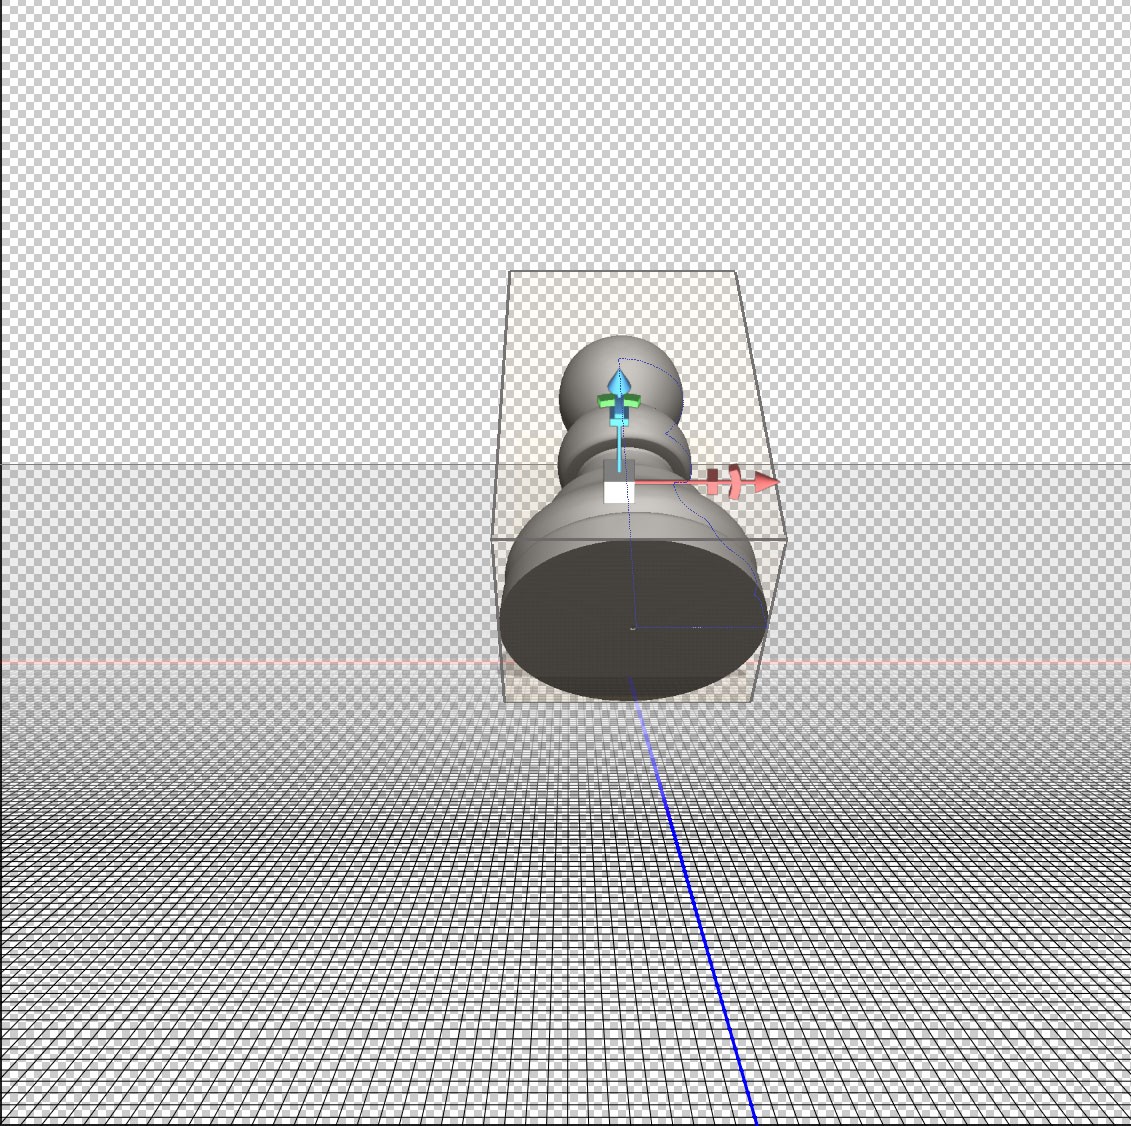
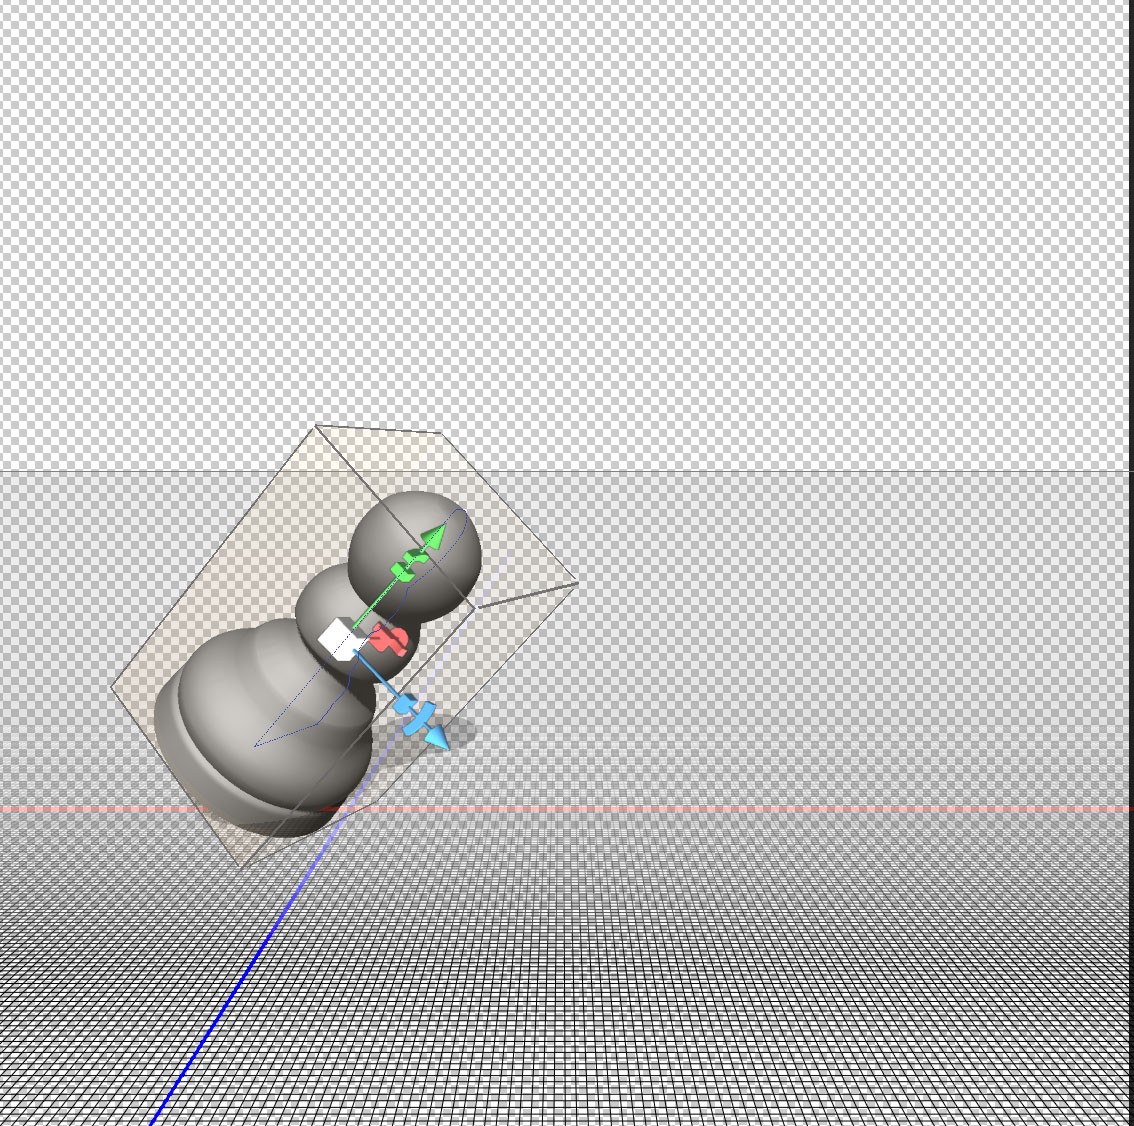
Click on the object you want to move. You should then see the ground plane and a box around the object as shown:
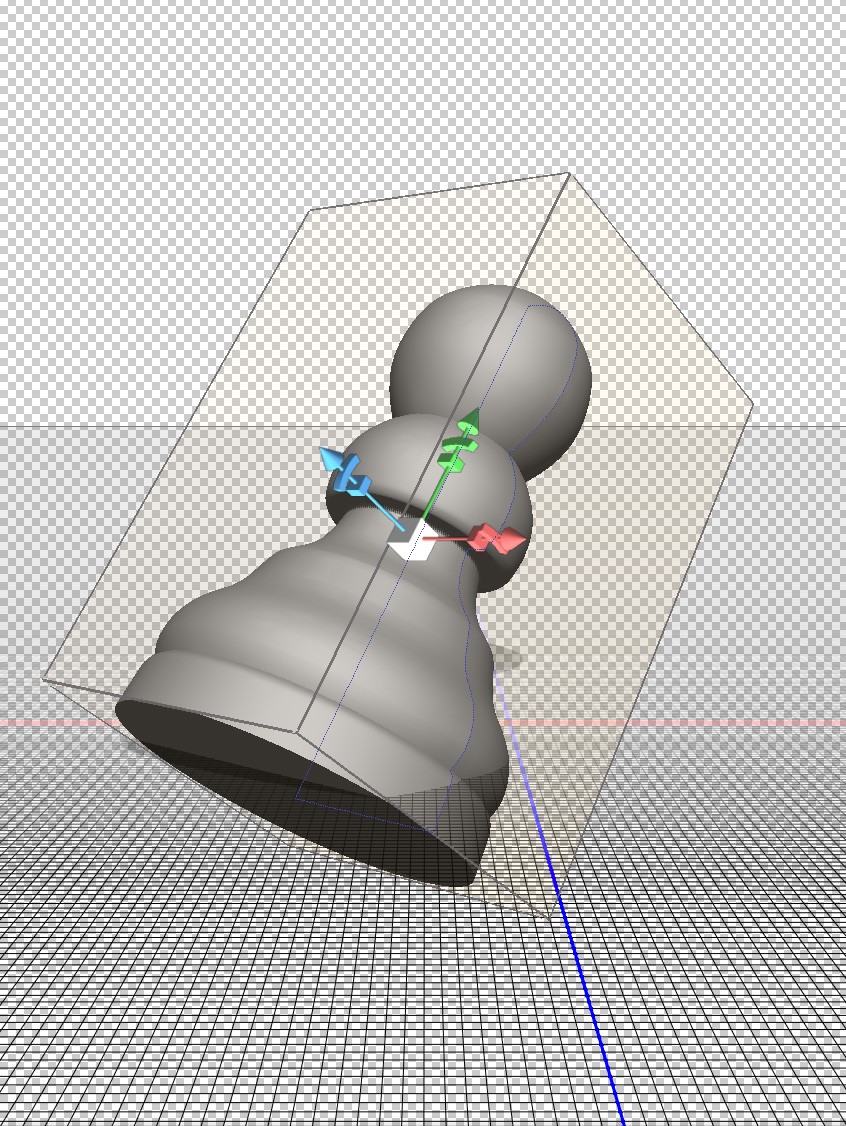
Object Selected
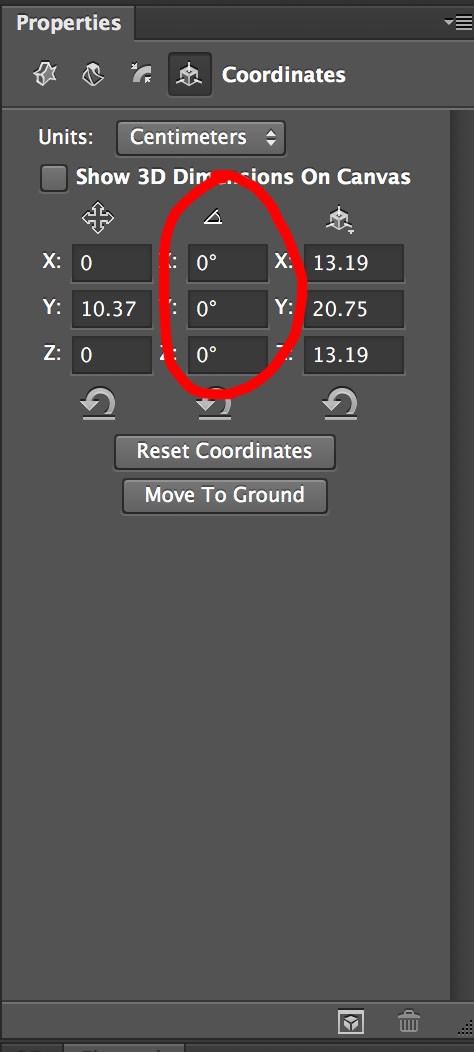
To set your object centrally on the intersection of the blue and white axis so that it is resting on the ground plane, you need to click on the last icon at the top of the Properties pallet:
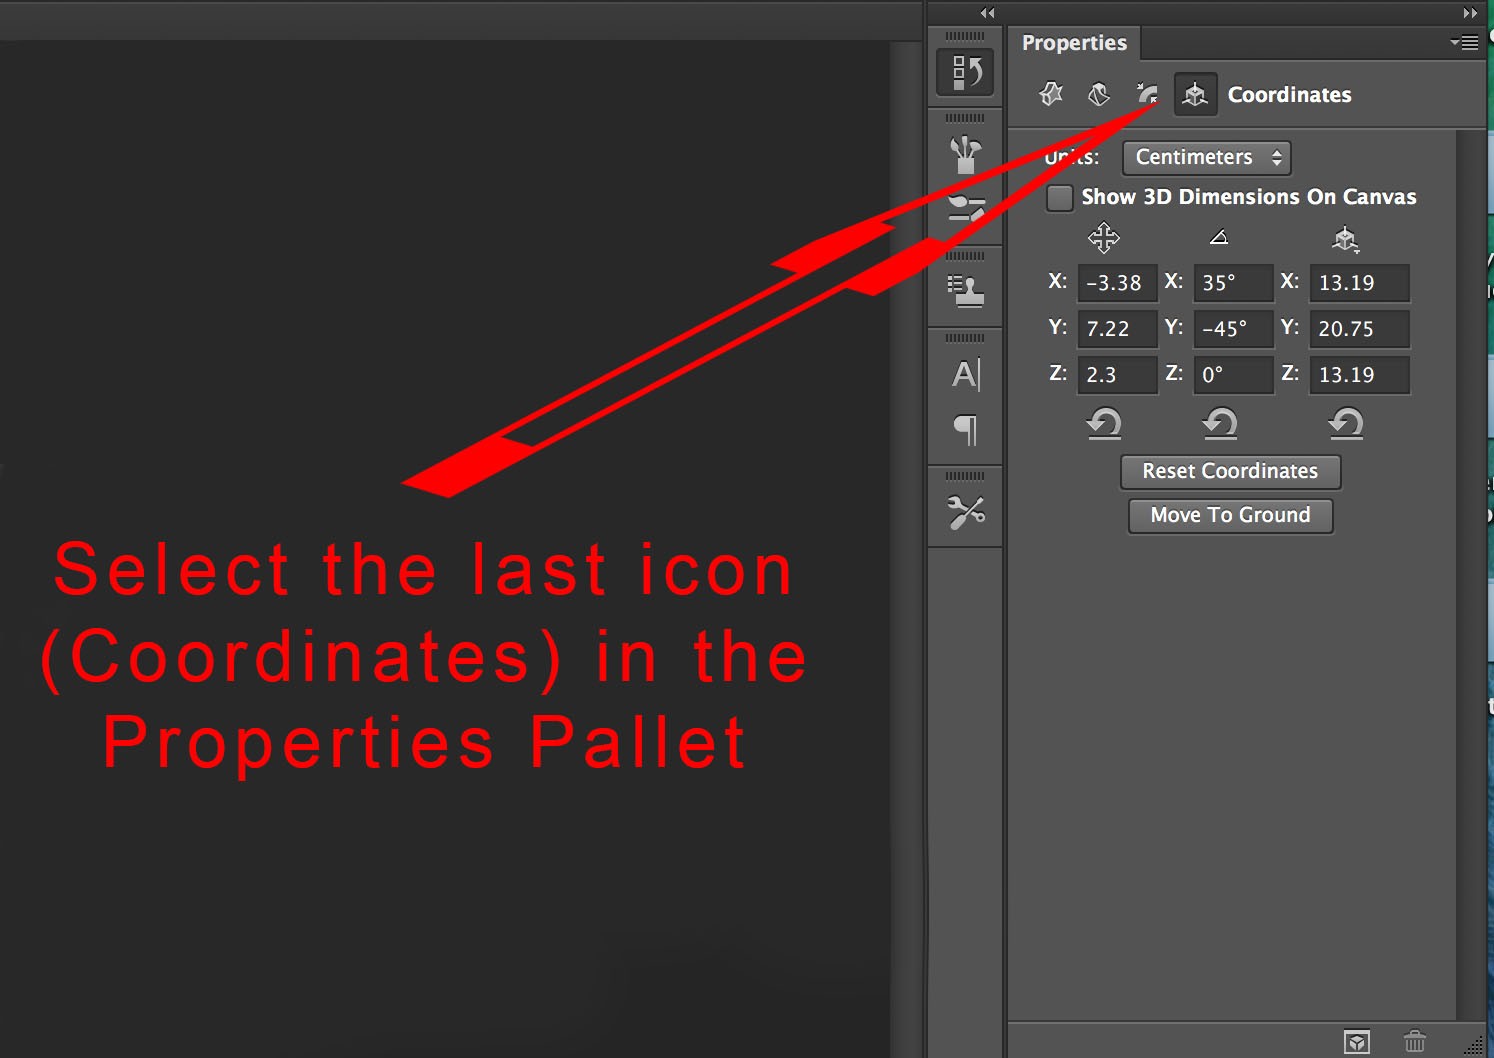
Select Coordinates from properties Pallet
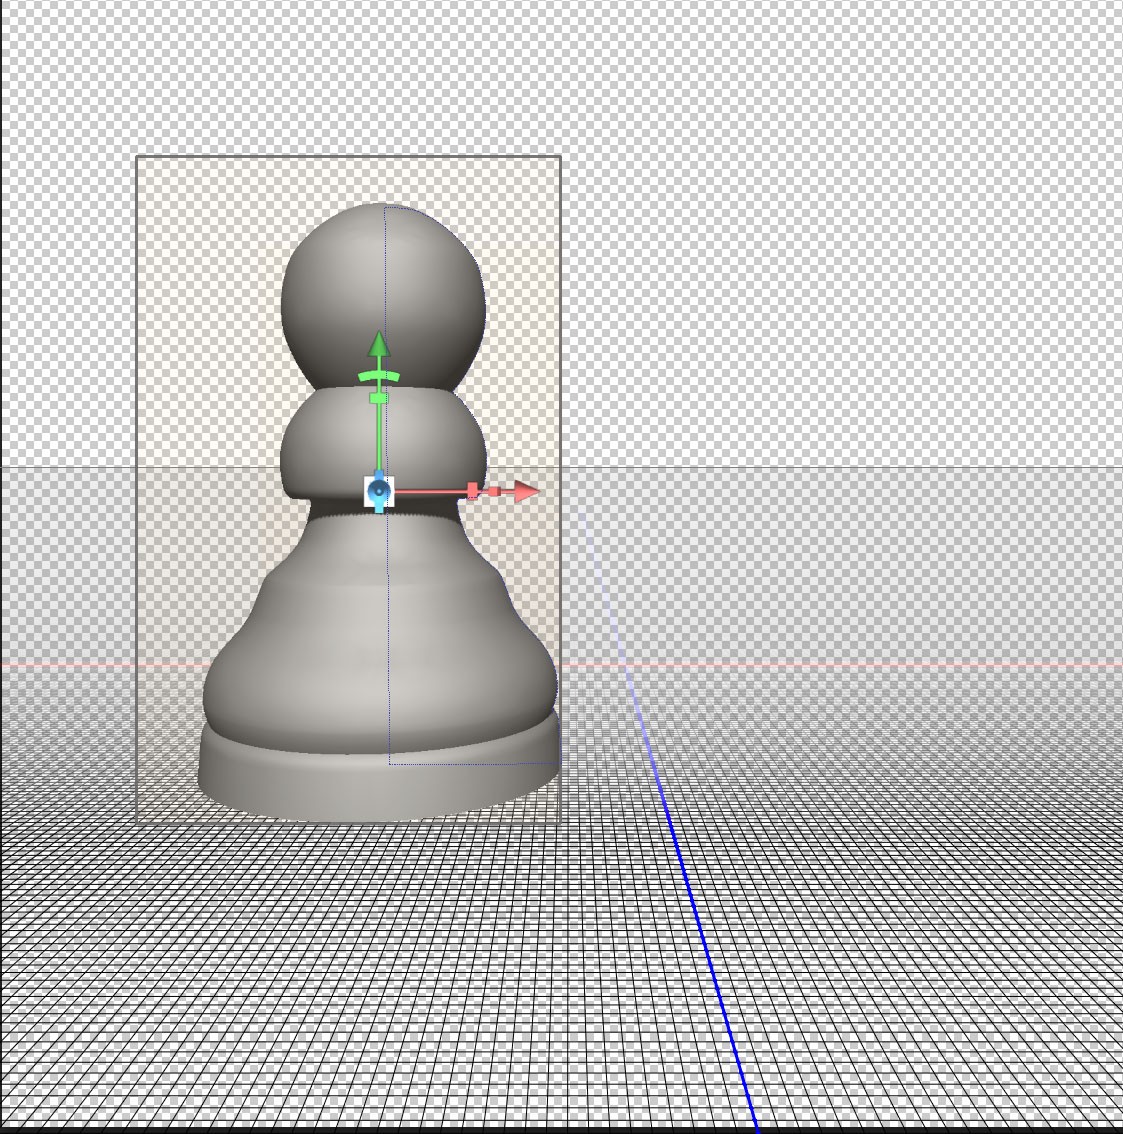
Click on the “Reset Co-ordinates” button. This will set the first two columns all to “0”. The third column will stay the same as these numbers are the height, width and depth of your object. You will notice at this point that the ground plane intersects the object exactly half way up:
Coordinates reset
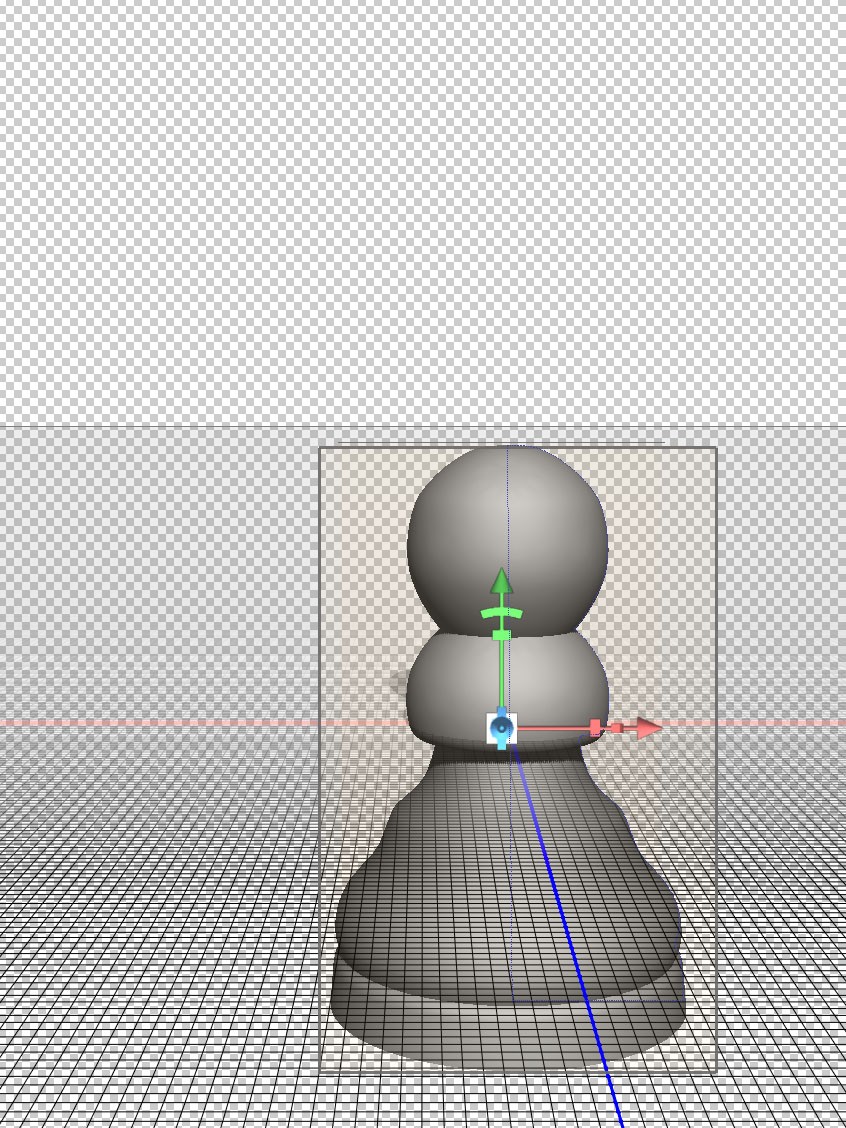
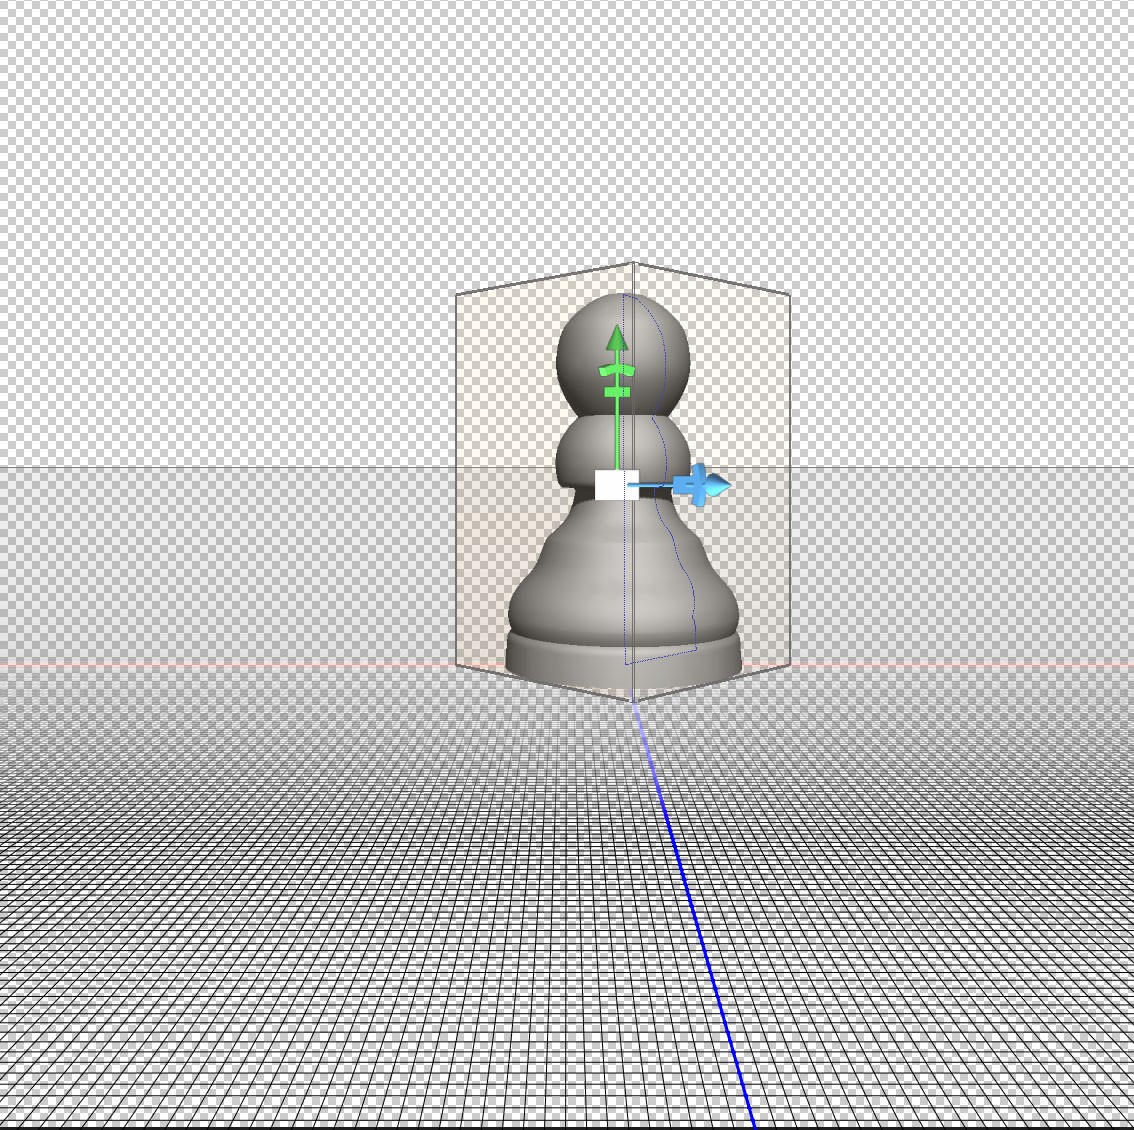
Click on the button labelled “Move to ground”, which is directly below the “Reset Co-ordinates” to shift your object up so it is resting on the ground plane:
Move to Ground
The above object can be moved anywhere in the 3D space. There several ways of doing this. Working in the Co-ordinates area of the properties pallet is a good place to start as this will help you understand exactly what’s happening. First here’s an explanation of the 3 axes;
The “x” axis is marked in red on the ground plane, going from left to right. You will also notice a red arrow with a couple of other symbols on it within the box showing the image is selected. This is for controlling movement in relation to the “x” axis, and we will take a closer look at this later.
The “y” axis is not marked on the background, but is the up/down axis marked by a green arroow on the 3D object.
Lastly the “z” axis is marked in blue on the background layer and is used to move the object closer or further away. Again there is a blue arrow on the object when it is selected. It is pointing straight forward and is therefore not easy to see in the example above.
Moving and scaling 3D objects using the Properties Pallet.
Looking at the coordinates on the far right you will see 13.19cm for both the x and z axes. This shows that the object has rotational symmetry. If you changed one of these you would have more of an oval shape, which is not what’s needed here but may be relevant for different objects. The reading of 20.75cm for the y axis shows the height of the object. These are just the dimensions of the object and do not change if the object is moved about within the 3D space.
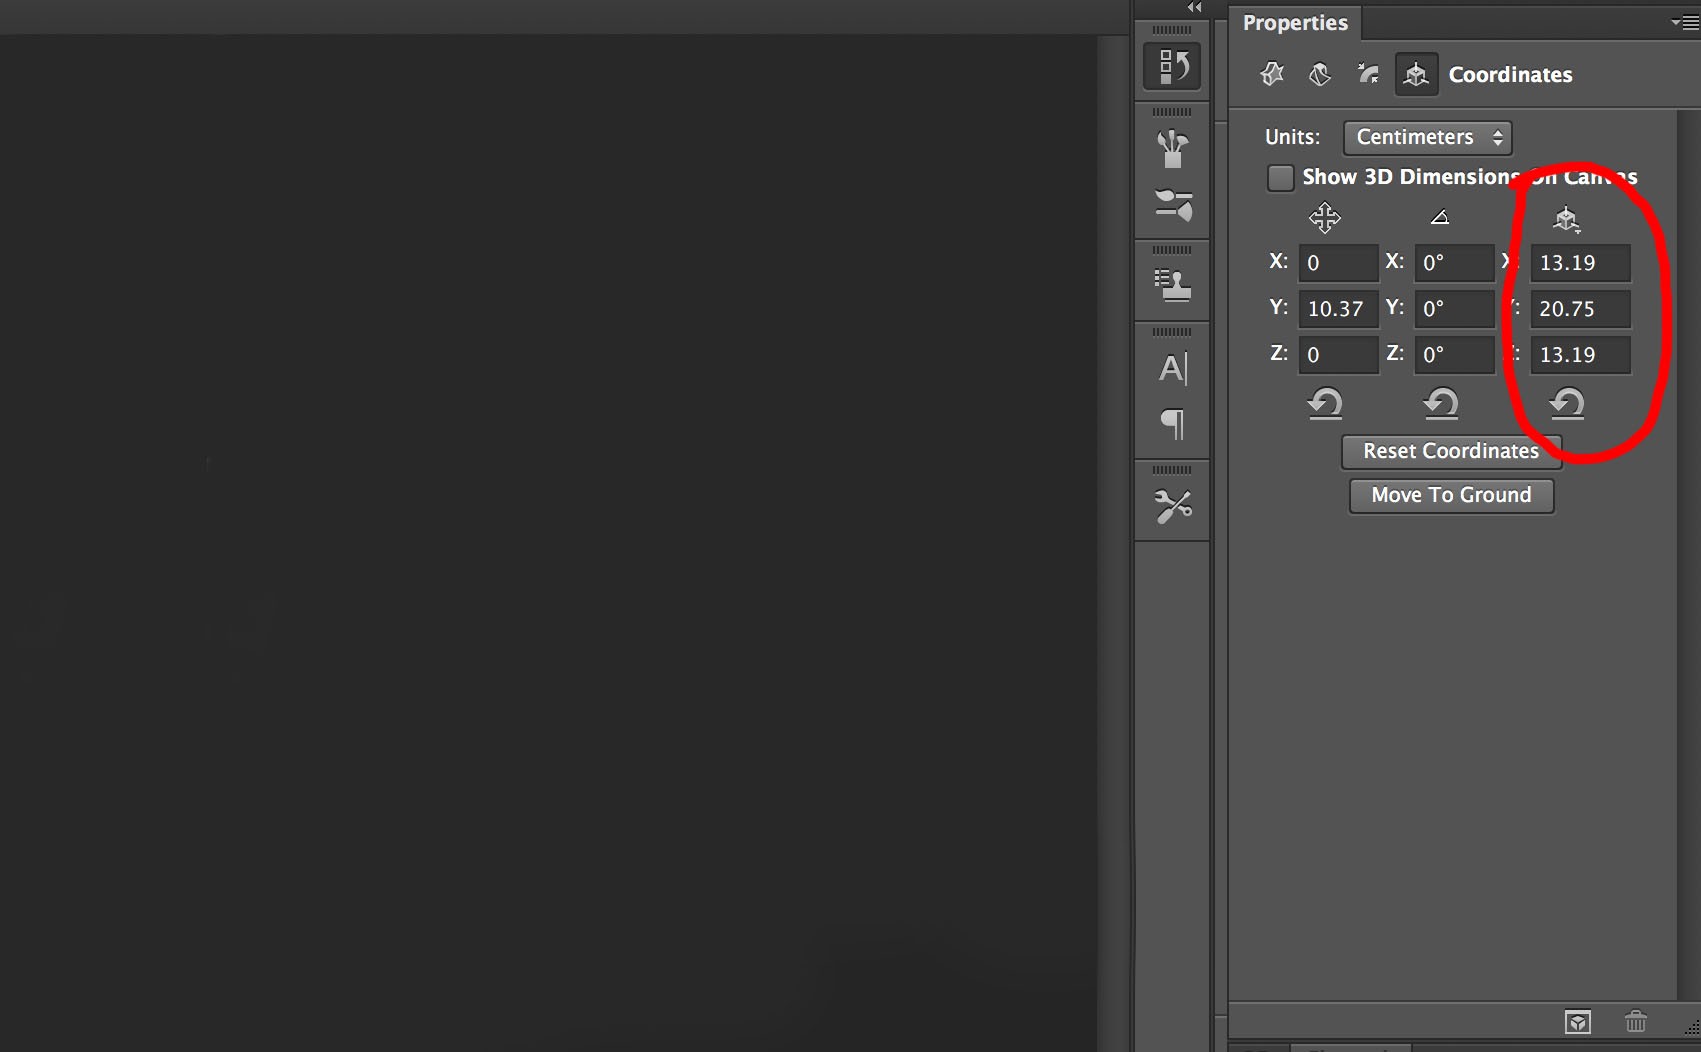
Dimensions of object.
You can use the right hand column to change dimensions on any of the three axes. As an experiment here’s the object showing the height increased on the “y” axis:
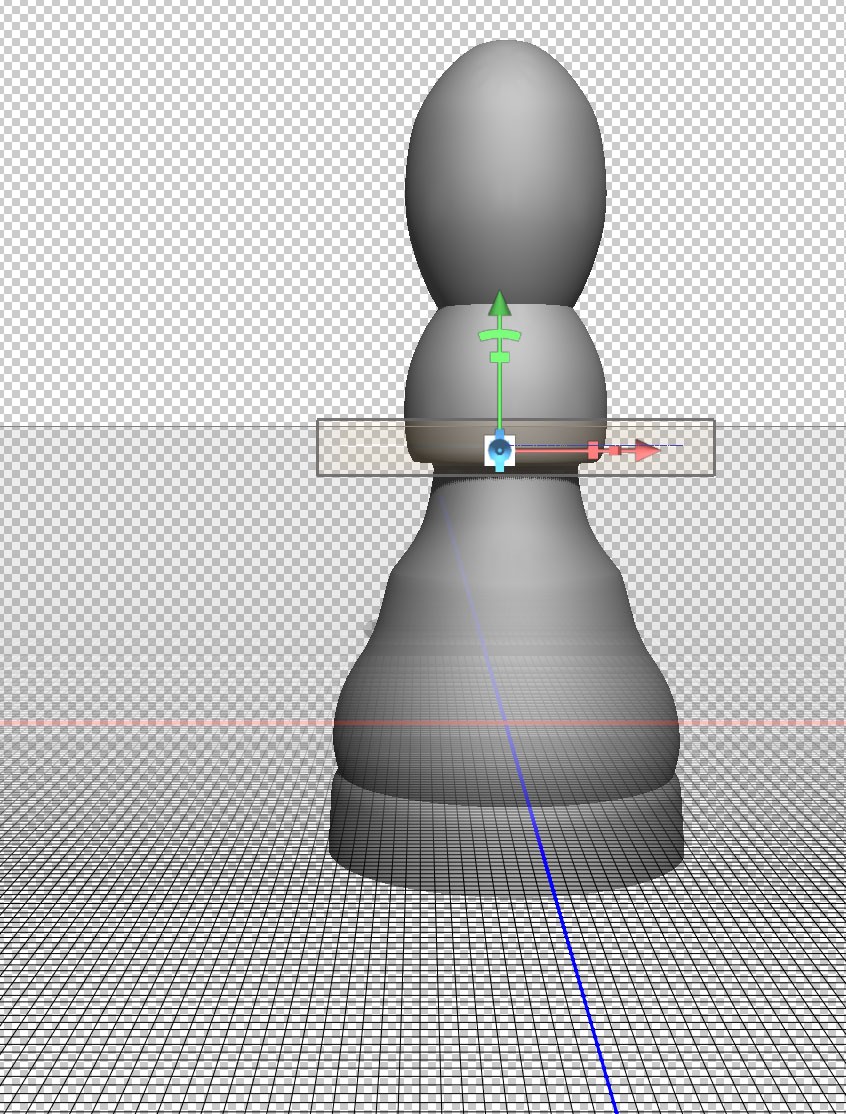
Increase size on y axis
The central point of the object has not changed. This means that it still lies on the intersection of the red “x” axis and blue “z” axis. Because it has increased in height from a central point the lower part now goes below the ground plane.
Step back in the history pallet so you have the original dimensions (x at 3.19, y at 20.19 and z at 3.19).
Now look at the far left column of numbers:
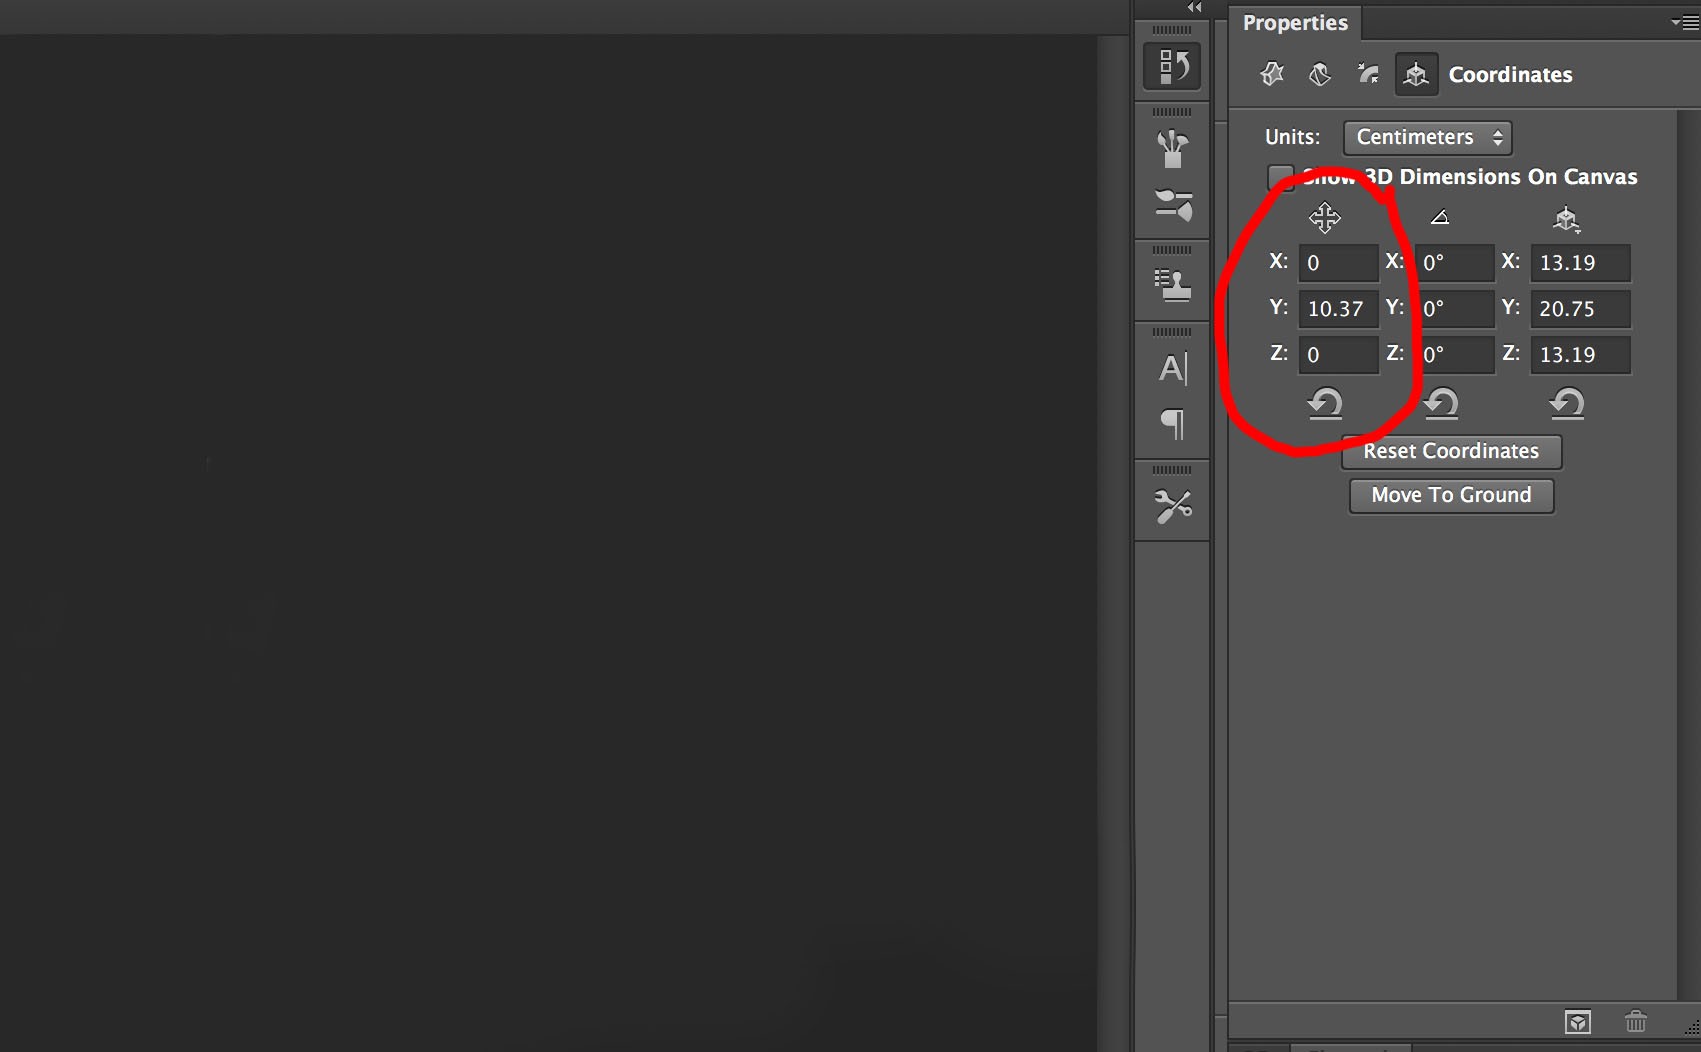
Position of object.
x has a reading of 0cm. This shows that the central point of the object is on the red line.
z has a reading of 0cm showing the object is also on the blue line.
As x and z both have a reading of 0cm the object is on the intersection of the 2 lines.
Now for the y axis. This shows a reading of 10.37cm. This may seem strange at first. The y axis is the up/down positioning of the object. If you reset the coordinates this reading becomes 0cm. You then see half the object above the ground plane and half below. If you then click on the “Move to Ground” button the y axis reading will show half the height of the object.
I have made some changes to the positioning of the object in the next few examples which involves altering figures in the first column. Have a look at the captions under each image to see what alteration has been done to each. I have also increased the canvas size, which you do exactly the same way you would when working on a two dimensional image.
“x” Coordinate set at 20cm
The object has been moved along the red “x” axis. It has moved to the right because a positive value has been entered. A minus value would have moved it to the left of the blue “z” axis.
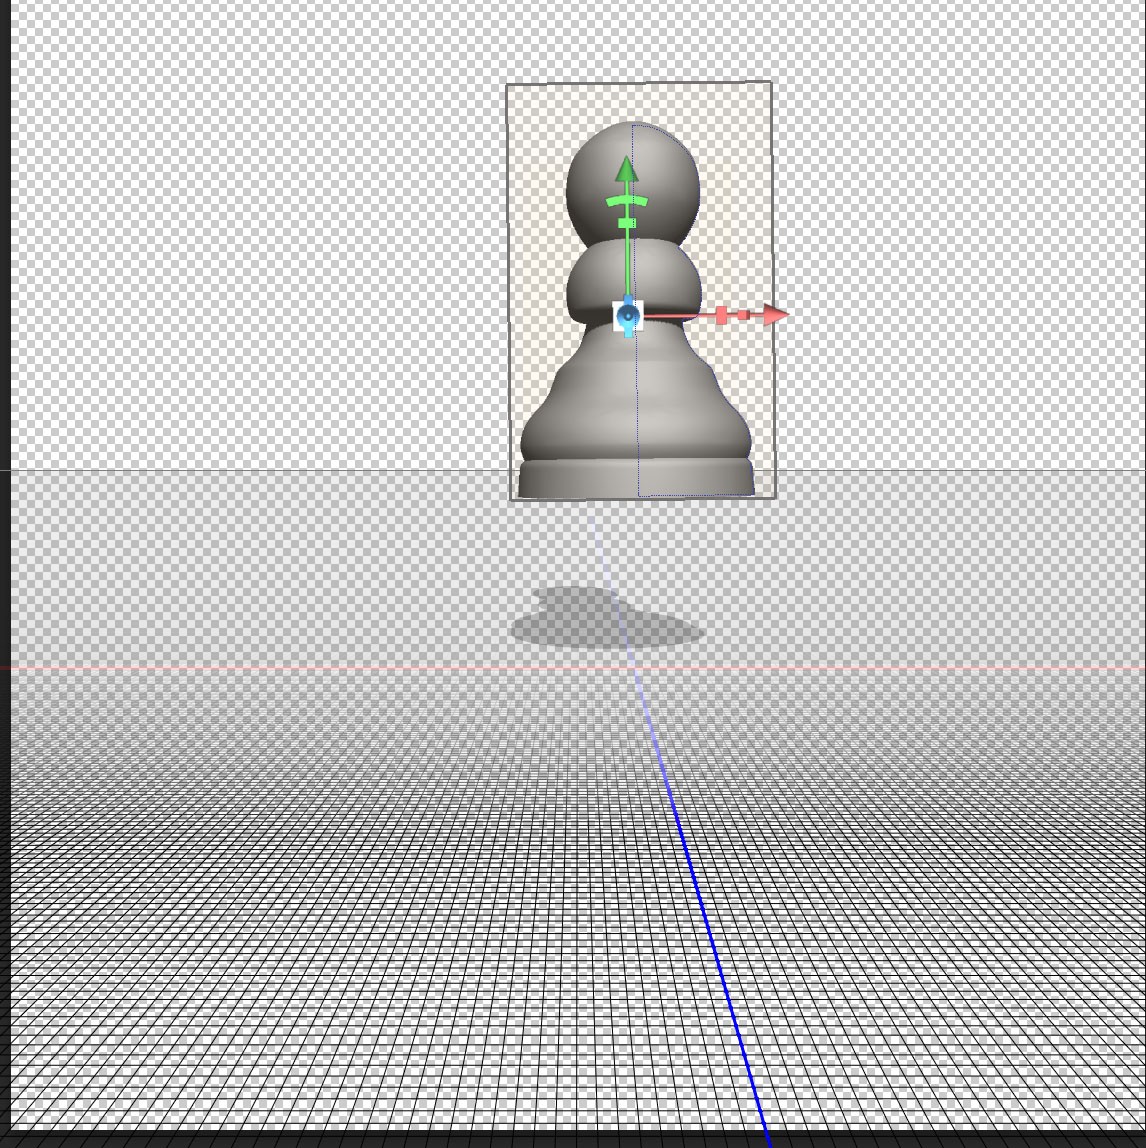
“y” coordinate set at 20cm
A positive value in the “y” coordinate setting will float the 3D object above the ground plane. It is also possible to enter a negative value to put the object below the ground plane.
“z” coordinate set to -20
I have entered a negative value on the z axis, moving the object away from the viewer along the blue line. A positive value would have moved the object to a position in front of the red “y” axis.
“x” set to -10 “z” set to 20
A minus setting on the “x” axis means the 3D object has moved to the left. A positive setting on the “z” means it has also moved forward to a position in front of the red “x” axis.
Looking at rotational angles.
The 3D object can also be rotated about any of the x, y and z axes. The amount of rotation can be set in the middle column shown:
Rotation about axis
Here are three images to show how rotation about each axis looks. The caption under each image gives the settings.
45 rotation on x axis
45 rotation on y axis.
Rotation about the “y” axis makes no difference to the object, as it has rotational symmetry about this axis. You will notice that the box around the 3D object now appears with it’s corner pointing towards us.

90 Rotation on z axis
Notice that rotation “x” and “z” axes will result in the object no longer being on the ground plane as rotation is always about the central point.
Entering numbers in the Properties pallet is useful for accurately positioning 3D objects. However there are quicker more intuitive ways of working.
Moving and scaling a 3D object using the controller axes
The image below shows the object viewed from a different angle so you can see the red green and blue arrows that appear when a 3D object is selected. The red arrow corresponds to the “x” axis marked in red on the ground plane, the “y” axis corresponds to the green arrow, and the “z” axis corresponds to the blue arrow. You will notice that if you hover over the tip of each arrow it will be highlighted as shown below. You can then click and drag along the relevant axis.
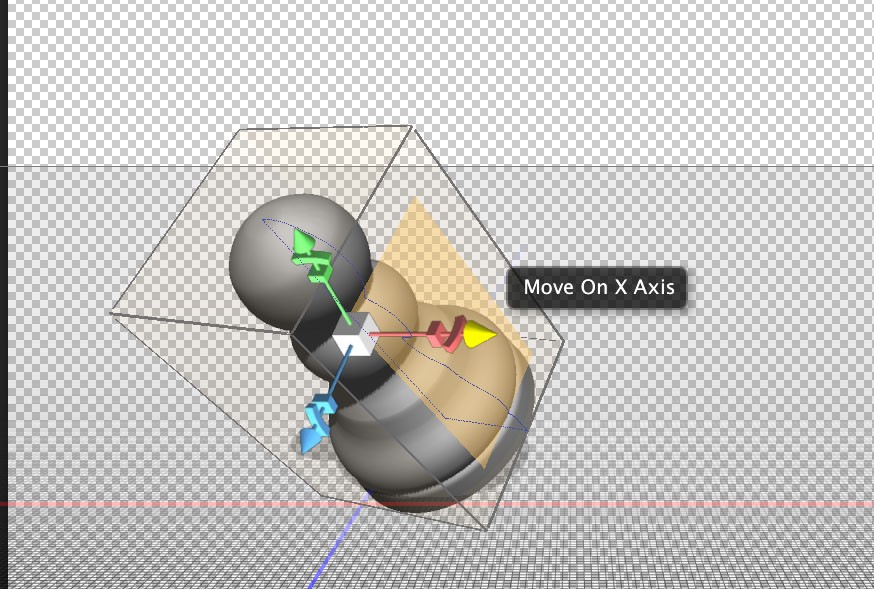
Move on X Axis
When the above arrow is highlighted you can move the object from left to right. Notice the tip of the arrow is highlighted in yellow.
Now Move the cursor slightly to the left. The rotational symbol will now be highlighted as shown.

Rotate around Y Axis
Notice how the above image shows the red “x” rotational symbol highlighted, however the text reads “Rotate Around Y Axis”. If you think about it, it would be difficult to rotate on the “x” axis by using the red handle. The rotation needs to be at right angles to the axis for ease of use.
Moving the Cursor in a bit further to highlight the box will allow you to change the dimensions along the “x” axis.
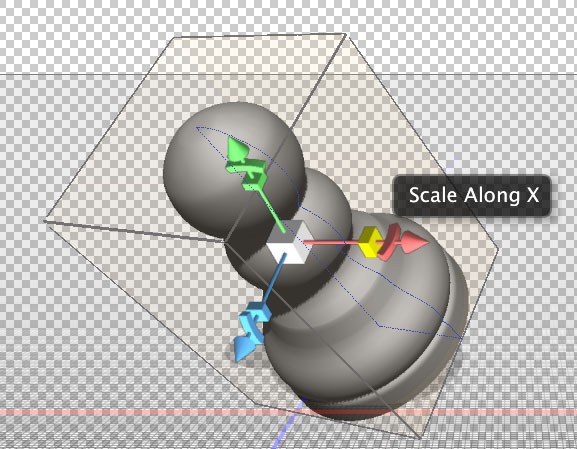
Scale along x axis
Once you have got the feel of making movement, rotational and scale alterations using this method on all three axes there is just one more alteration to look at. That is the white box in the middle. This is a click and drag alteration, same as the others. The difference is that it increases or decreases the size of the object while maintaining the correct proportions between x, y and z axes.
Moving a 3D object using the selection box
This method may well be your preferred method for quickly moving an object around. The small controllers on the axes are sometimes difficult to pinpoint, especially if you are using a pen and tablet.
If you move your cursor over any side of the selection box it will be highlighted in yellow:
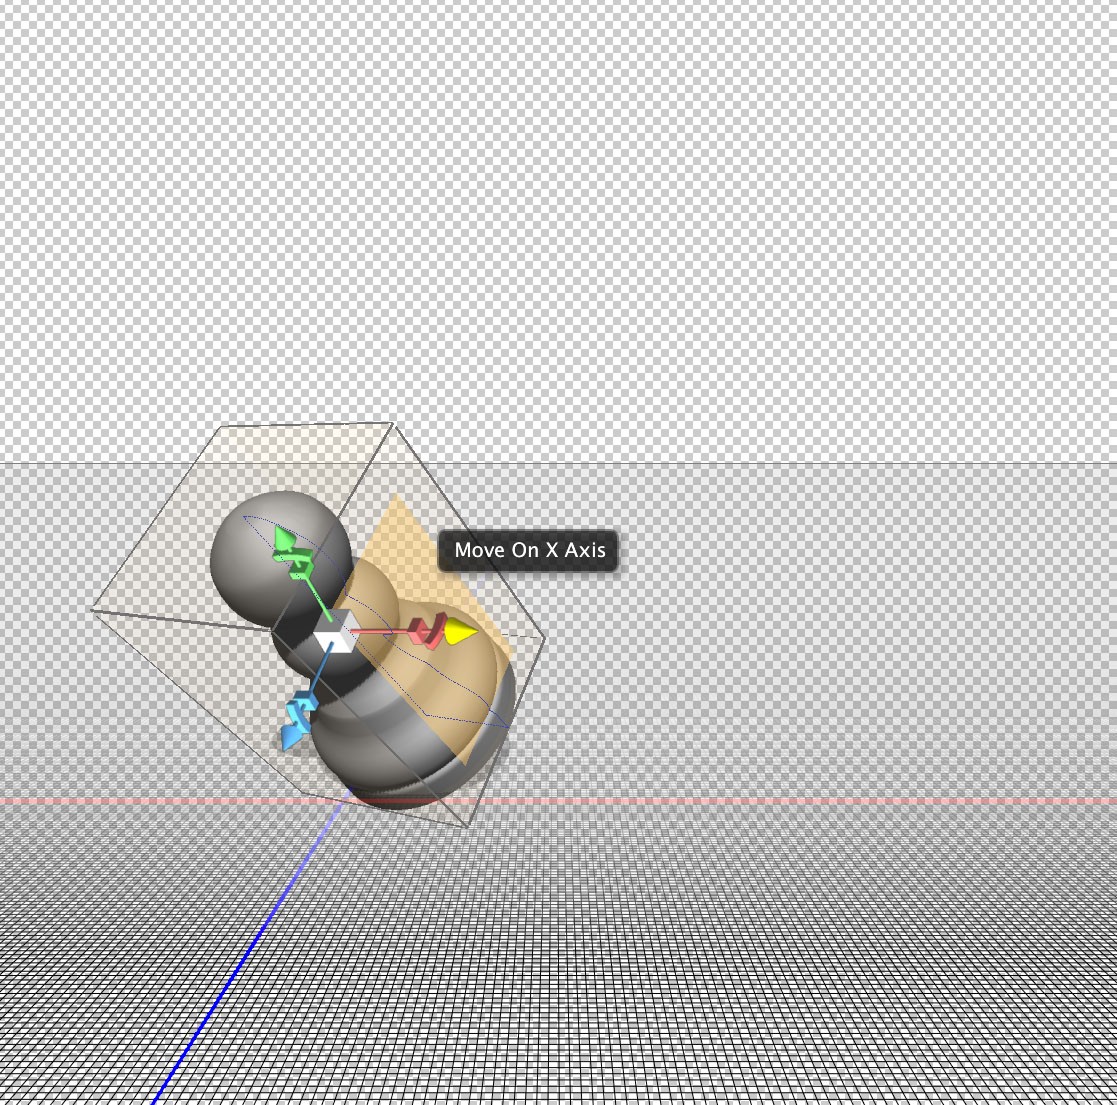
Move on x axis
As the message that appears indicates, you can click and drag to move the object left to right on the x axis.
Now move your cursor closer to the edge of the box. Again you get a message indicating the direction of movement and the three visible edges are highlighted in yellow.
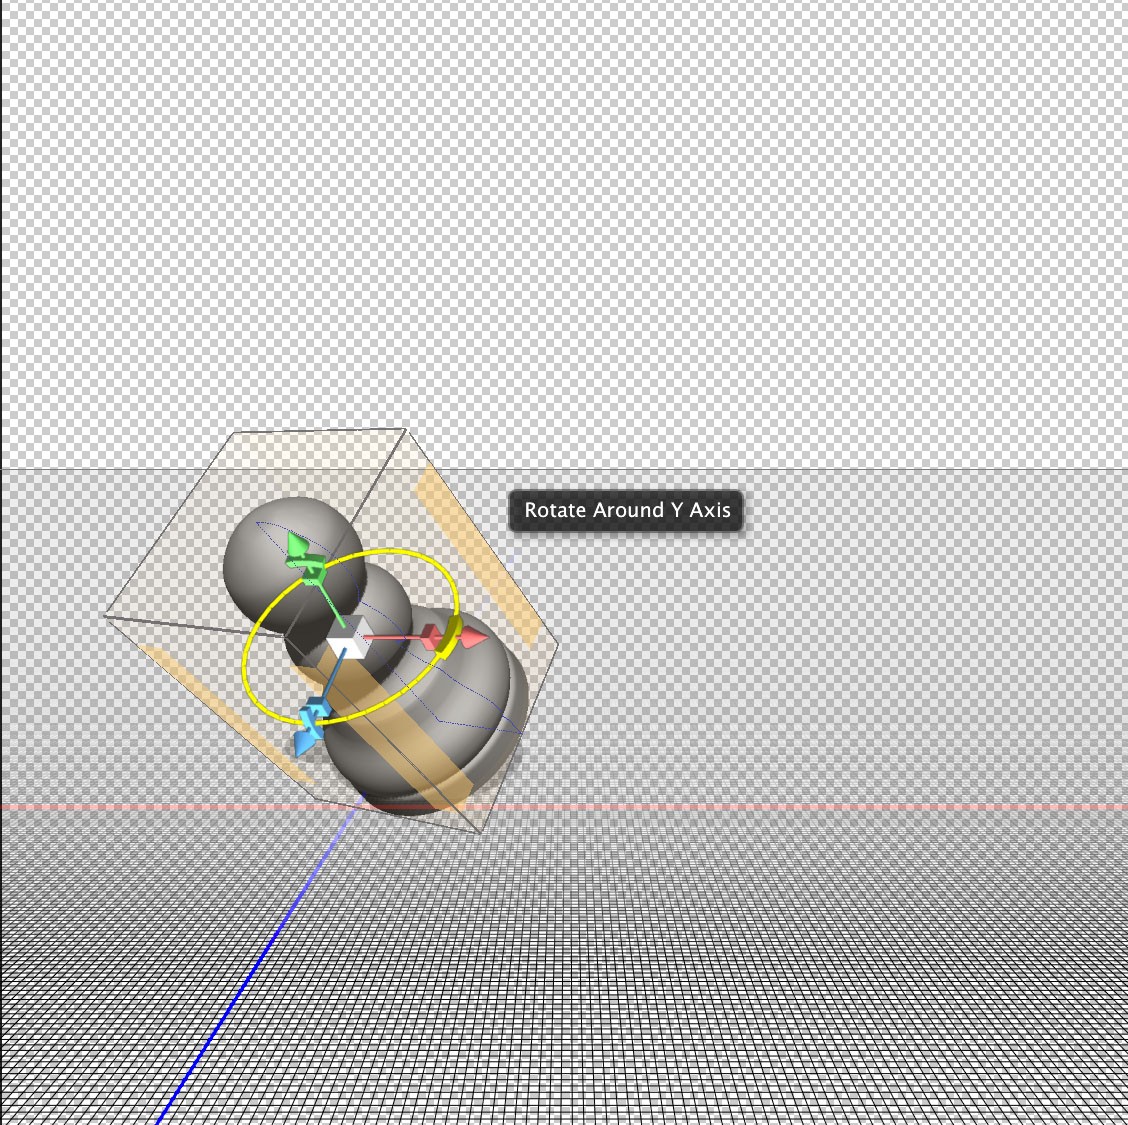
Rotate on y axis
Now position your cursor directly onto the edge rather than just close as in the last example. This will allow you to move the object on two axes simultaneously.
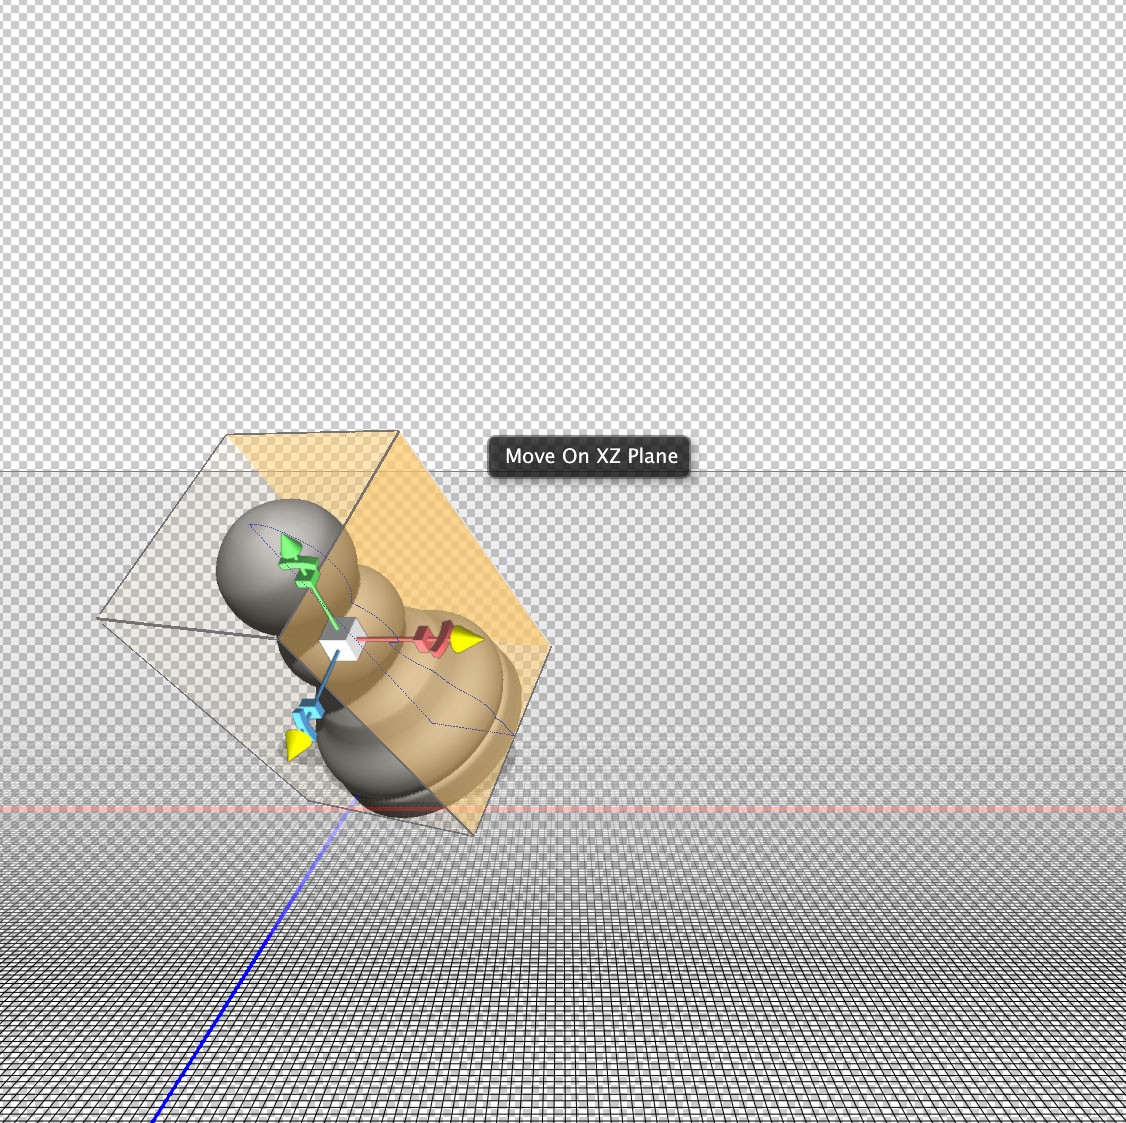
Move on X and Z Plane simultaneously.
The above example is very useful as it is possible to move an object around on the ground plane without accidentally moving it up or down.
Moving using the sides and edges of a box may at first seem like a much better solution than using the control axis. There are however situations where the side of the box is at right angles to the viewing position and not accessible. In this instance using the control axis would be a better solution.
Using the Move Tools
The 3D move tools options can be found at the top of your screen, but only when you have the move tool selected in the tools pallet:
3D move tools, Rotate tool selected.
When using any of these tools make sure you don’t accidentally click on the control points of the box that indicates the object is selected as this will confuse things. Clicking and dragging anywhere outside the objects box will allow you to do this, but make sure you don’t accidentally deselect the object.
The image above shows the Rotate tool selected. Click and drag to experiment with this tool. You can rotate about any axis but the central point remains in the same position.
Using Rotate tool
Notice how the white box at the centre of the image lies directly above the intersection of the red “x” axis and blue “z” axis. This cannot be changed using the rotate tool.
Now look at the next tool along:
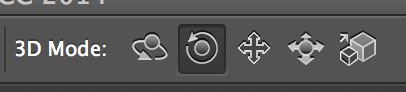
Roll Tool Selected
This is the roll tool. It is similar to the rotate tool, but will only rotate in a plane parallel to your monitor.
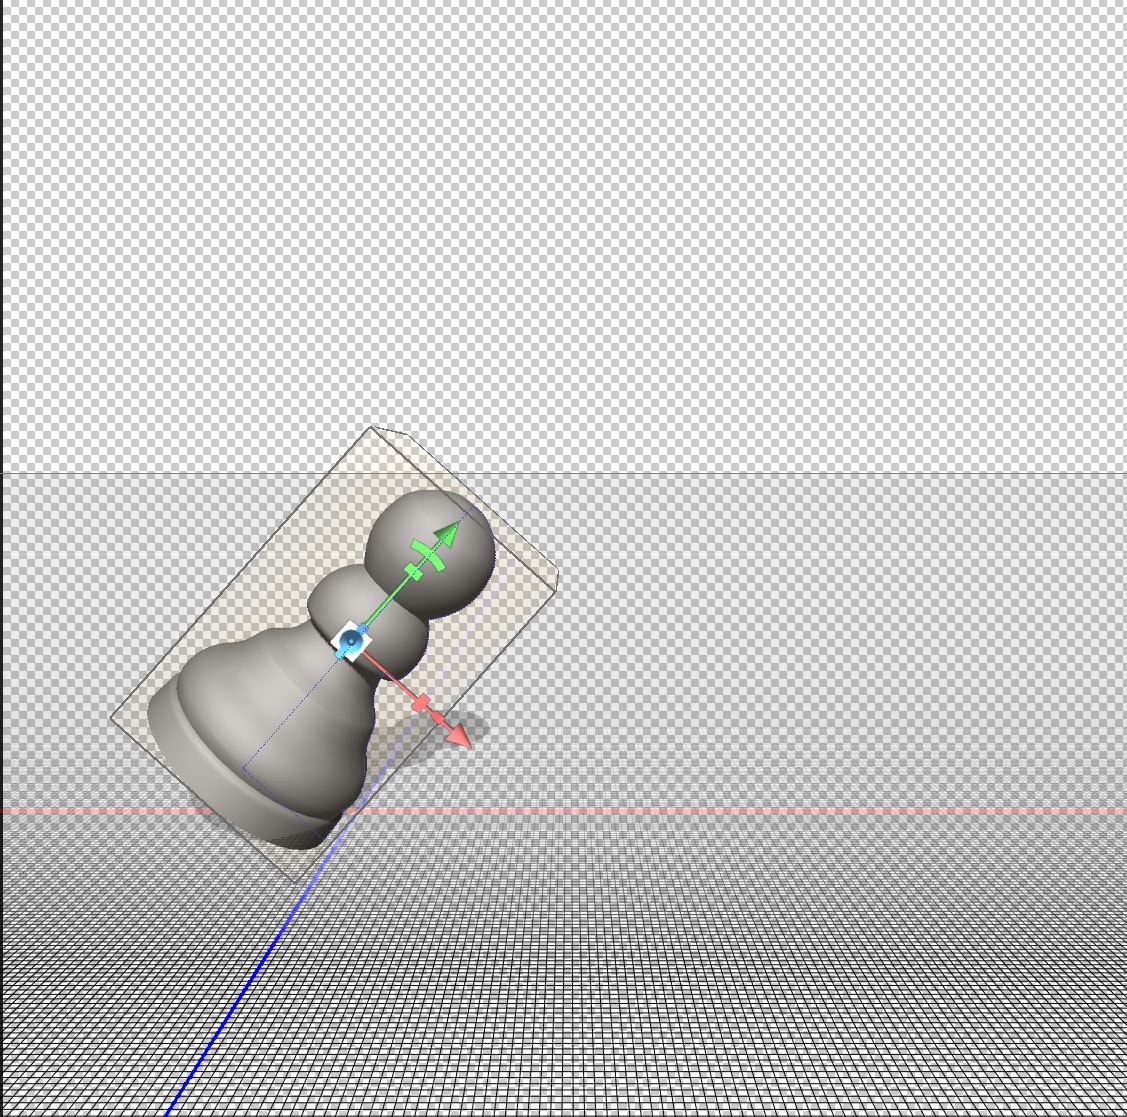
Effect of roll tool
Because the object was reset before using the roll tool it would be impossible to see the top or bottom of the object without using any of the other tools.
The next tool is the drag tool:

Drag Tool selected.
The drag tool allows you to move the object up, down, left and right. You cannot move the object closer or further away. In other words you are moving on the “x” and “y” axes only.
Next is the slide tool:

Slide Tool Selected.
The slide tool allows you to move an object left, right, forwards and backwards. If you start with your object on the ground plane the slide tool will not allow you to move off the ground plane. In other word you use this tool to move in a plane at right angles to your monitor.
The last tool is the scale tool:

Scale tool selected
The scale tool allows you to uniformly enlarge or shrink the object around it’s central point. Clicking and dragging up will increase the size, whereas down will decrease the size. The relationship between x,y and z dimensions will stay the same when using this tool.
Summary
We have looked a four different ways of moving an object within a 3D space:
1.Using coordinates in the properties pallet.
2.Using the red, blue and green control axes in the object’s box.
3.Using the sides and edges of the objects box.
4.Using the 3D move tool options.
Next post we will look at moving around within the 3D scene. The object will stay in the same place but be viewed from different positions. With the understanding of move tools gained in this post you will find this quite easy to understand.
We will also look at creating more of a scene with several copies of the same object moved to different positions. This will allow you to practice what’s been learnt in this post.
Very good partnership https://shorturl.fm/68Y8V
https://shorturl.fm/TbTre
https://shorturl.fm/A5ni8
https://shorturl.fm/9fnIC
https://shorturl.fm/a0B2m
https://shorturl.fm/9fnIC
https://shorturl.fm/N6nl1
https://shorturl.fm/9fnIC
https://shorturl.fm/oYjg5
https://shorturl.fm/5JO3e
https://shorturl.fm/m8ueY
https://shorturl.fm/XIZGD
https://shorturl.fm/IPXDm
https://shorturl.fm/xlGWd
https://shorturl.fm/hevfE
https://shorturl.fm/hQjgP
https://shorturl.fm/nqe5E
https://shorturl.fm/47rLb
https://shorturl.fm/fSv4z
https://shorturl.fm/retLL
Monetize your influence—become an affiliate today! https://shorturl.fm/0sTnj
Unlock exclusive rewards with every referral—enroll now! https://shorturl.fm/lzIC3
Be rewarded for every click—join our affiliate program today! https://shorturl.fm/NF5MF
Join our affiliate family and watch your profits soar—sign up today! https://shorturl.fm/NSMPX
Become our affiliate and watch your wallet grow—apply now! https://shorturl.fm/Gd88j
Join our affiliate program and start earning commissions today—sign up now! https://shorturl.fm/ubVIr
Monetize your audience with our high-converting offers—apply today! https://shorturl.fm/fRPyI
Share our products and watch your earnings grow—join our affiliate program! https://shorturl.fm/n4Pae
Monetize your audience—become an affiliate partner now! https://shorturl.fm/fLk9T
Share our products and watch your earnings grow—join our affiliate program! https://shorturl.fm/i4Neg
Your influence, your income—join our affiliate network today! https://shorturl.fm/9BrDD
Start sharing our link and start earning today! https://shorturl.fm/HcWJP
Share our link, earn real money—signup for our affiliate program! https://shorturl.fm/XtLWX
Invite your network, boost your income—sign up for our affiliate program now! https://shorturl.fm/mPbUx
Boost your profits with our affiliate program—apply today! https://shorturl.fm/eritL
Get paid for every referral—sign up for our affiliate program now! https://shorturl.fm/9P8QV
Turn traffic into cash—apply to our affiliate program today! https://shorturl.fm/qahbN
Earn passive income on autopilot—become our affiliate! https://shorturl.fm/S5vQT
Start sharing our link and start earning today! https://shorturl.fm/lPWGS
Your network, your earnings—apply to our affiliate program now! https://shorturl.fm/kiAA2
Maximize your earnings with top-tier offers—apply now! https://shorturl.fm/Egfi3
Share our offers and watch your wallet grow—become an affiliate! https://shorturl.fm/M44tE
Become our affiliate—tap into unlimited earning potential! https://shorturl.fm/IgwZB
Promote our products—get paid for every sale you generate! https://shorturl.fm/jZ0wF
Join our affiliate community and start earning instantly! https://shorturl.fm/m2tlr
Become our affiliate and watch your wallet grow—apply now! https://shorturl.fm/W1W9n
Apply now and unlock exclusive affiliate rewards! https://shorturl.fm/BsnmF
Promote our brand and watch your income grow—join today! https://shorturl.fm/9wPE7
Turn traffic into cash—apply to our affiliate program today! https://shorturl.fm/dWiMm
Monetize your traffic instantly—enroll in our affiliate network! https://shorturl.fm/DSe6A
Join our affiliate program today and start earning up to 30% commission—sign up now! https://shorturl.fm/LHbYI
Boost your income effortlessly—join our affiliate network now! https://shorturl.fm/m2tJf
Promote our brand and watch your income grow—join today! https://shorturl.fm/3OJB6
Sign up now and access top-converting affiliate offers! https://shorturl.fm/Mv4mp
Tap into a new revenue stream—become an affiliate partner! https://shorturl.fm/C6QvS
https://shorturl.fm/Z24aJ
https://shorturl.fm/mS37X
https://shorturl.fm/mS37X
https://shorturl.fm/eE7kQ
https://shorturl.fm/fiZ9C
https://shorturl.fm/67GdW
https://shorturl.fm/v2bKy
https://shorturl.fm/zHqa4
https://shorturl.fm/jCfgU
https://shorturl.fm/aeFLz
https://shorturl.fm/qthZK
https://shorturl.fm/qjNtT
https://shorturl.fm/1gos8
https://shorturl.fm/W08Dq
https://shorturl.fm/YuI97
https://shorturl.fm/U2u4I
https://shorturl.fm/uiveA
https://shorturl.fm/7NlED
https://shorturl.fm/oWDsf
https://shorturl.fm/x6fbL
https://shorturl.fm/PtN31
https://shorturl.fm/mmLFq
https://shorturl.fm/Jnqsx
https://shorturl.fm/hbfl1
https://shorturl.fm/ZmJp4
https://shorturl.fm/qroP5
https://shorturl.fm/nKKwQ
https://shorturl.fm/3JUCJ
https://shorturl.fm/jyaET
https://shorturl.fm/3joQQ
https://shorturl.fm/fBF9S
https://shorturl.fm/bb7AK
https://shorturl.fm/FM9Zg
https://shorturl.fm/6HTwV
https://shorturl.fm/Sz8Iw
https://shorturl.fm/Ge97Y
https://shorturl.fm/W6JLE
https://shorturl.fm/3oz1I
https://shorturl.fm/3kA1P
https://shorturl.fm/msqzZ
https://shorturl.fm/I3QAO
https://shorturl.fm/9jTGS
https://shorturl.fm/yBSpX
https://shorturl.fm/loQki
https://shorturl.fm/4ll1v
https://shorturl.fm/BP1s2
https://shorturl.fm/Uu3Lr
https://shorturl.fm/6wMq8
https://shorturl.fm/KVcGX
https://shorturl.fm/hzmOU
https://shorturl.fm/CSaKo
Проверить своё везение — вот с чего началась моя история с Vodka Casino приложением. Установил ради интереса, активировал стартовый бонус и сразу же выиграл неплохую сумму. Самое интересное, что не возникло никаких проблем с выводом. Всё по-честному, всё быстро. Зеркало активируется автоматически, приложение работает плавно, поддержка отвечает мгновенно. Мне понравилось, что каждый слот — как отдельная история: есть тематика, музыка, атмосфера. Это не просто игра, а целый мир, в который хочется возвращаться. И именно такие платформы вызывают уважение.
https://shorturl.fm/1XhN3
https://shorturl.fm/y61DN
https://shorturl.fm/jY1jN
https://shorturl.fm/mPZAX
https://shorturl.fm/AJHF4
https://shorturl.fm/bTPHm
https://shorturl.fm/6rgpc
https://shorturl.fm/oMmoe
https://shorturl.fm/ECuRA
https://shorturl.fm/0WpA1
https://shorturl.fm/95PEo
https://shorturl.fm/M7iOW
https://shorturl.fm/FdAl4
https://shorturl.fm/EZ1Iu
https://shorturl.fm/veFpz